


DIY with this quick tutorial to explore how GoldFynch suits your eDiscovery needs
Create a free trial case and upload the dataset to it to start testing the platform.
Steps to Create a case
- Sign into your GoldFynch account here
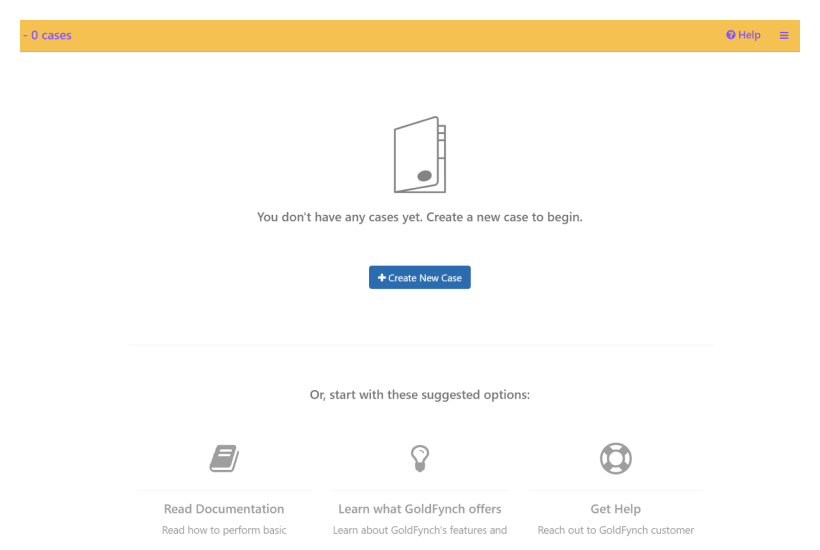
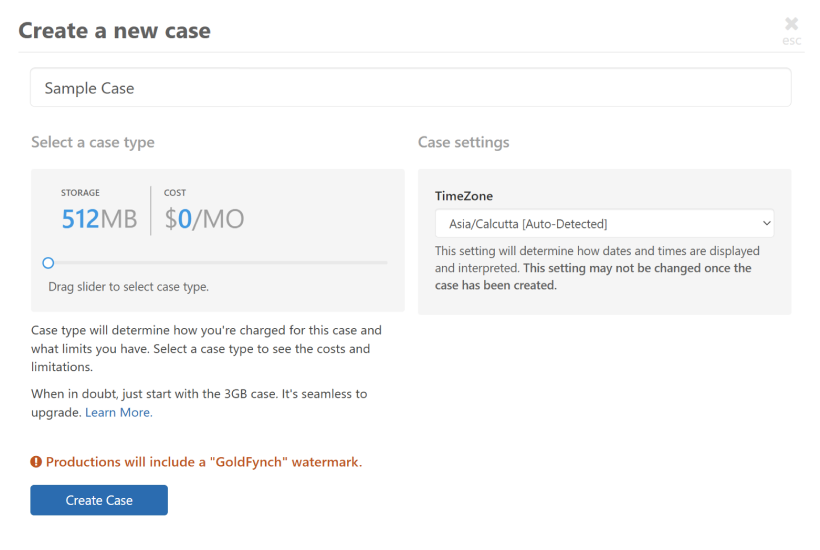
- Click + Create new case, select the 512 MB case, click “Create case”

Data Sources: Portions of the dataset have come from the EDRM Micro Dataset, EDRM Enron v2 Dataset, Benson, John. (2024). EMC-2 eDiscovery Dataset (Version 1.0) [Data set]. GitHub.
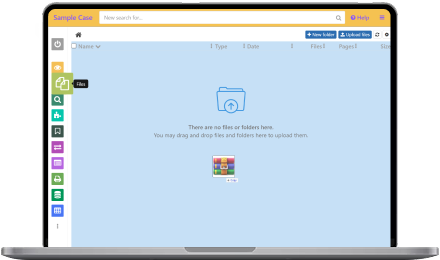
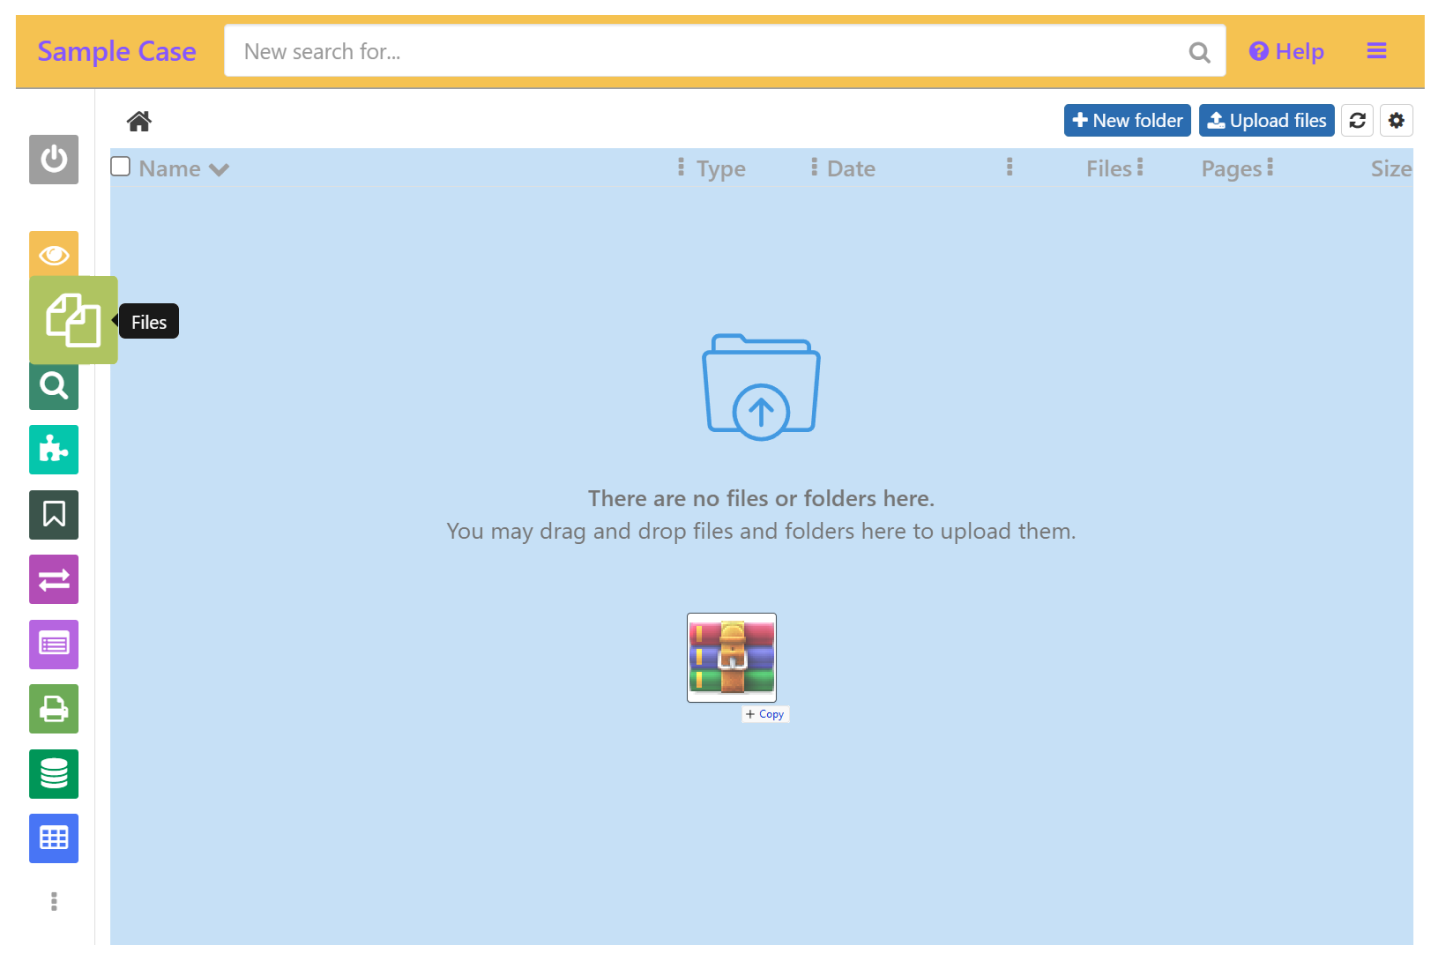
Steps to Upload files
- In the “Files” view, drag and drop the ZIP file that you downloaded
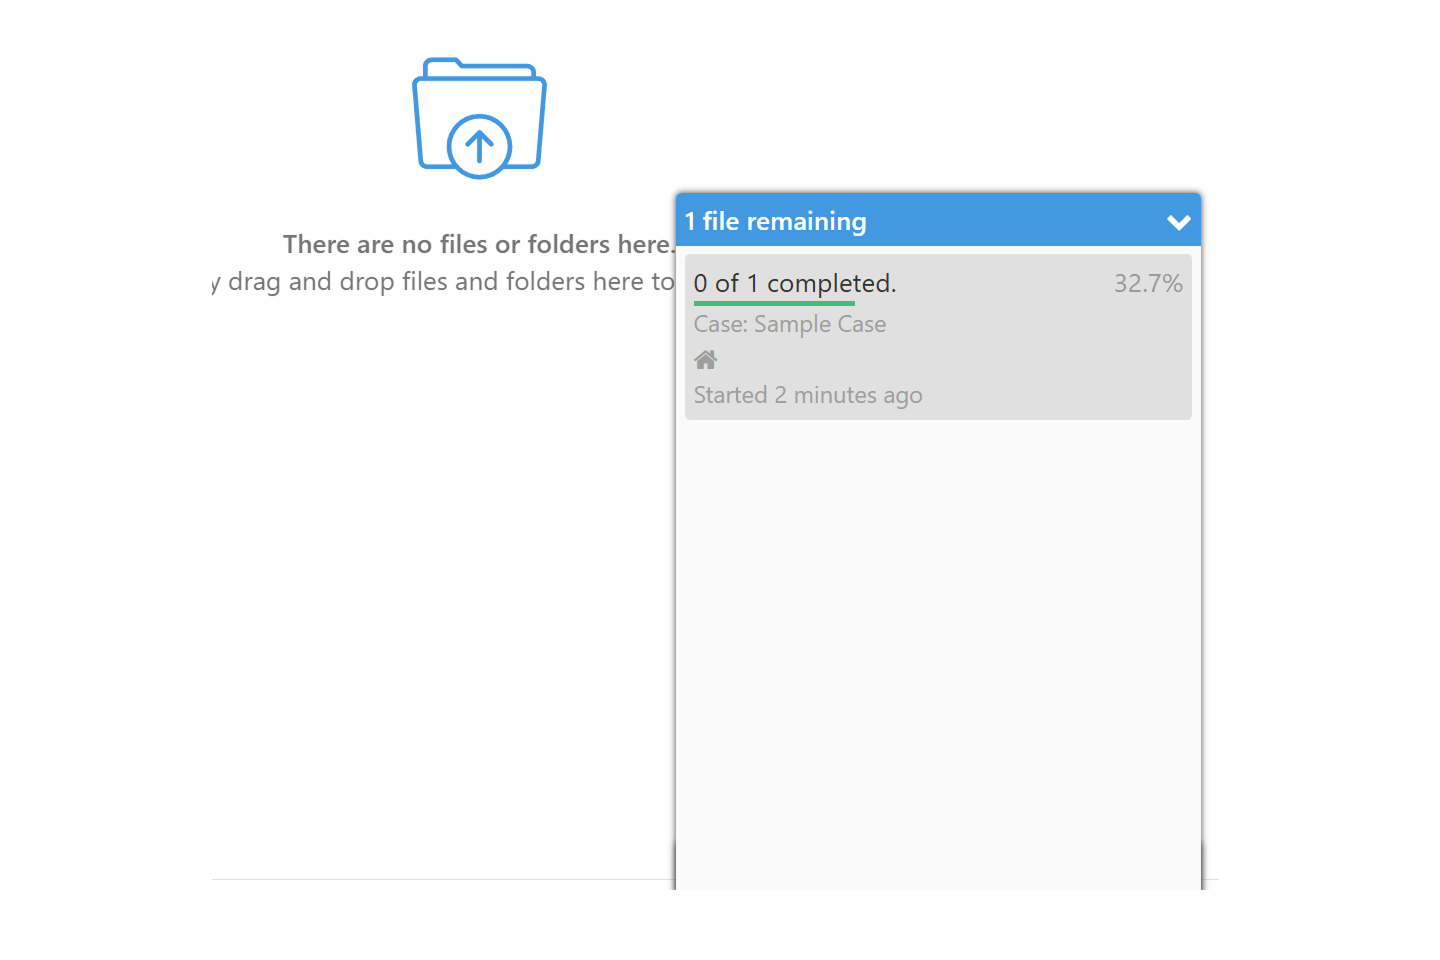
- Wait until it’s uploaded and processed (est. 5-10 minutes, depending on your connection).
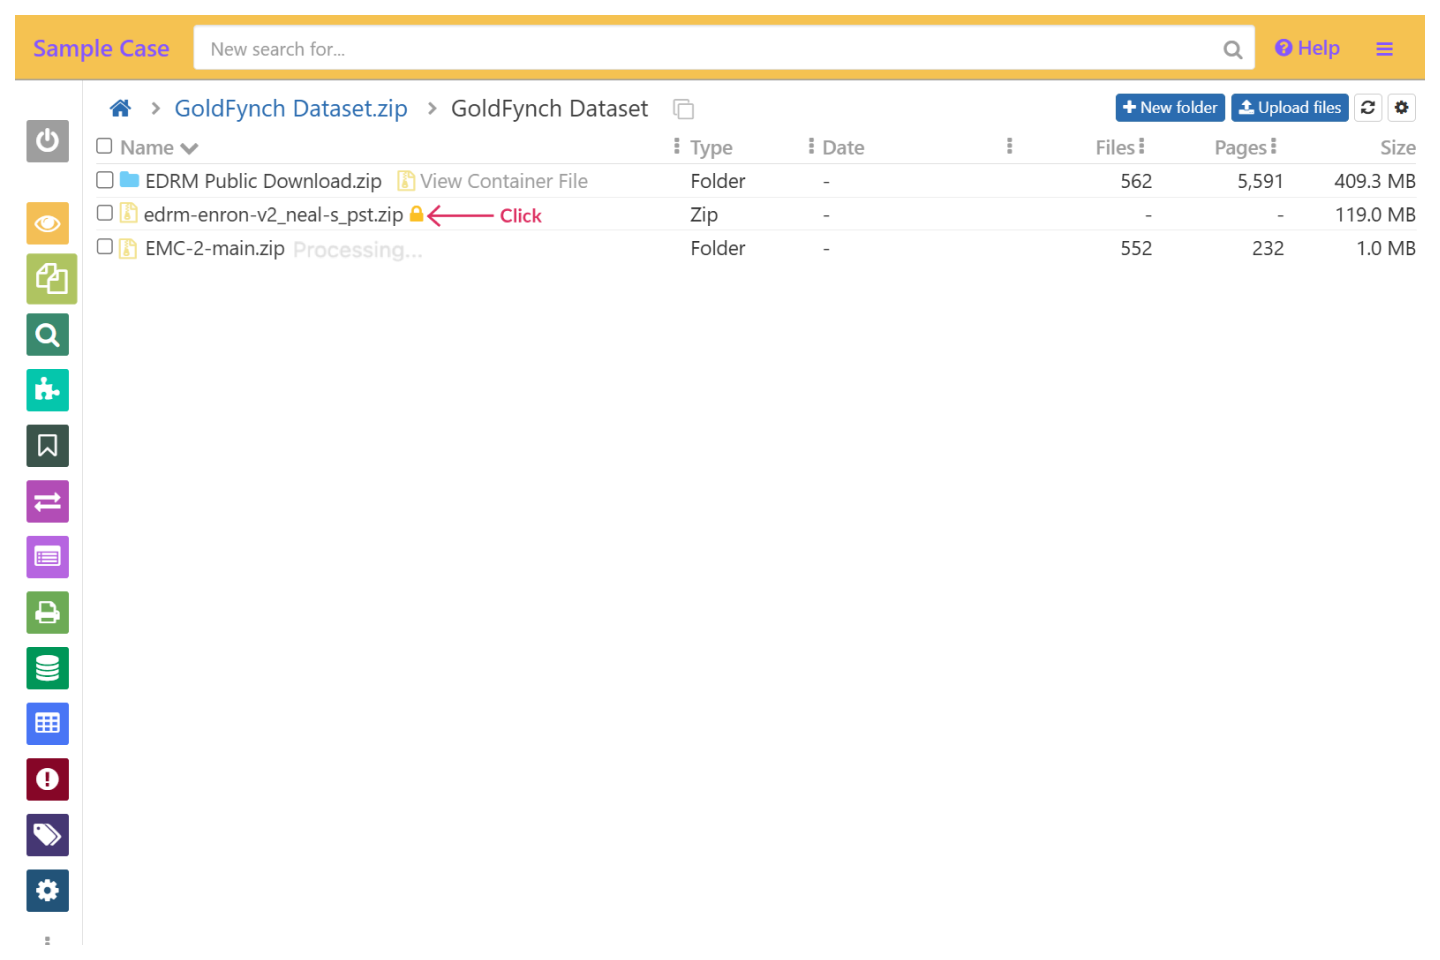
- You’ll know they are ready when the “Processing” text disappears
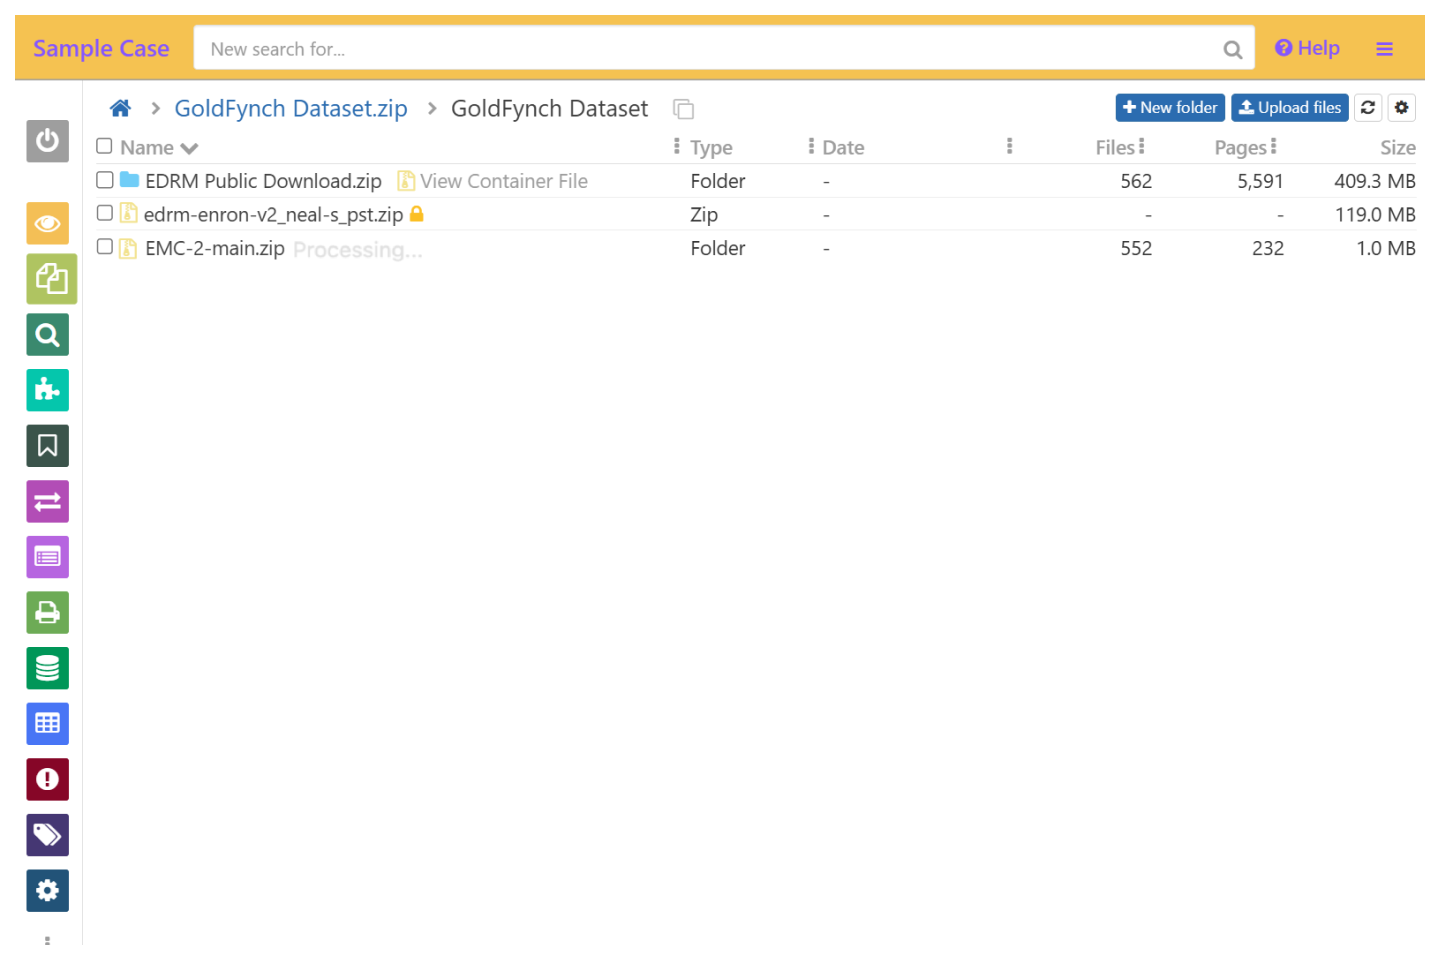
Once uploaded your files are automatically processed
- Optical Character Recognition (OCR) makes your documents searchable and ready for review
- Keywords, metadata, and dates are extracted and listed in the Document Viewer
- Compressed files are extracted into folders of the same name, preserving their internal folder structure (ZIPs, multipart ZIPs, PSTs, MBOX, attachments, etc.)
- Password-protected, unsupported, and errored files are flagged on.
- Click through folders and files just like on your computer to navigate and view their contents.
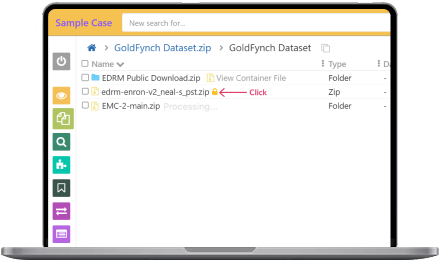
Resolving Passwords
Let's resolve your password-protected files (lock icon) so they are processed and ready for review as well.
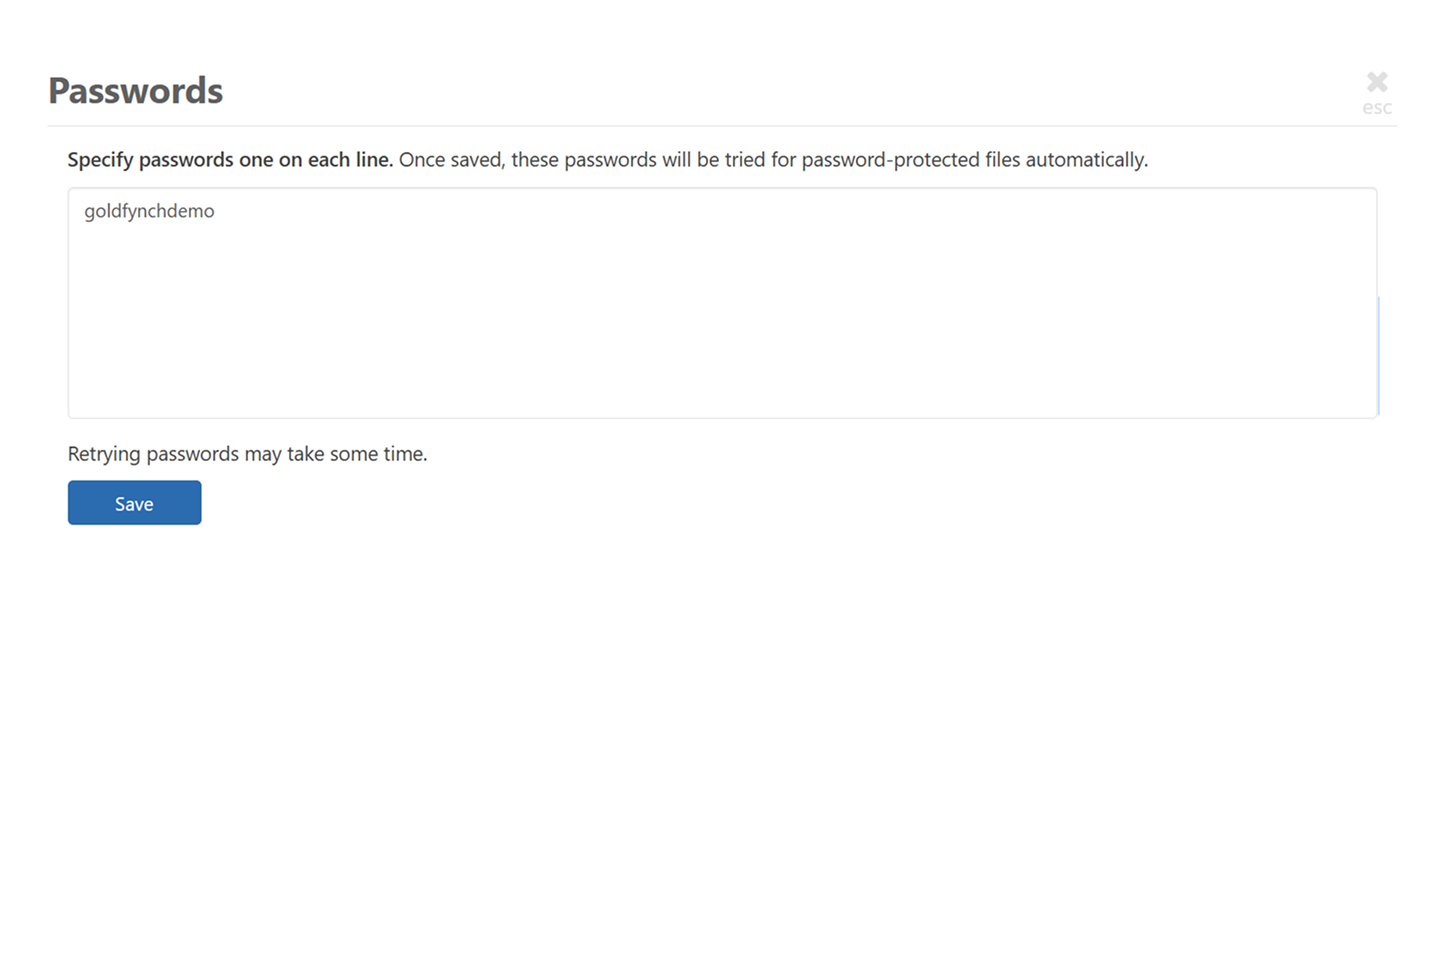
- Click on the lock icon to open the Passwords list
- Type in passwords for files, one on each line - they will be automatically matched. For this dataset, enter “goldfynchdemo”
Find responsive data in your case
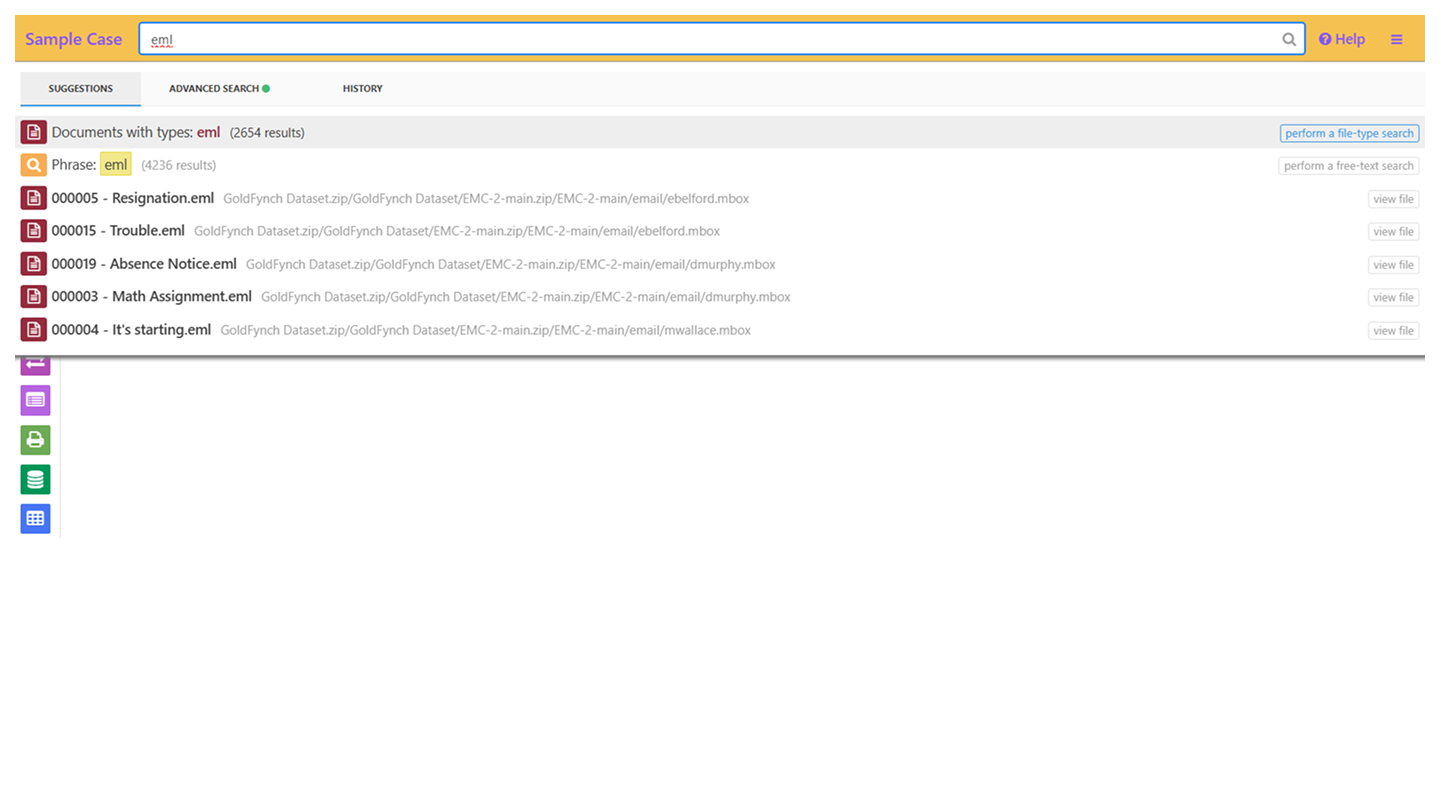
The search bar works just like a Google search. Just type a word or a phrase (in quotes) to return all instances in your entire case. It can also run more specialized searches.
Special Quick Searches look for information of a specific type
| Search type | Example |
|---|---|
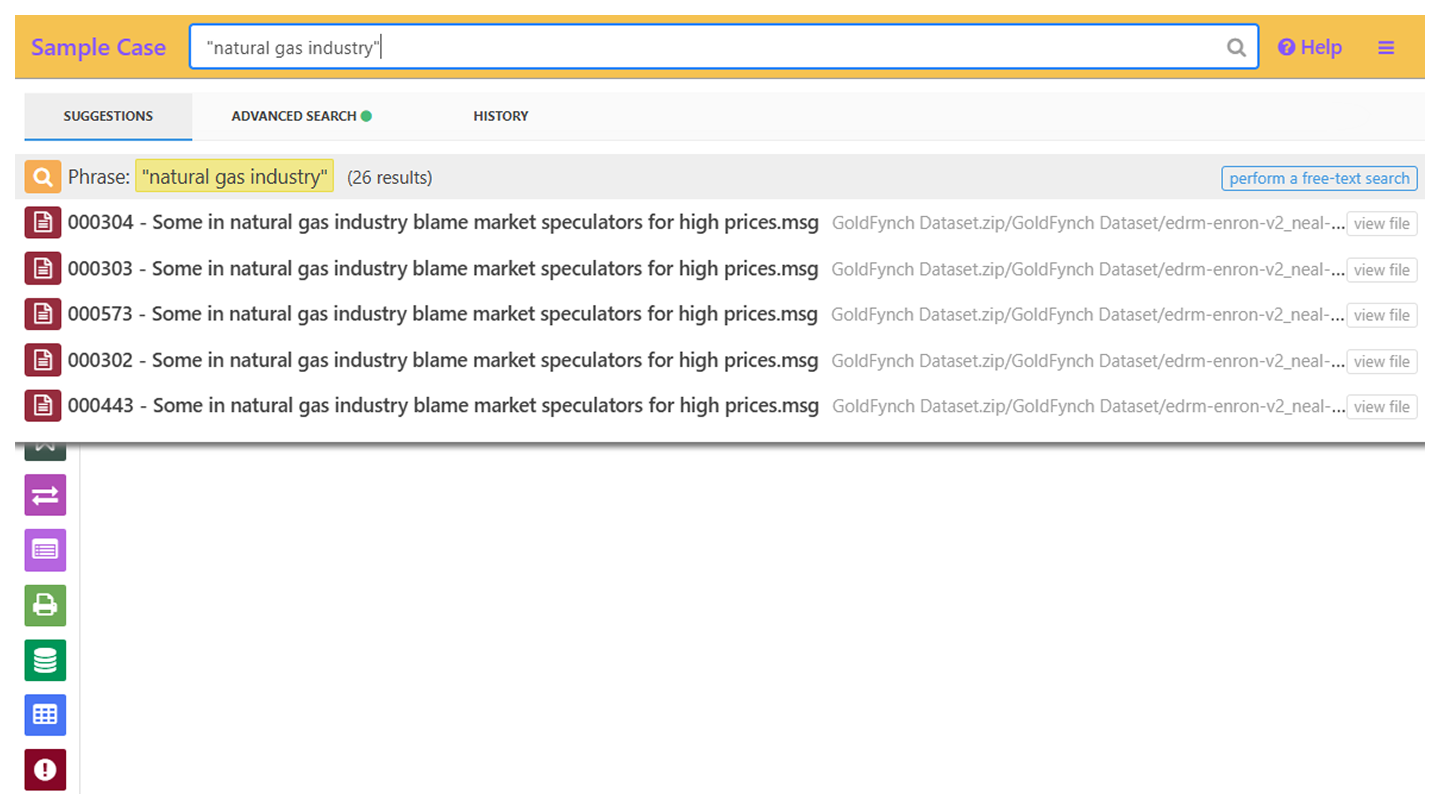
| Phrase in quotes | “natural gas industry” |
| Date | All documents dated with that day/month/year: 2017 |
| Email address | Prefixed with an email parameter like to:, from:, cc:, etc.: to:support@goldfynch.com |
| File format | pdf, msg, eml |
| Generic file type | Image, email, etc. |
| File name | traffic_report |
| Bates number of a produced page | A00123 (after you create a production, search for a Bates number you assigned) |
Note:
The dropdown list of special quick searches appears only if there is a match in your case.
The dropdown list of special quick searches appears only if there is a match in your case.

Create complex search queries by combining multiple parameters. This helps us zero in on responsive data.
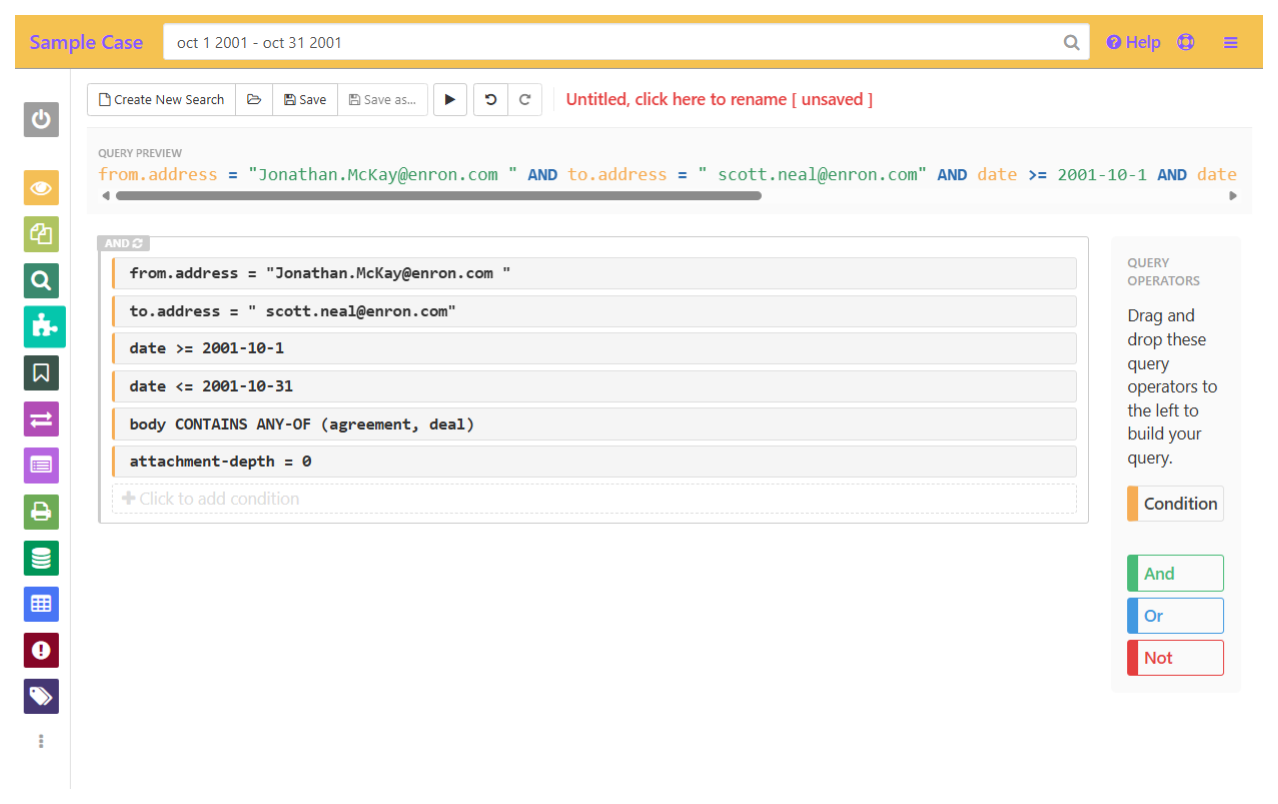
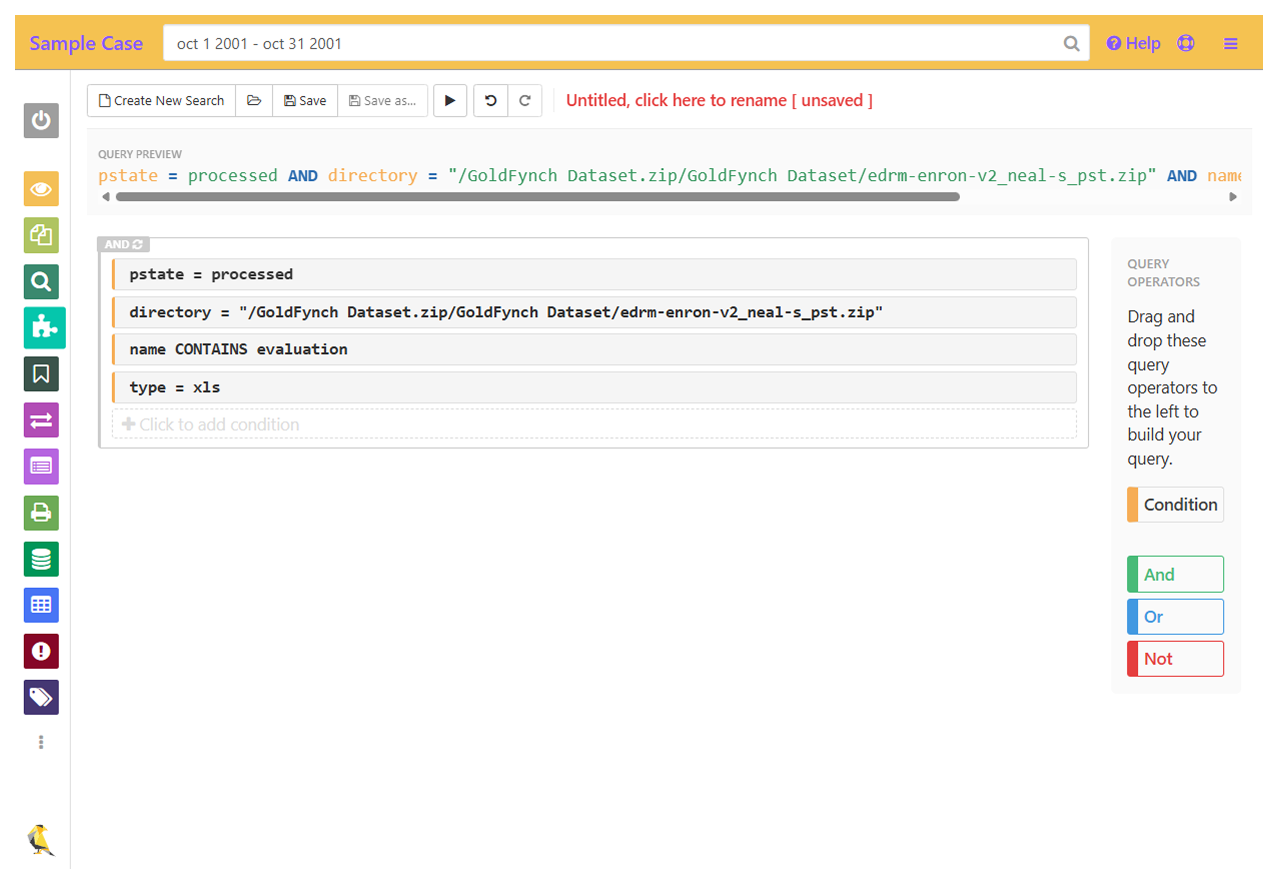
Run advanced searches using the “Advanced Search” view to construct the search query using a simple drag-and-drop interface, or from the search bar using formatting like the examples below.
Let’s say we want to search for emails from
Jonathan.McKay@enron.com to scott.neal@enron.com sent or received
between Oct 1, 2001 - Oct 31, 2001.
Jonathan.McKay@enron.com to scott.neal@enron.com sent or received
between Oct 1, 2001 - Oct 31, 2001.
The emails should contain the words "Agreement" or “Deal”, and have attachments.
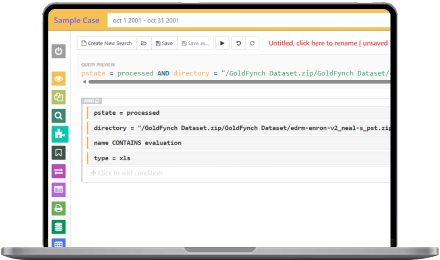
This is a breeze with GoldFynch! The “Advanced Search” view makes it as simple as dragging and dropping search elements!

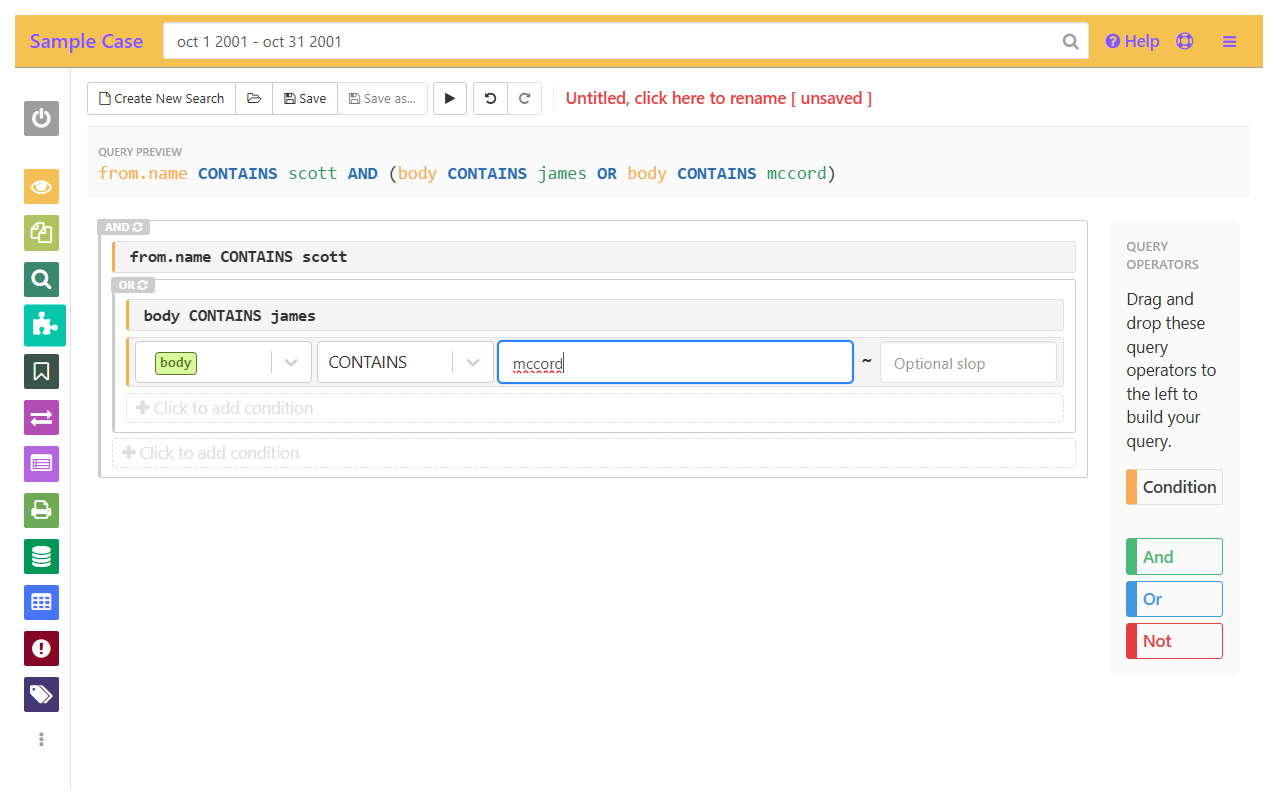
Here are some search queries based on the review scenarios that you can try building in your case. You will see the query preview built at the top of the page.
-
You can combine multiple terms with logical operators like AND & OR to make “complex” queries that check for multiple terms or parameters:from.name CONTAINS scott AND (body CONTAINS James OR body CONTAINS Mccord)Depo prep
-
Try changing the queries to see the different results you get, too!participant.address IS ANY-OF (sarah.chen@ellingson-it.com, hal.benson@ellingson.com) AND subject CONTAINS ANY-OF (access, hacker, security)Cybersecurity
-
Find documents within specific time periods:sent-date >= 1995-10-1 AND sent-date <= 1995-10-31Cybersecurity
-
Search by directory, filetype, name, file state in GoldFynch, and much more:pstate = processed AND directory = "/GoldFynch Tutorial Sample Dataset 1.zip/edrm-enron-v2_neal-s_pst.zip" AND name CONTAINS evaluation AND type = xlsDepo prep
-
You can also save searches in the Advanced Search view that any collaborator on the case can load and run. Saved searches can be used to select files for productions, review sets and more!

There’s no limit to how many terms you can have in your search, allowing for comprehensive queries:
Deposition prep scenario (Enron)
from.name CONTAINS scott AND body CONTAINS ANY-OF (James, Mccord) AND (subject CONTAINS resume OR subject CONTAINS hiring OR subject CONTAINS "candidate evaluation")
Cybersecurity scenario (EMC-2)
participant.address IS ANY-OF (hal.benson@ellingson.com, "sarah.chen@ellingson-it.com") AND body CONTAINS ANY-OF (Security, Access, Hacker) AND sent-date >= 1995-10-1 AND sent-date <= 1995-10-26
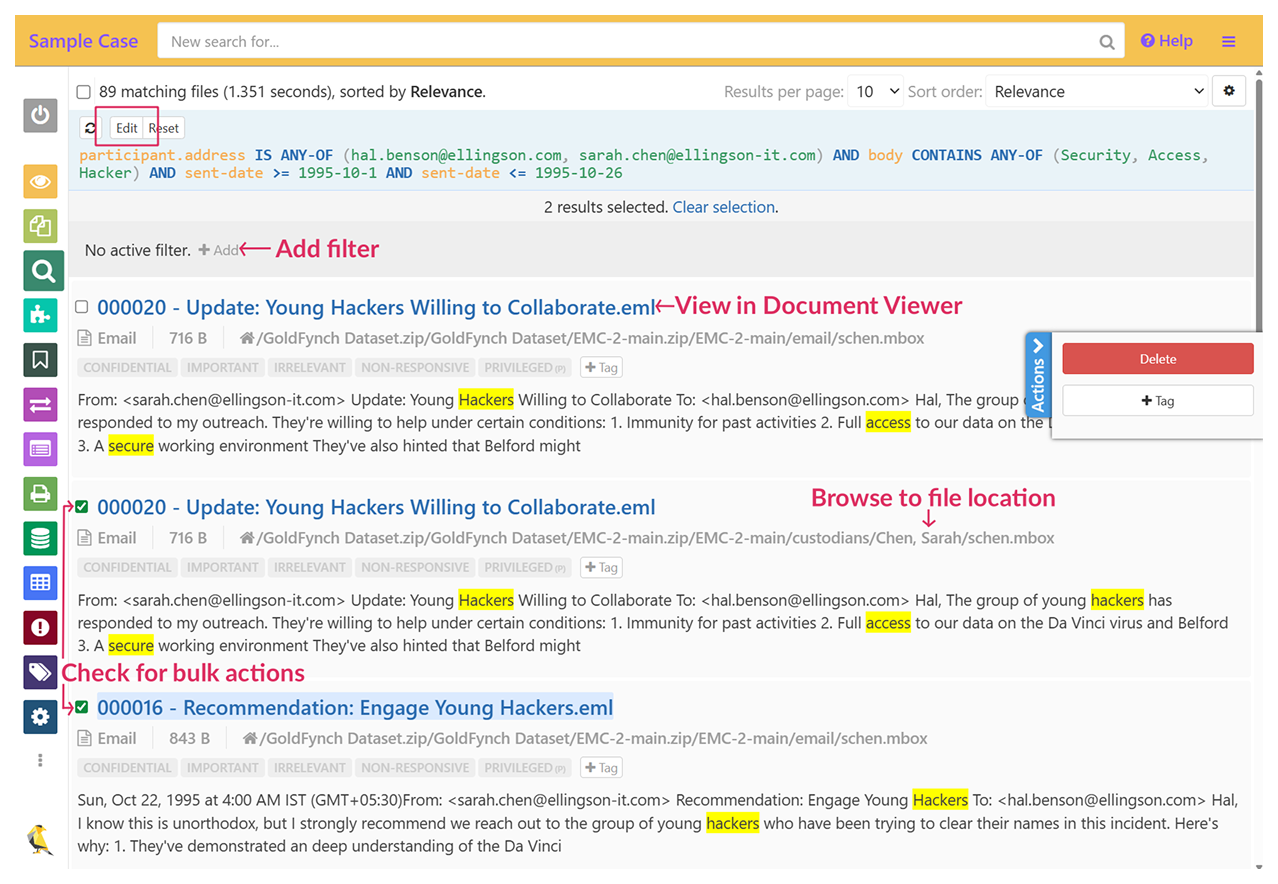
Viewing Search Results
Once you’ve run a search, results are listed and can be sorted and filtered - this is agreat way to refine broad searches.
- Click on a fileView in Document Viewer (review, annotate & redact)
- Click on file pathbrowse in Files view
- Click the edit iconEdit the query in the Advanced Search view
- Check checkboxesPerform actions in bulk (deleting, tagging, etc.)

Tagging Files
Tags are virtual labels that you can attach to files that help to:
- Classify Information
- Mark files for quick viewing
- Perform actions in bulk, like creating review sets or productions
Examples of Tagging
- By responsiveness (Non-responsive, responsive)
- Privilege (Attorney-Client, Work Product, No Privilege)
- Issues (Contract Terms, Employment, Financial Data, Compliance)
- Confidentiality (Confidential, Public, Attorney Eyes Only)
GoldFynch also has some easily-accessible preset “Quick” tags that you can toggle on and off for files. These can be edited, along with all other tags in the “Tags” view
- Click on the +Tag button to create a new tag or apply an existing tag
- Click on a Quick Tag (black text/box) to toggle it on/off
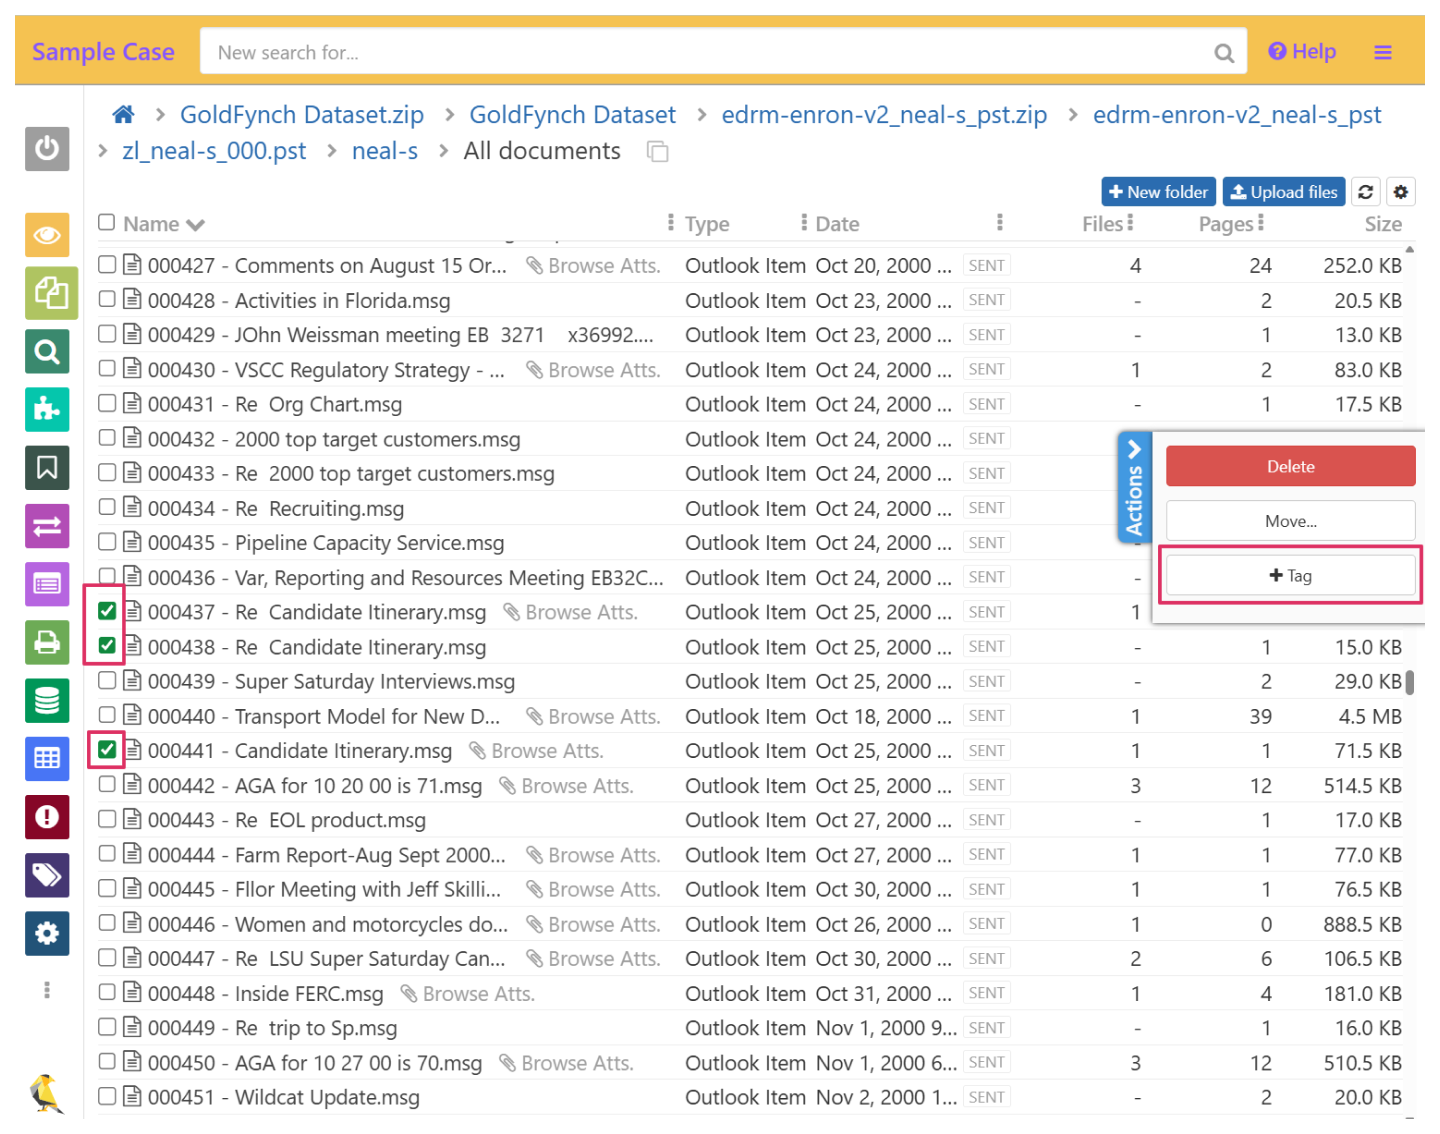
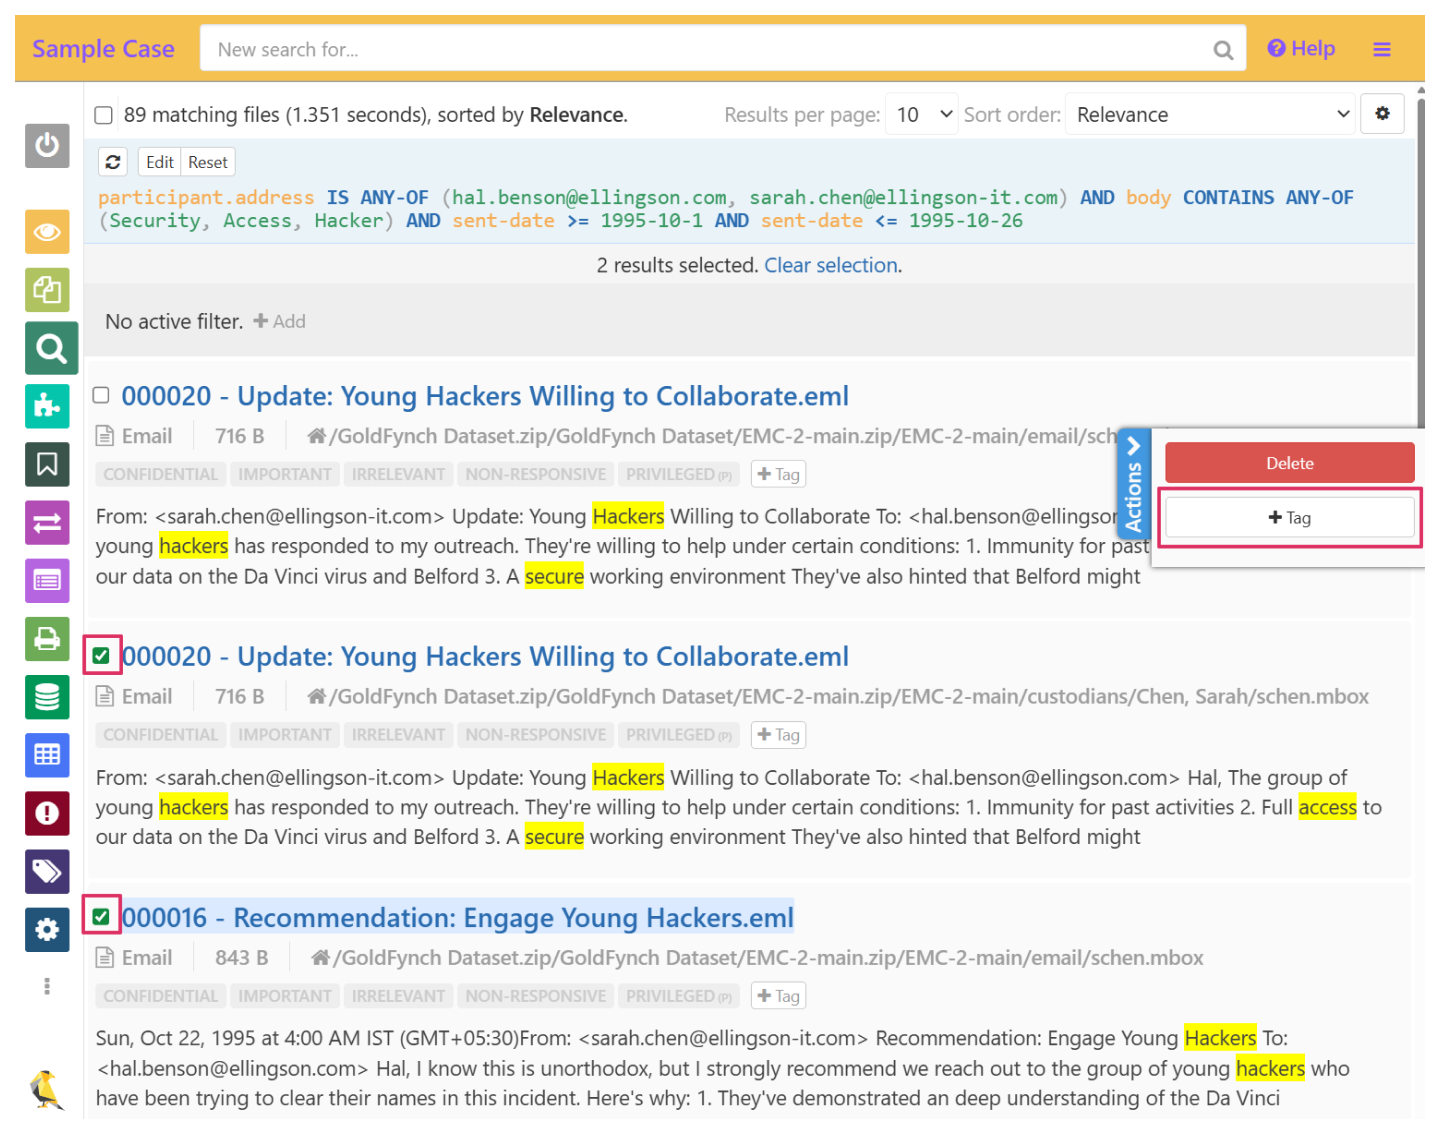
- In the “Docs” view, the +Tag button is listed along with the Quick Tags
- In the “Files” view, check one or more checkboxes next to files then click on “+Tag” on the right of the screen
Note:
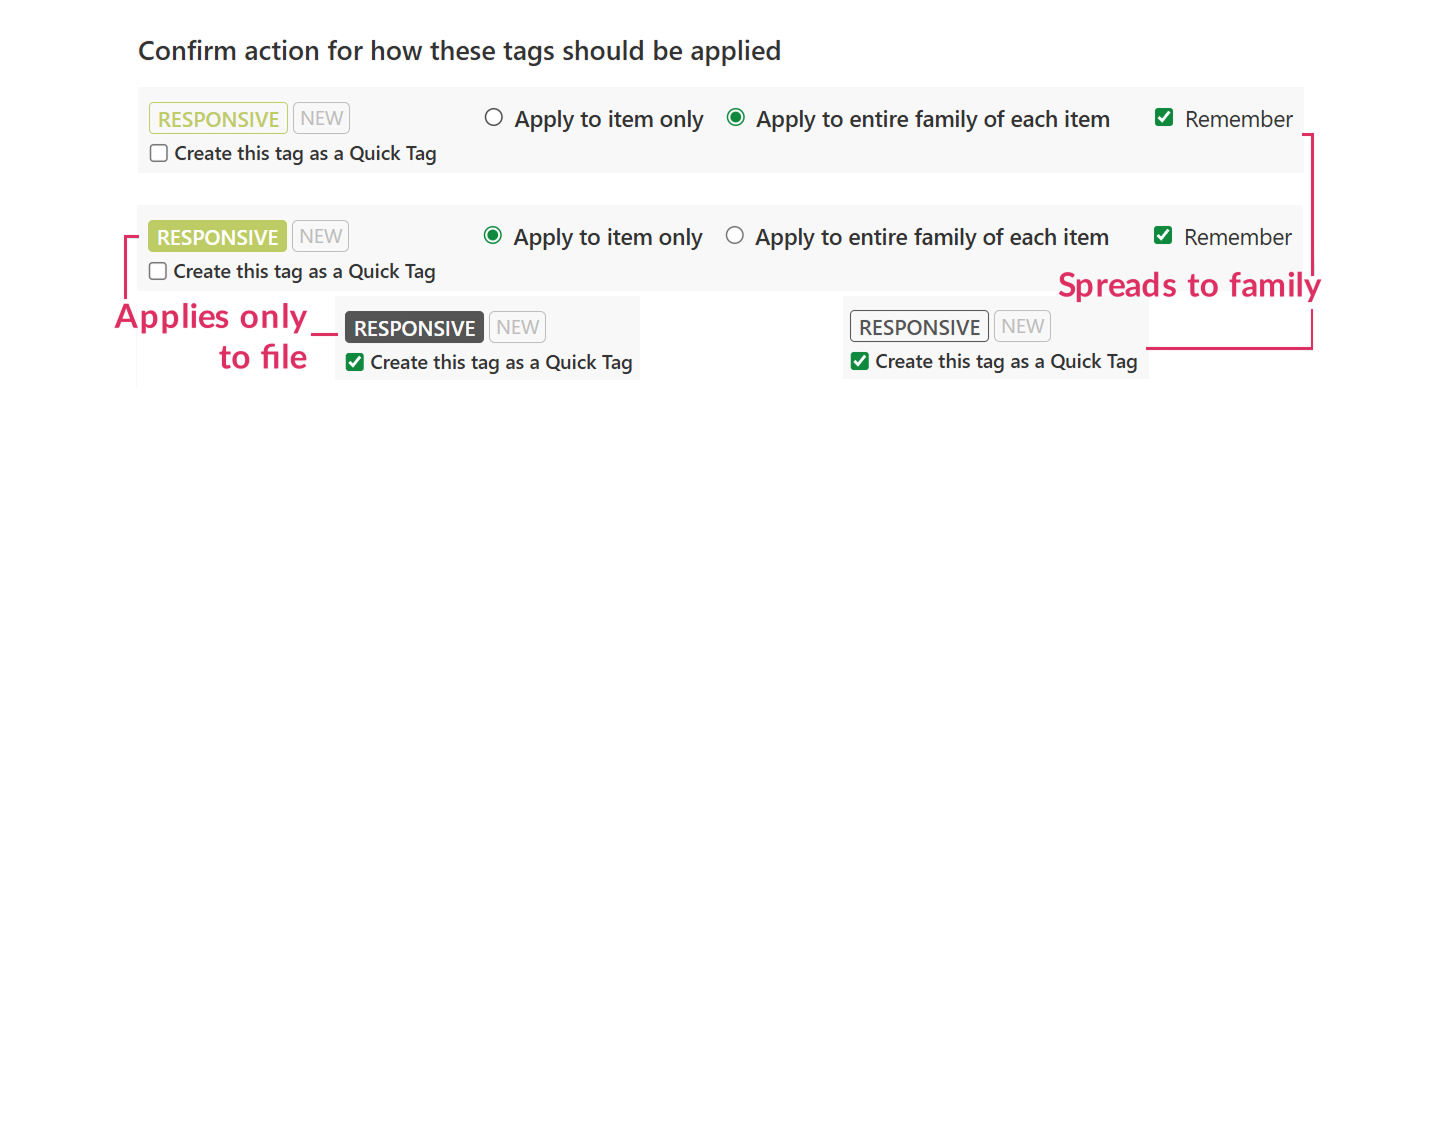
Tags in GoldFynch can be set to spread to families of files when applied - e.g. if you tag an attachment, it tags the parent email. See the images for how to identify them.
Tags in GoldFynch can be set to spread to families of files when applied - e.g. if you tag an attachment, it tags the parent email. See the images for how to identify them.
Add Tags to Files
- Create a new tag “Responsive” and add it to at least 7 files
- Tag at least 2 files as “Privileged”, with some overlapping with “Responsive”-tagged files
- In the next section (Document Review) tag a few more files as per the scenario(s) you are following:
Deposition prep scenarioSuggested tags:
DEPO PREP, JAMES MCCORDCybersecurity scenarioSuggested tag:
TO PRODUCE, PRIVILIGED

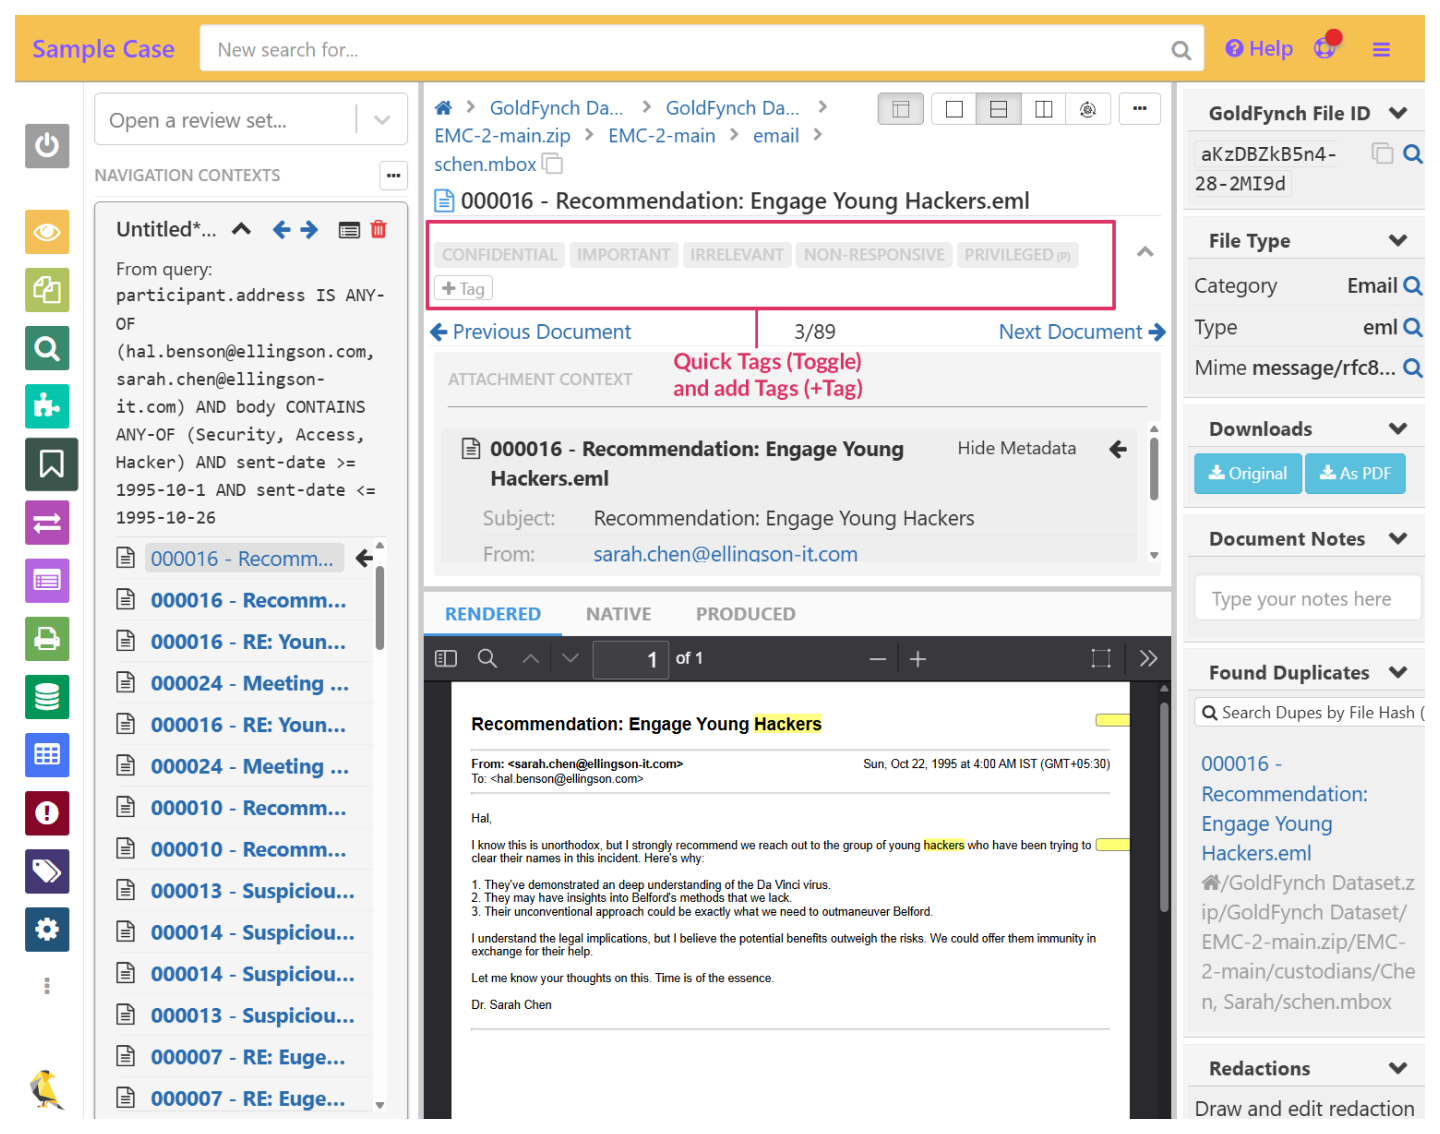
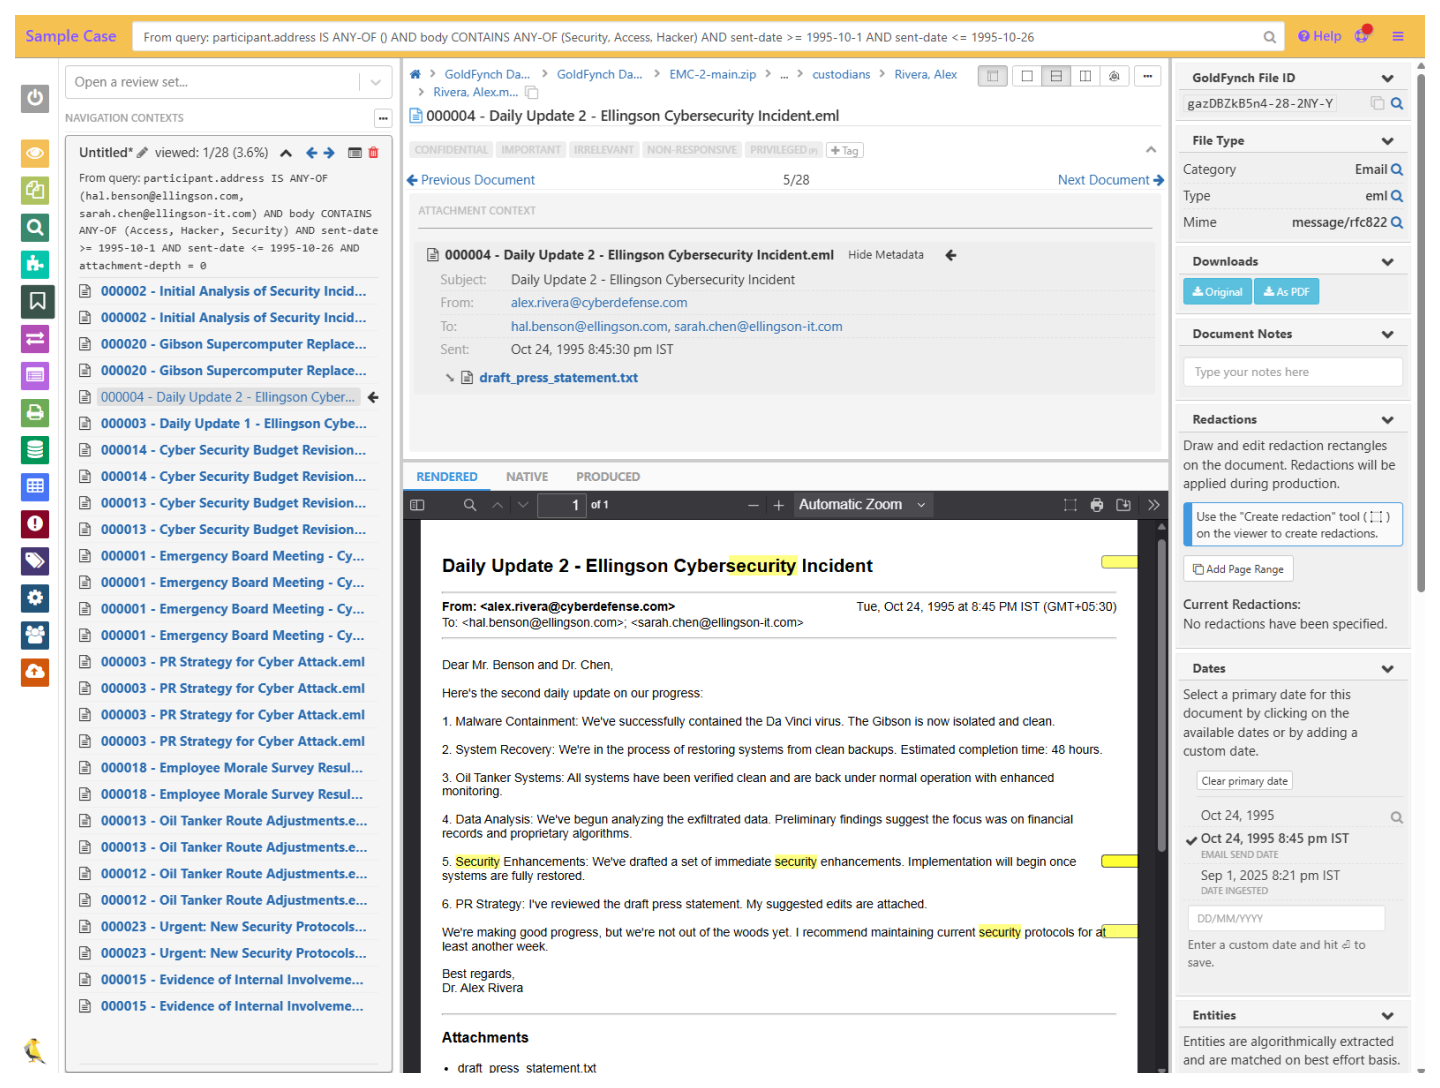
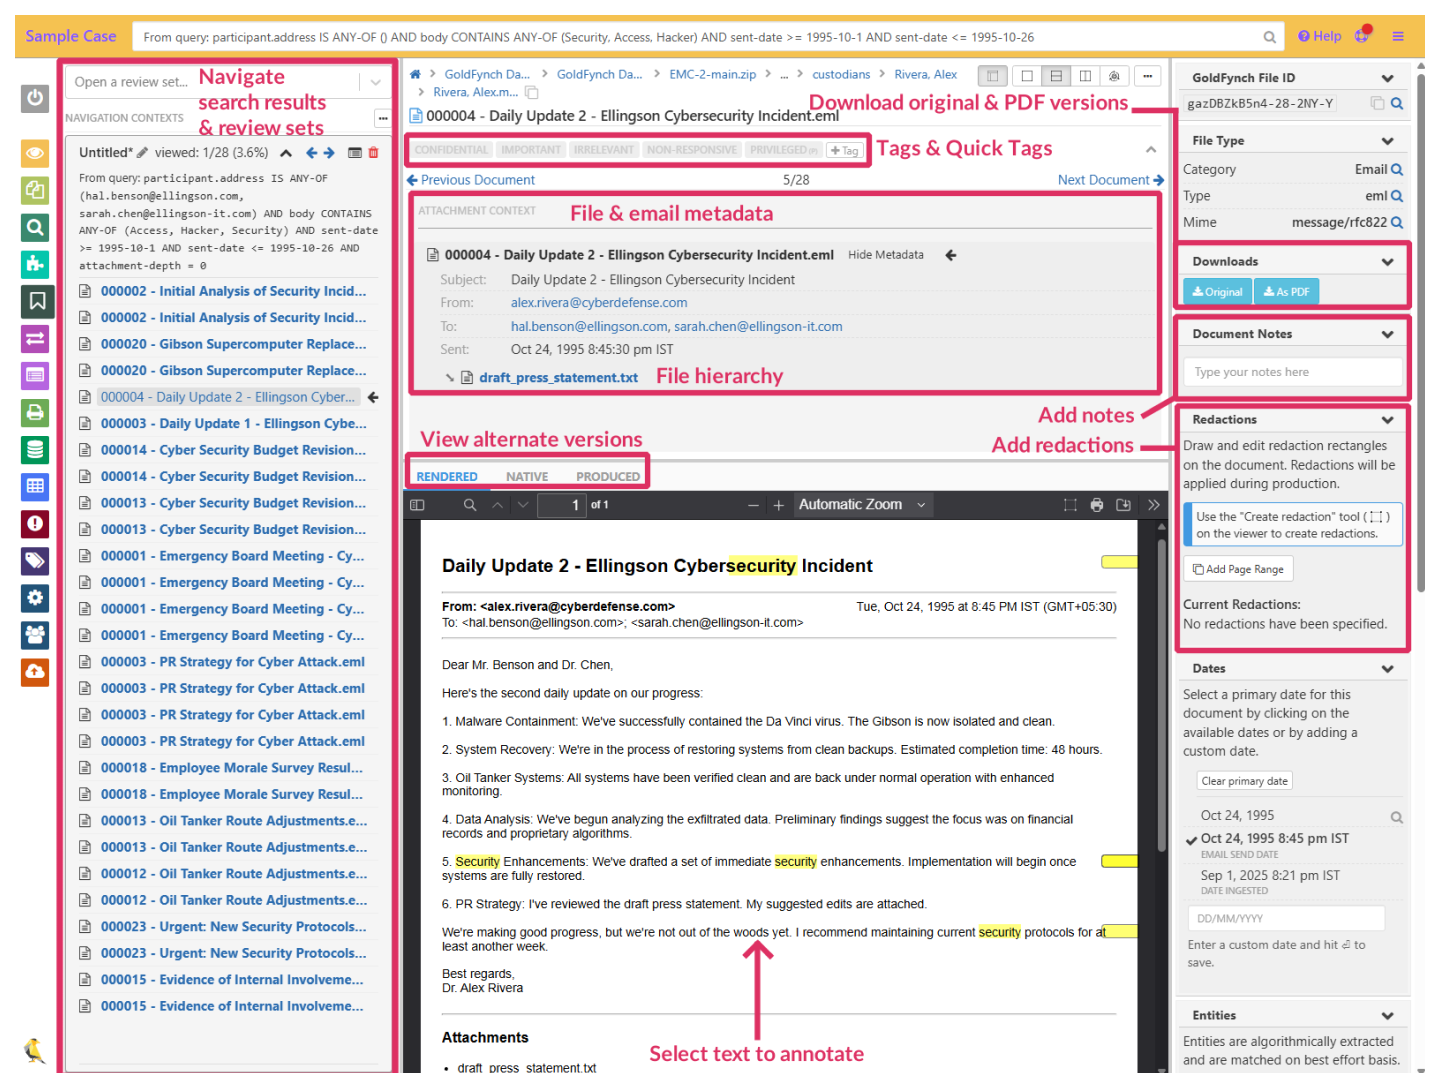
The Document viewer is at the heart of review and provides you with a number of review tools.
From here you can
- Navigate through search results and review sets
- View a file’s hierarchy with parent files and attachments
- View file and email metadata
- Add and remove tags
- Annotate text and leave notes for collaborators.
- View and download native, PDF, and produced versions of files
- Redact information - Use the redaction tool to draw boxes over sensitive data. It will be removed during production, while remaining reviewable in GoldFynch
See the Screenshot Guide for a look at where to find these tools, or click below for a detailed system breakdown.

After review, use the Production Wizard to compile or produce your files in an appropriate format for sharing, then share them securely.
Production scenarios
Deposition prep scenario
- Step 2: File selection: DEPO PREP, JAMES MCCORD tags
- Step 3: Production type: PDFs only > One PDF per document
Cybersecurity scenario
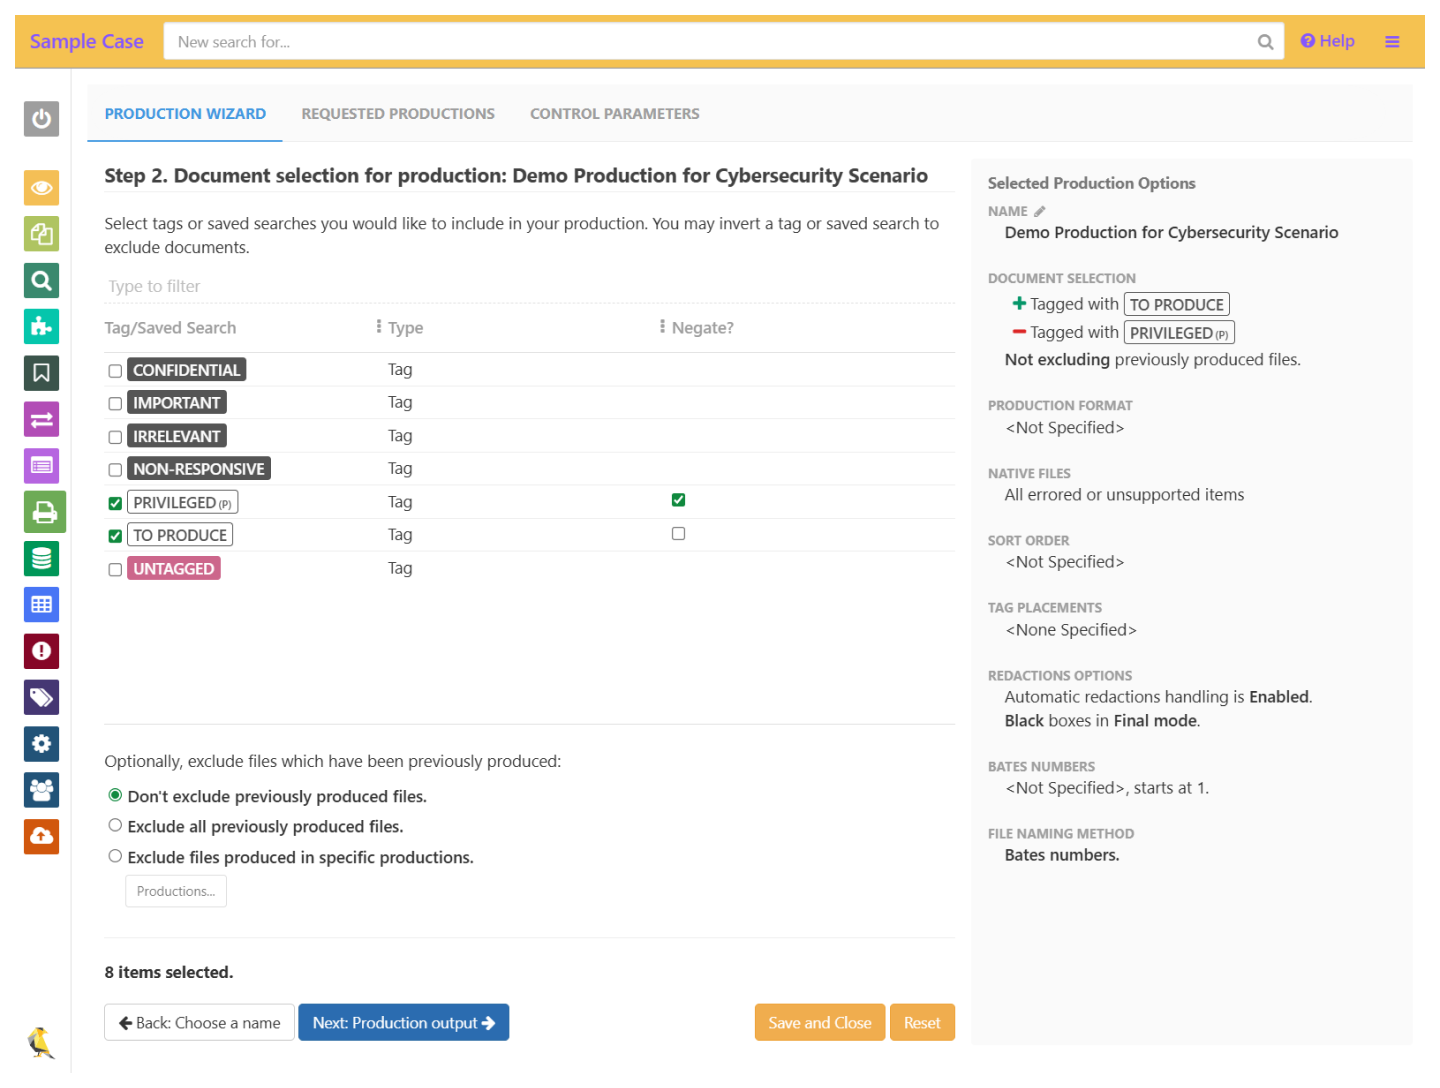
- Step 2: File selection: TO PRODUCE, “negate” PRIVILEGED tag
- Step 3: Production type: Load files > Minimal or user-specified natives > PDF documents
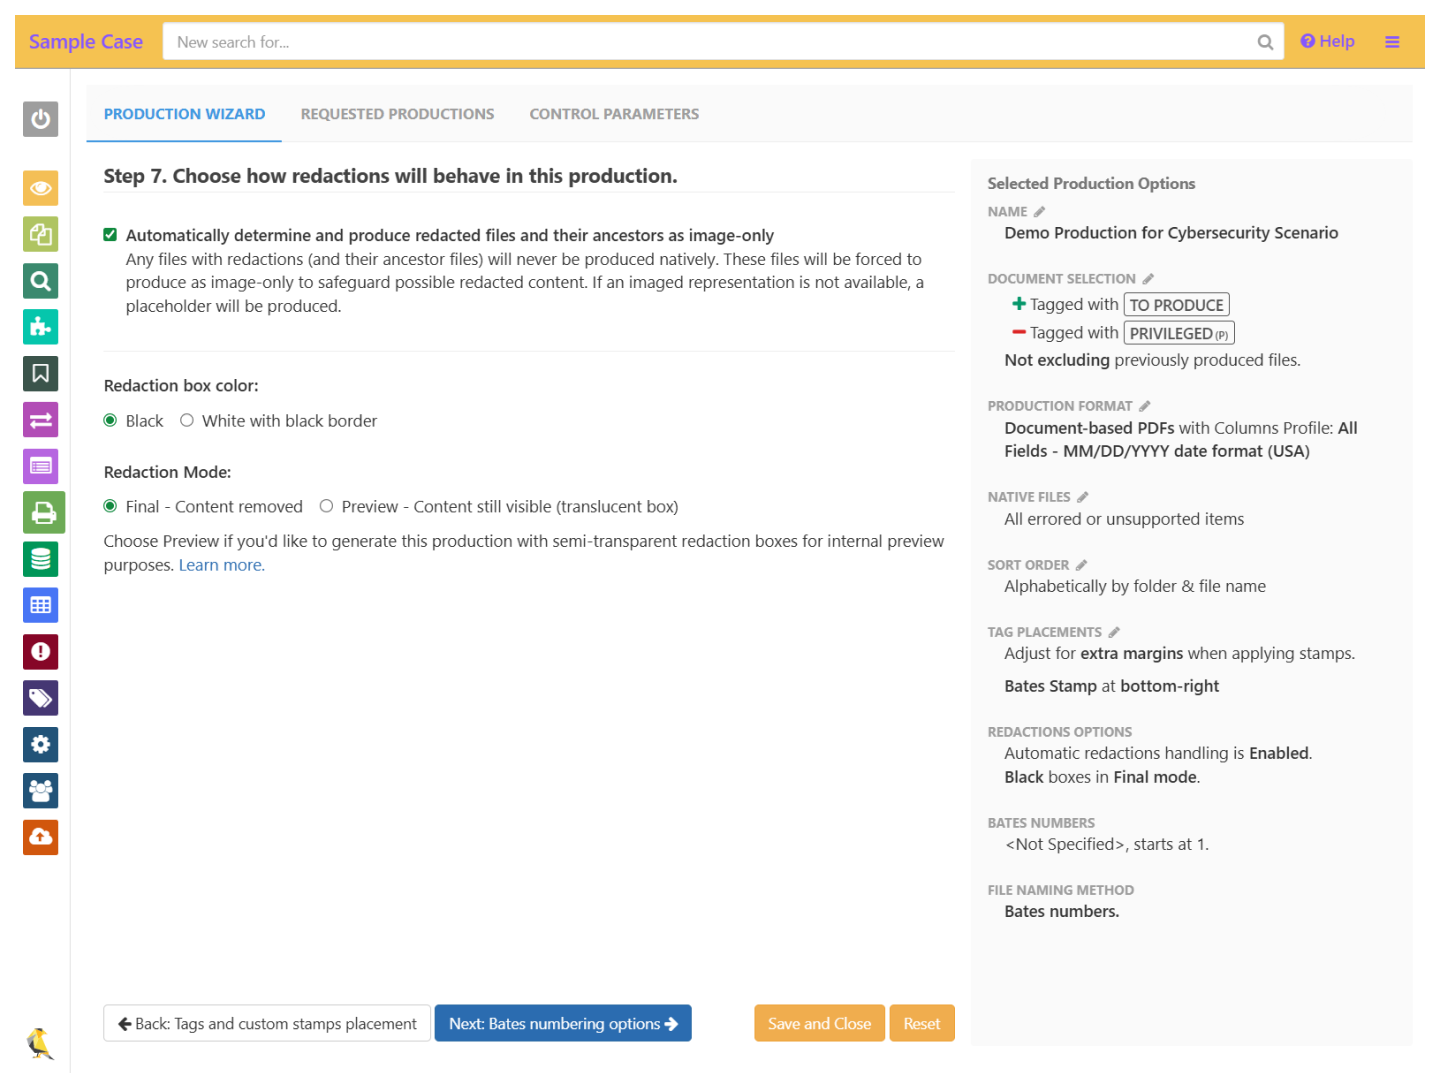
- Step 7: Redaction Mode: Final
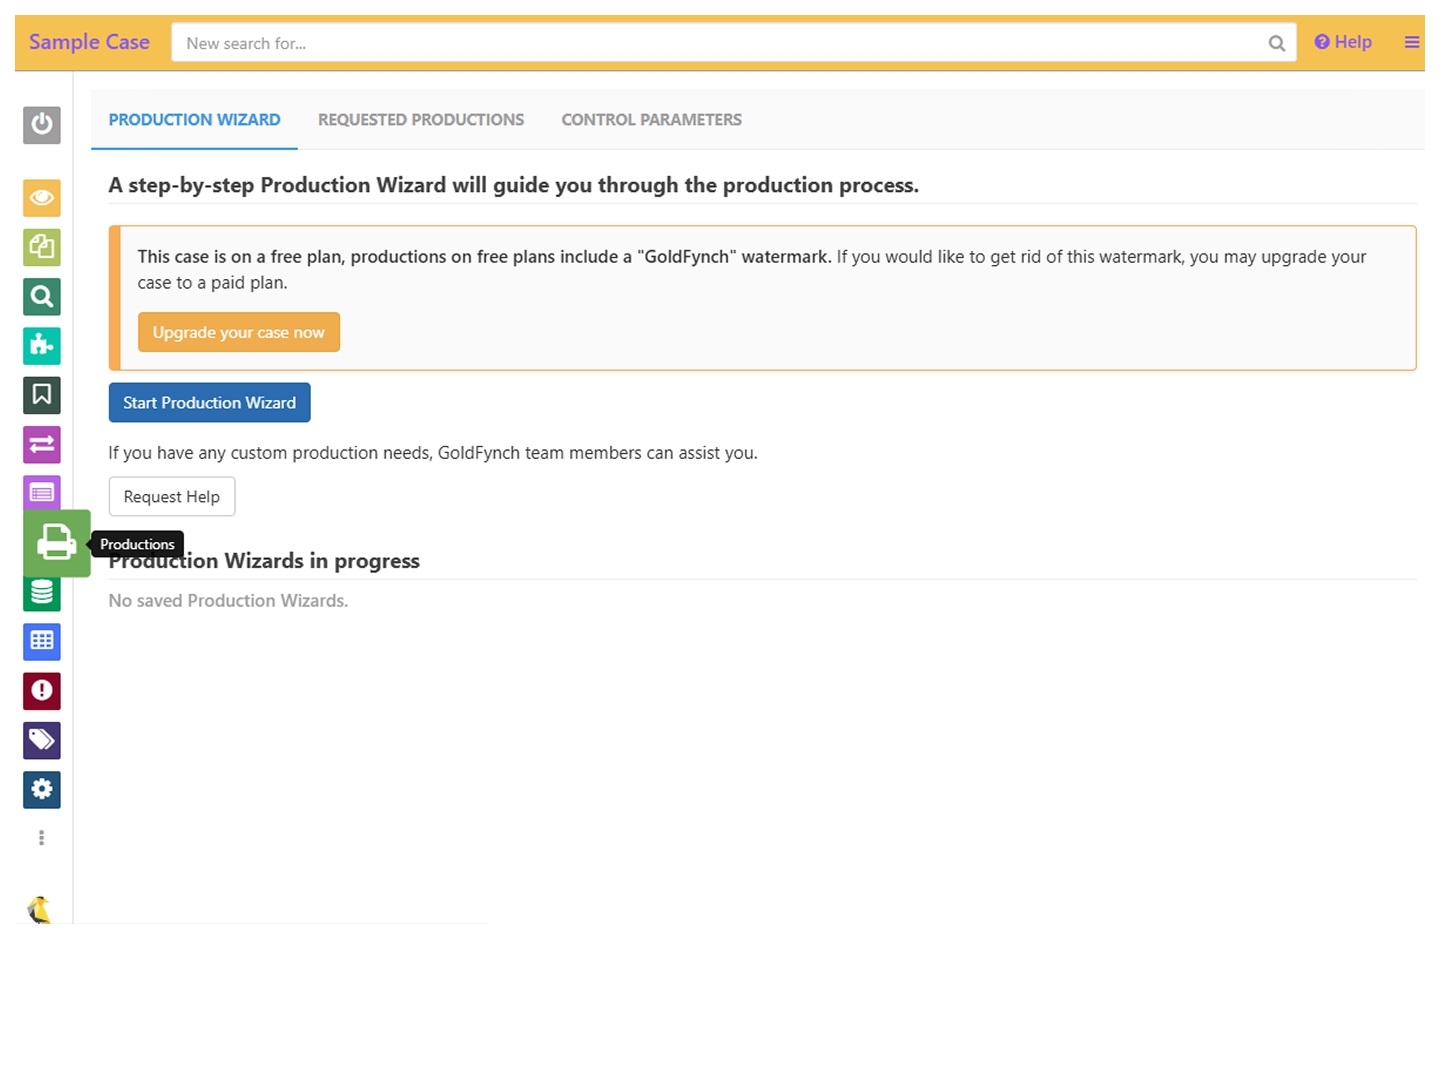
Creating Production - Step wise guide
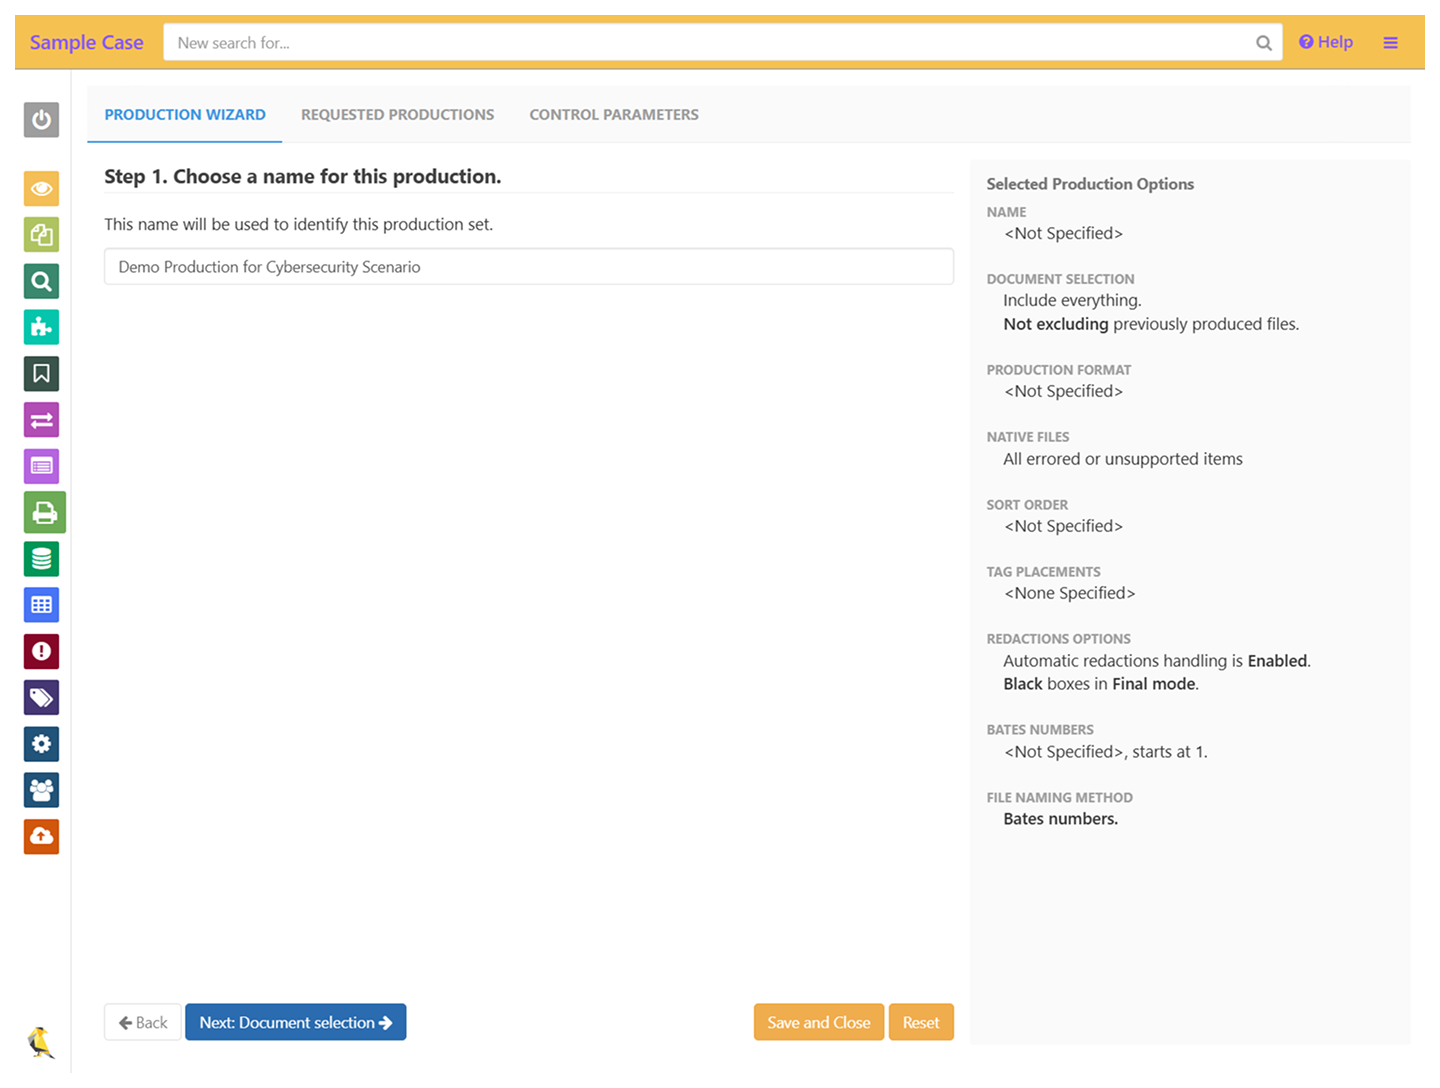
- In the “Productions” tab click on “Start Production Wizard” and enter a name for your production
-
Choose the files to include - this can be tags, or a saved search. If you don’t check any boxes, all files in your case will be produced
- You can omit files with a tag or saved search using the “negate” option
- If you do not have any checked, non-negated selections, all files in your case will be produced
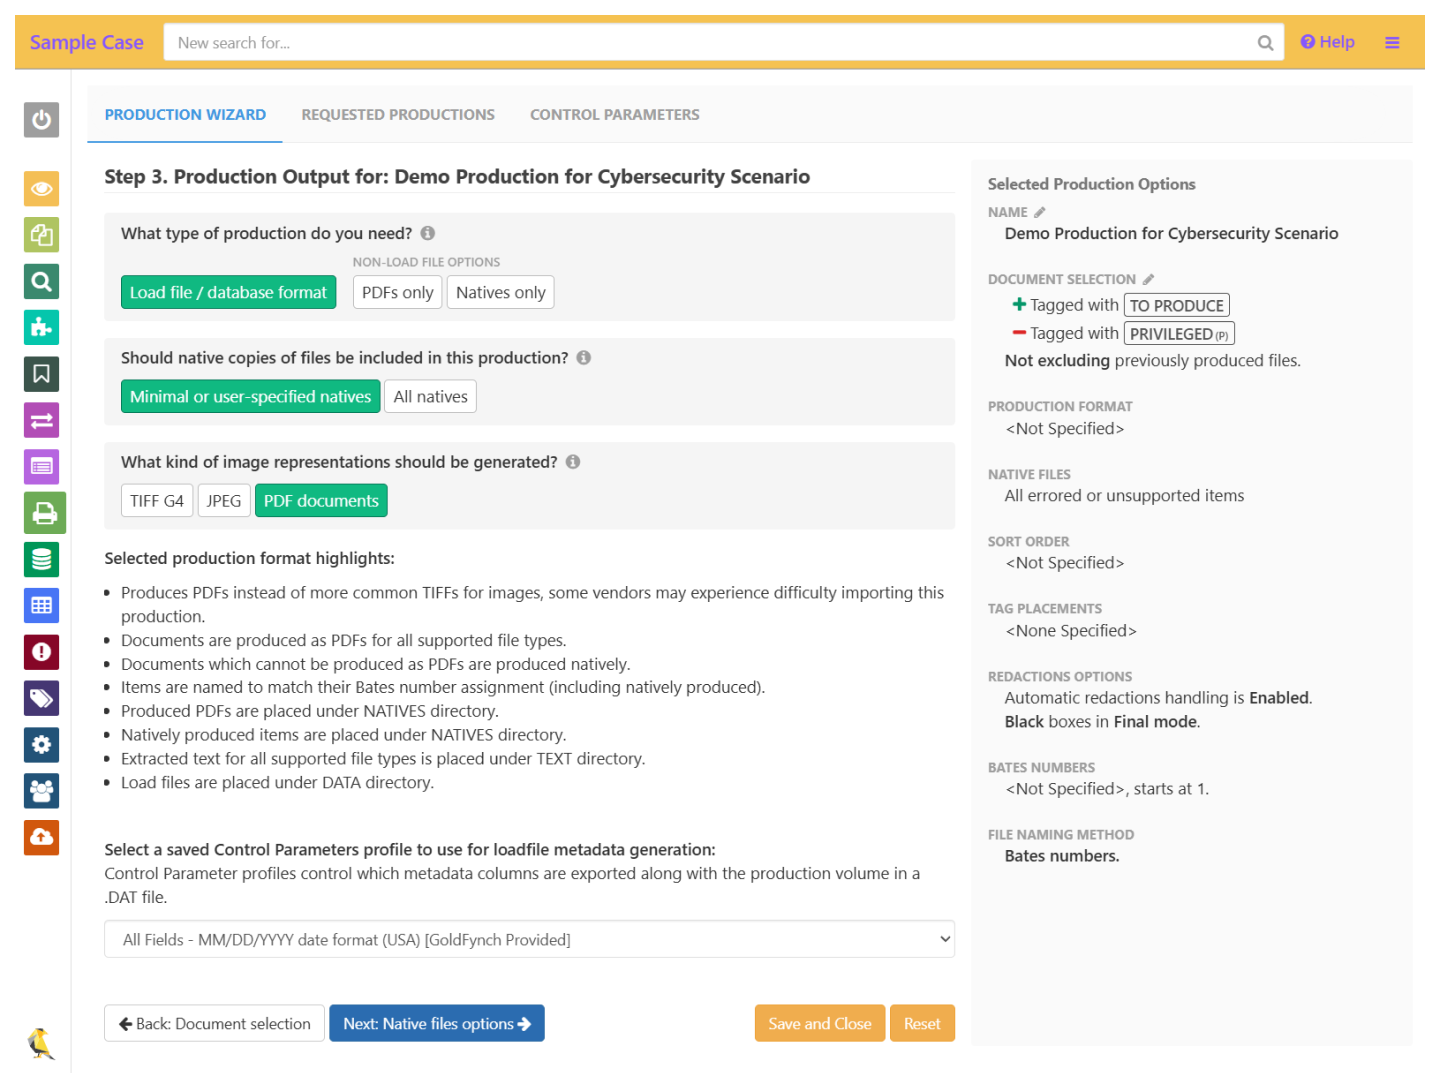
- In step 3, select the options for the type of production you want. Use the default Control Parameters now, but in the future you can use these to customize your generated load file (for load file productions)
- Keep going through the next few steps. Step 4 - you can force certain file types into their native format
- Set a sorting order
- Assign a location for Bates stamps, and add tags or custom text as stamps
- Redactions placed in the Document Viewer will be applied. Checking the box forces redacted files (and their parent files) to be included only in their redacted image form (and not native forms), ensuring redacted content cannot be extracted and viewed
- Select Bates numbering options for files. Bates stamping in step 6, and Bates-based naming in step 9 will be carried out according to this, if they are selected in those steps
- Choose naming options for the file
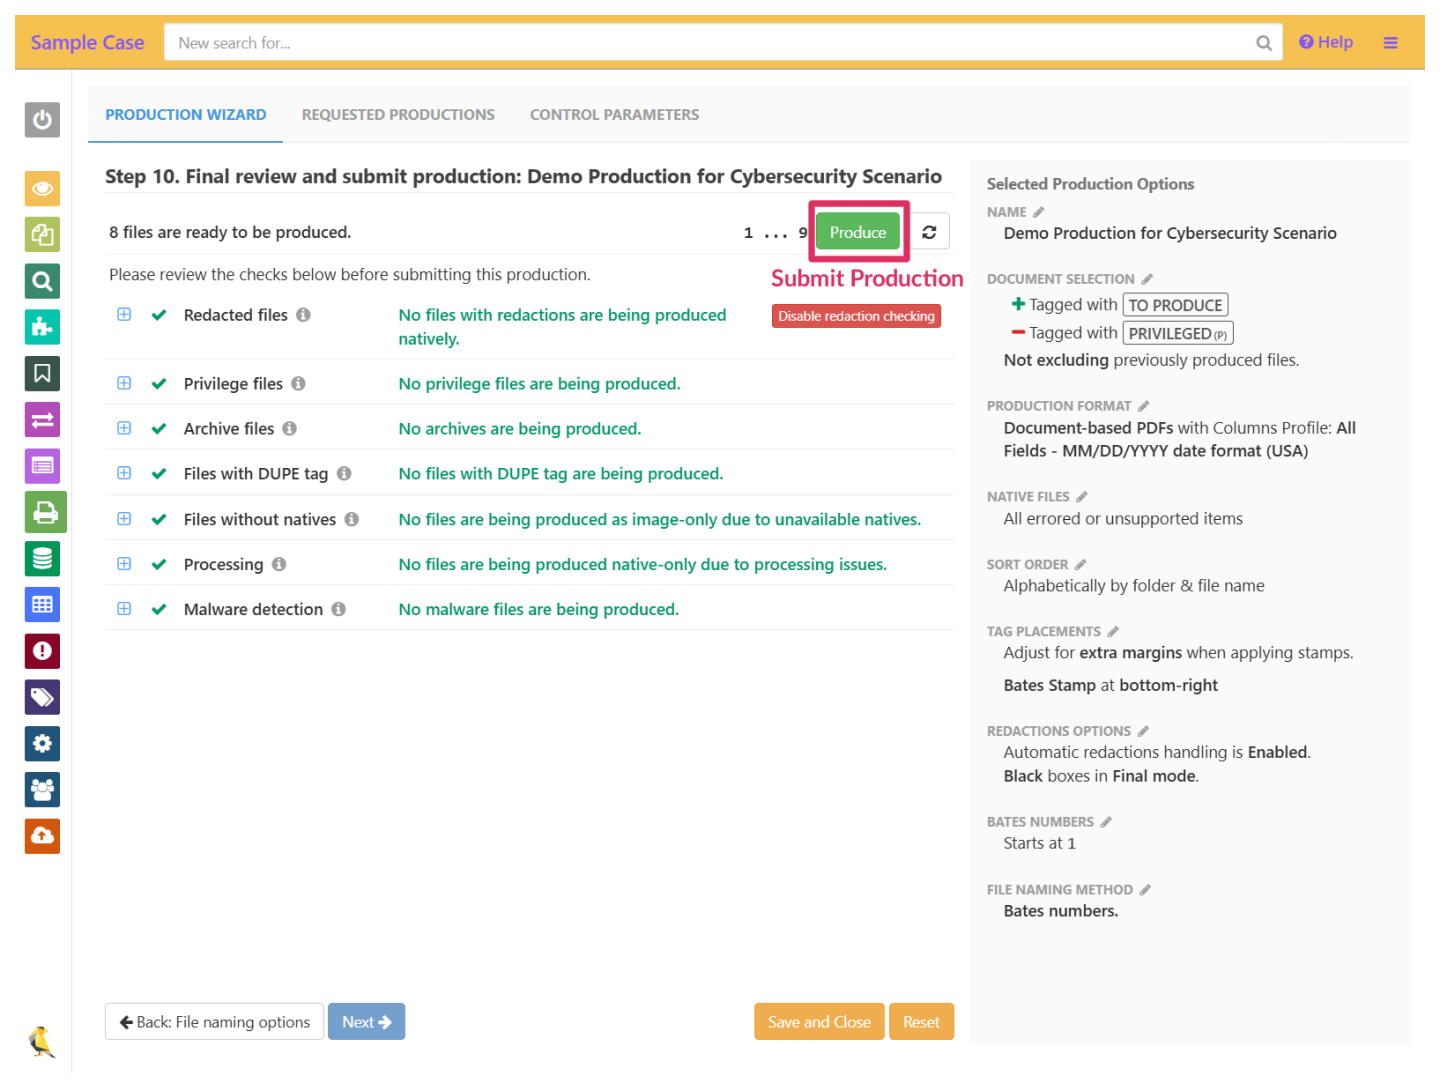
- Review your production. A series of checks will be run, issues flagged, and files that are commonly undesirable in productions will be highlighted, allowing you to easily omit them if required. Once done, click on “Produce files” or “Produce Despite errors”

Production
In the “Productions” tab click on “Start Production Wizard”
Enter a name for your production
Choose the files to include - this can be tags, or a saved search
Select the options for the type of production you want
Redactions placed in the Document Viewer will be applied
Review your production
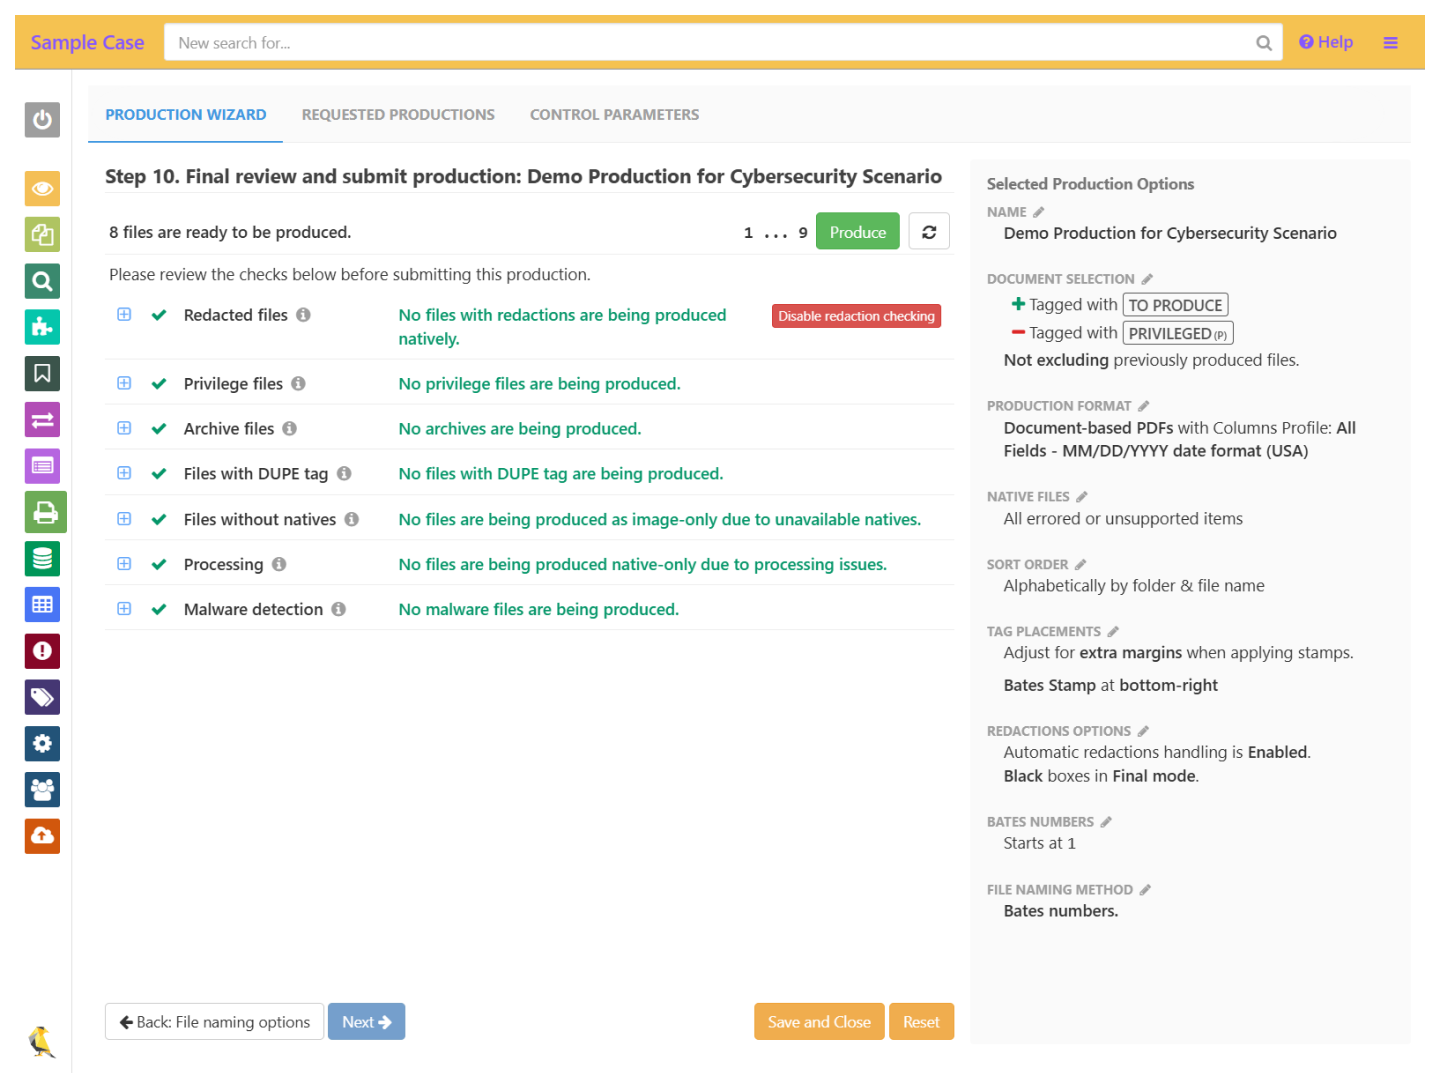
Once done, click on “Produce files” to submit to Production
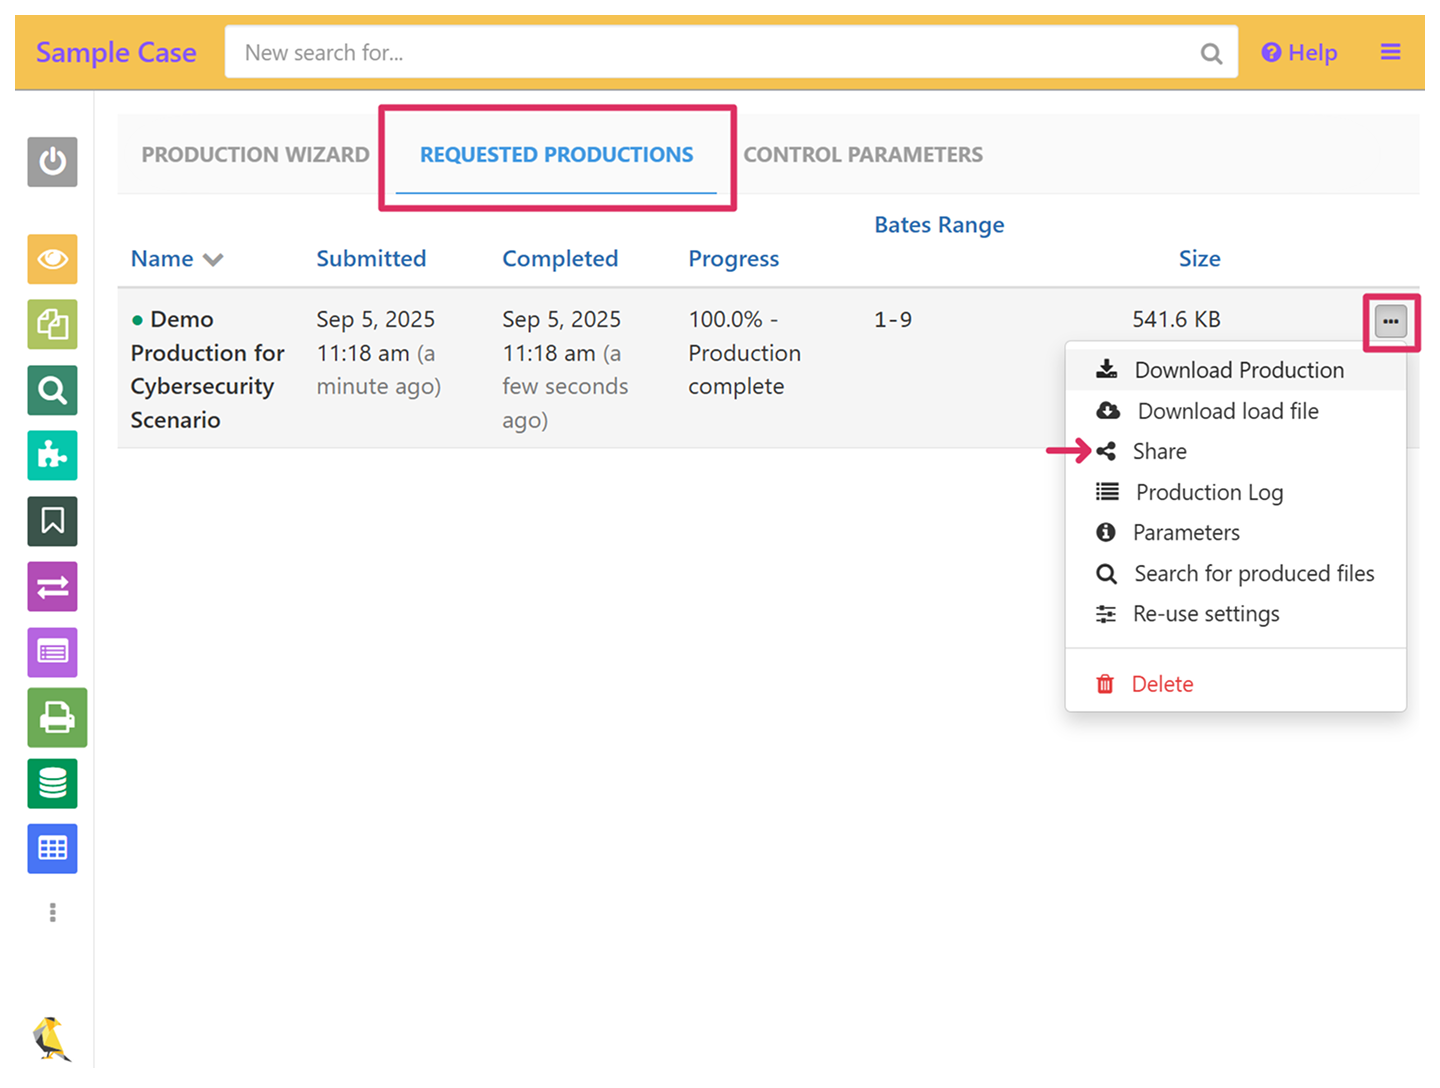
Click on the “Requested Productions” tab to view the progress of your productions
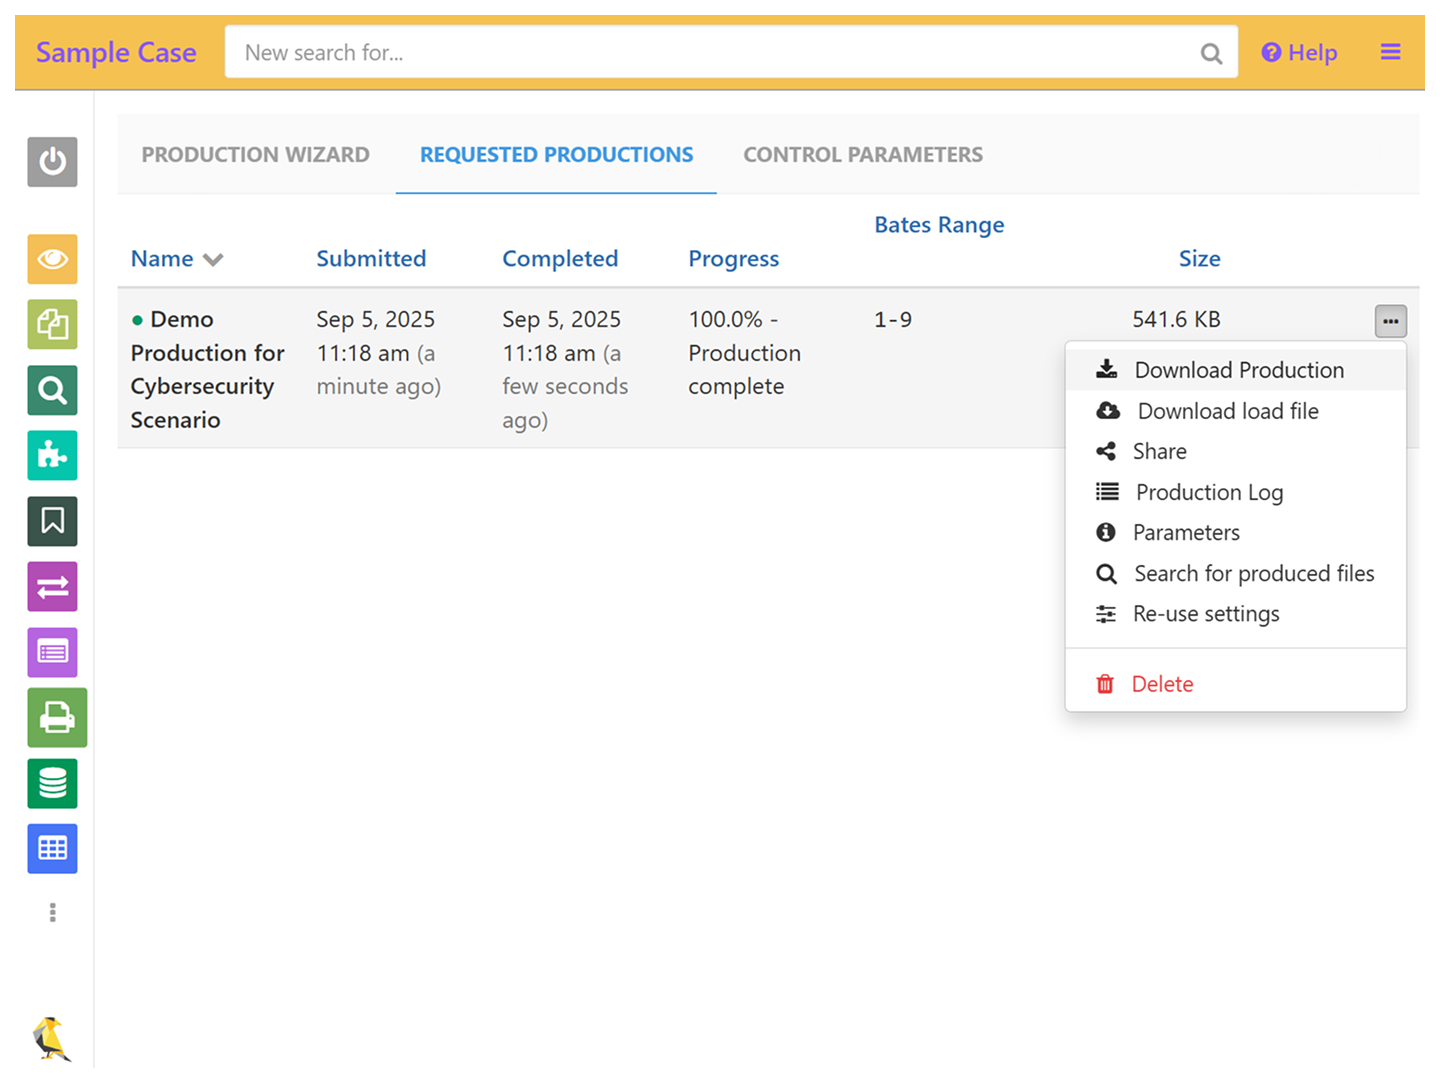
Click on the “...” and “Share”, to share the Production
Share via email
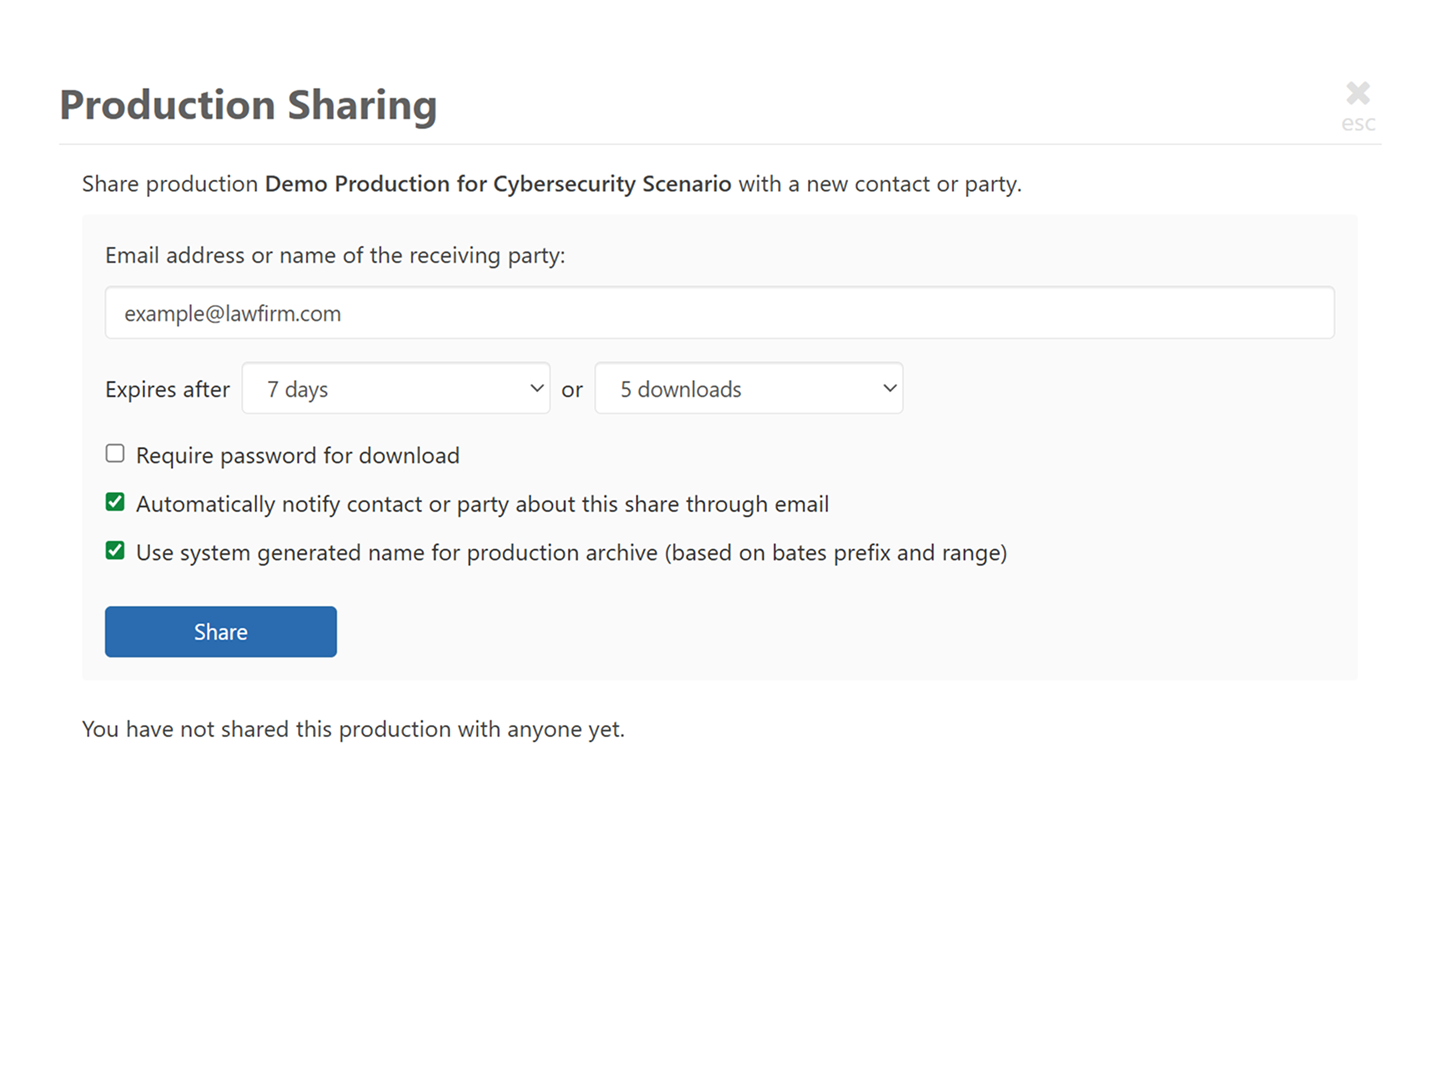
Downloading and Sharing Productions
GoldFynch lets you share productions directly and securely, instead of having to
rely on email or a filesharing service. This helps control access and keep your data safe.
- Click on the “Requested Productions” tab to view progress of your productions, download and share them once complete, and view their production logs
- Click on the “...” and “Share”, then either:
- Share via email
- Create a sharing link to send to the recipient
Note:
Productions in GoldFynch are free to create and you are not charged for the files generated or shared.
Productions in GoldFynch are free to create and you are not charged for the files generated or shared.
Next Steps
Want to download and verify your production?
Use this short checklist
Use this short checklist
- Verify Bates numbering sequence has no gaps
- Confirm all redactions are properly applied and visible
- Check metadata accuracy in load file
- Validate privilege log completeness with withheld documents
- Test production file integrity and readability
- Ensure confidentiality designations are properly marked