Features of the Document Viewer (i.e., the 'Docs' view)
The Document Viewer provides easy access to many of the review functions available in GoldFynch.
Some of the functions you can execute from the Document Viewer are :
- Navigating through search results
- Viewing attachments
- Navigating through review sets
- Adding and removing tags
- Performing redactions
- Adding document notes and annotations
- Viewing a file in its native format
- Viewing a produced version of the file
You can access the Document Viewer from the left navigation panel by clicking on the Docs view icon.

You can also access it by clicking on any file in the Files view or on a file that is part of a search result.
Managing the Document Viewer layout
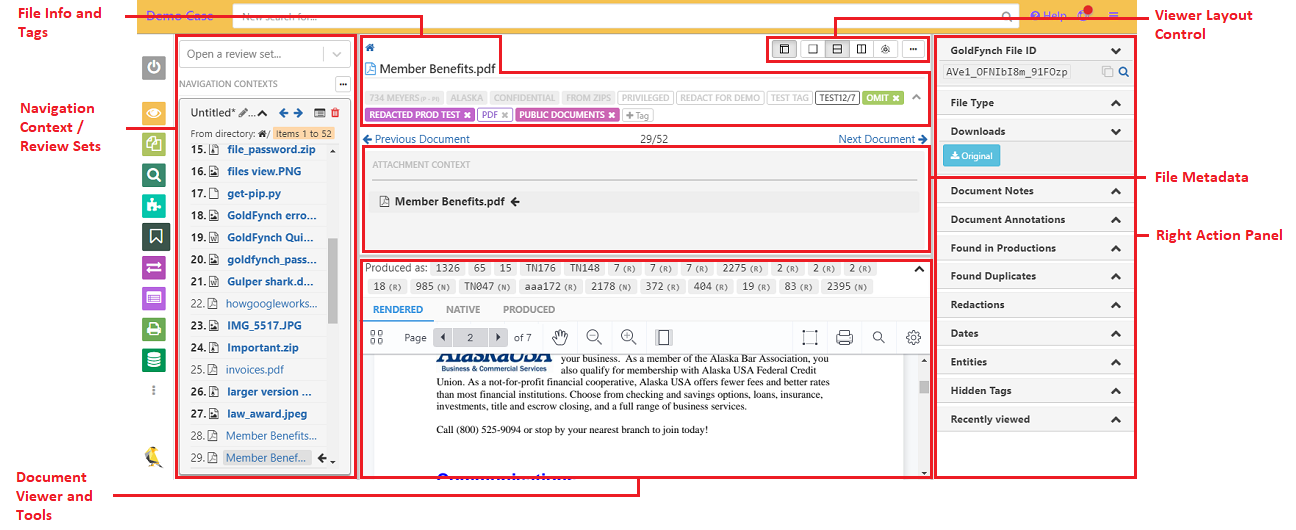
The default layout of the Document Viewer, shown below, includes the navigation context to the left of the viewer and a right panel that contains various details about the file. You can adjust the width of the main reading area if required, and also toggle the navigation context open/closed.
The functions of the viewer control buttons at the top of the Document Viewer are -
- The
Navigation contextbutton will toggle the Navigation context/ Review set panel on and off - The forward and backward arrows, which let you navigate to the next and previous documents
- Current file position
- The
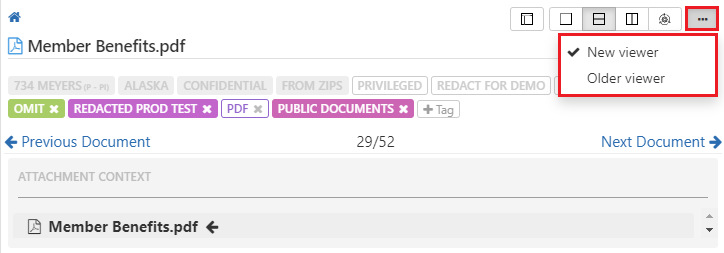
...button will let you switch between the two Document Viewer options
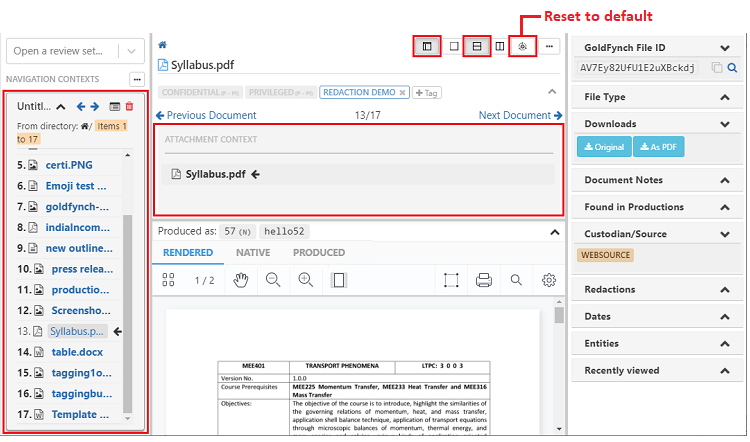
The image below shows the Document Viewer with the navigation context toggled off.

Click and drag the border of the navigation context panel next to the PDF viewer to resize it.
Note: Similarly, you can click and drag the border of both the right action panel to resize it
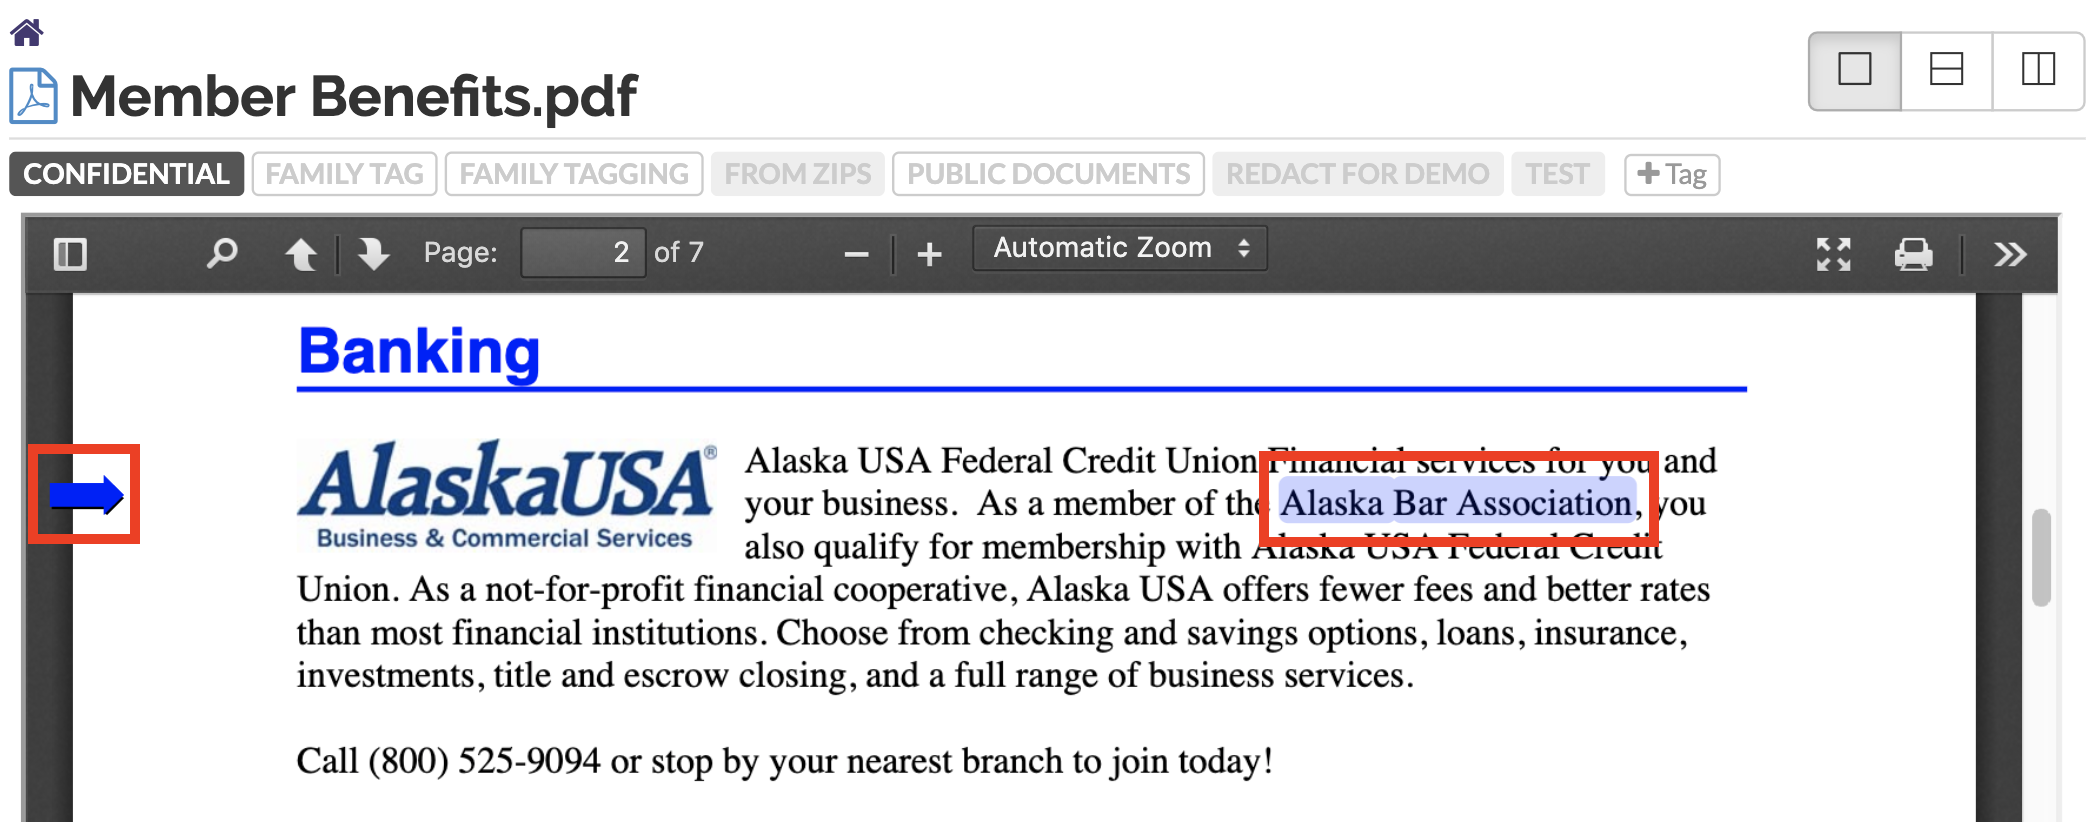
Viewing results from a keyword search
If you ran a search for a keyword, phrase, or similar text parameter, and then opened one of the search results, the Document Viewer will highlight the word(s) you searched for, and an arrow will point to the line in which they are found in.
Navigating through search results via navigation context
When you are navigating through files in the Document Viewer opened as part of a search result, they are opened in a "context", and you can:
- Cycle through all documents in the "context" in the Document Viewer using the backward
<and forward arrows>found at the top-right corner of the Document Viewer or by using the arrows in theNavigation Contexttool in the left column - Click on an item that is part of that context in the Navigation context to jump directly to that item
- Save the Navigation context of a file to return to it, even if you navigate away from the page
Note: If you view a folder in the Files view and open one of the files, all files in that folder will be part of the file's "context".
Learn more about the navigation context here.
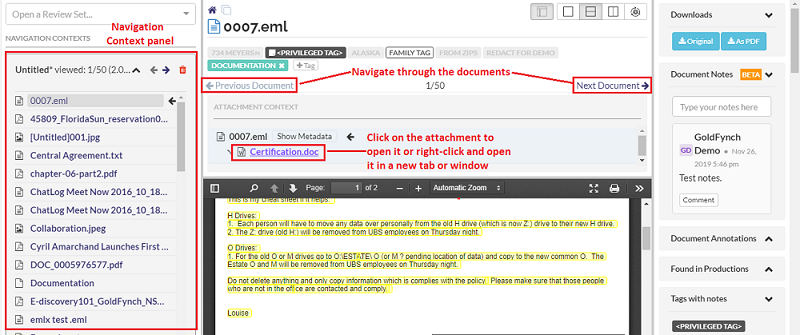
NOTE: While in the Document Viewer, we recommend that you open attachments or other links (for example, those found in the Attachment Context section) in new tabs so that your current position in the file review order is maintained. You can do this by either:
- Holding the "control" (CTRL) button while clicking on the attachment/link
- Right-clicking on the link/attachment, then clicking on "Open Link in New Tab" or "Open Link in New Window" options
Navigating through review sets
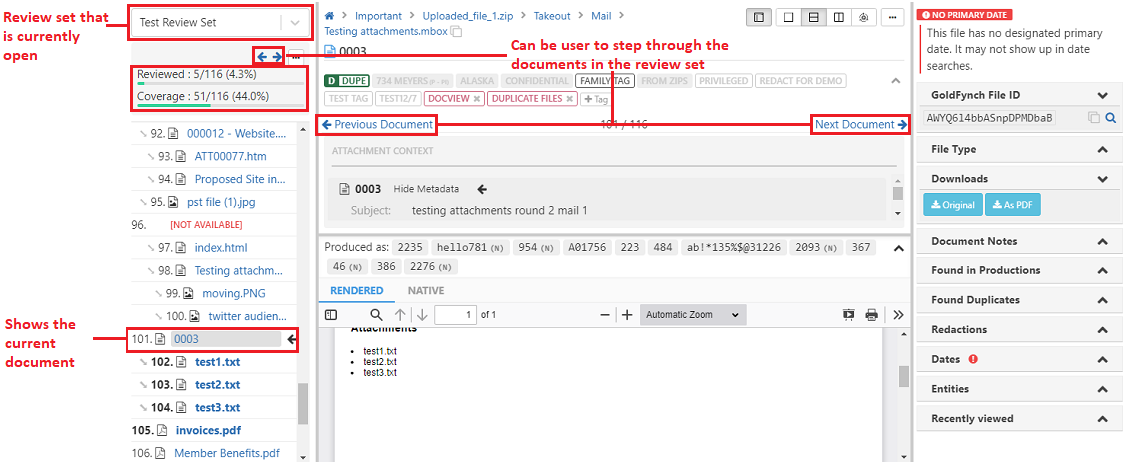
When viewing a document from a review set, the left panel, which usually displays the "navigation context", will now display the open review set, and it provides the following information:
-
The name of the open review set
-
The list of documents in the review set with the file names in bold text, indicating that they are yet to be reviewed
-
The backward(<-) and forward (->) arrows help you to step through the documents that are part of the review set, as do the
<and>arrows found in the top-right corner of the Document Viewer -
The number and percentage against "Reviewed" show how many files you have reviewed in this batch
-
The number and percentage against "Coverage" show how many files in this batch have been reviewed in total across all collaborators
Learn more about creating review sets
The viewer toolbar
The toolbar helps navigate through individual documents. Some basic tools are always displayed in the Document Viewer, and additional functions accessible by buttons at either end of the toolbar.
There are two layouts for the Document Viewer, each with a different viewer toolbar. To change between the old and new layouts of the Document Viewer, you need to click on the ... button present in the layout panel.
Functions accessible from the old Document Viewer layout
The toolbar in the old Document Viewer has three different components.
- The main component contains the basic actions that you can perform from the Document Viewer
- The document outline component
- The additional tools component
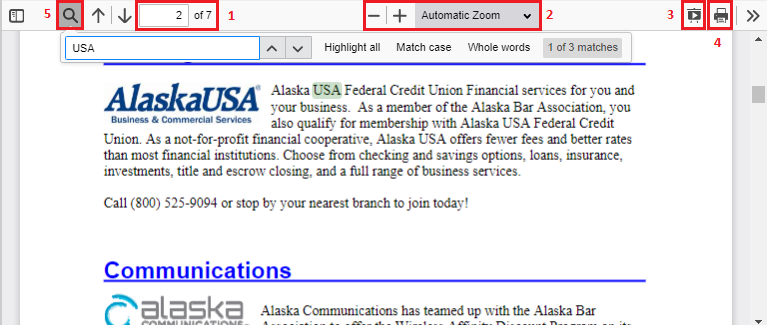
Basic actions using the old Document Viewer layout
The basic actions you can execute using the main component of the old Document Viewer toolbar are -
- Jump to a particular page - type a page number in the text box
- Zoom in and out
- View the document in full-screen view
- Print directly from the Document Viewer
- Search within the document - click on the magnifying glass icon, and a search bar will open. Type in a word or phrase, and GoldFynch will highlight matches.
Document outline
If a document outline can be generated, here is how to view it:
- Click on the sidebar button to open it
- Click on the document outline tab. If possible, one will be displayed.
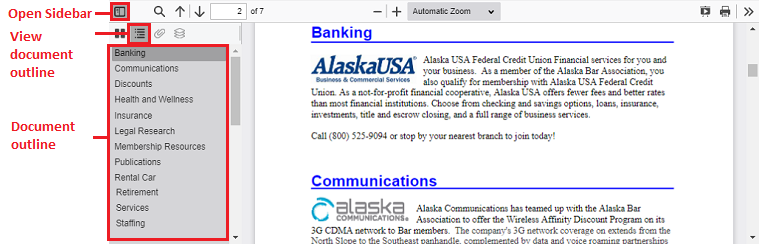
The sidebar also contains buttons to view thumbnails, attachments, and layers.
Additional tools
To open the menu, click on the >> icon on the far right side of the toolbar.
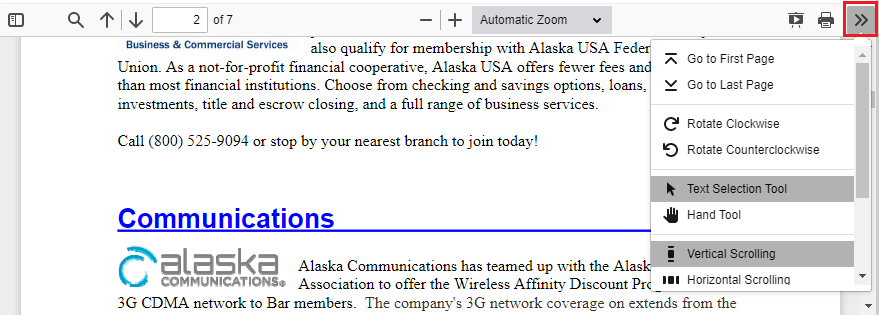
It will open a menu with a few more functions, letting you:
- Rotate pages of the document
- Change the navigation method of the document from scrolling to click-and-dragging
- Jump to the top and bottom of the document
Functions accessible from the new Document Viewer layout
The toolbar in the new Document Viewer contains the main component, where you can perfomr basic actions, and a page layout component.
Basic actions using the new Document Viewer layout
The basic actions that you can execute using the toolbar of the new Document Viewer are -
- Toggle sidebar
- Search within the document by clicking on the magnifying glass and entering the search text
- Jump to a particular page - type a page number in the text box
- Zoom in and out
- Draw redaction boxes - to redact pages, you will need to use the
Add page rangebutton in the right panel - Print directly from the Document Viewer
- Save file to your computer

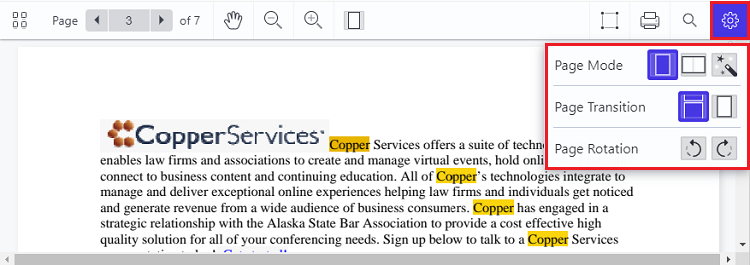
Additional tools
To open the menu, click on the >> icon on the far right side of the toolbar.
The menu options found here let you:
- Change the page mode
- Define how you transition from one page to another
- Rotate a page
- View document metadata
Tools in the Right Action Panel
The right action panel of the Document Viewer displays different details about the document being viewed. Such as: tags associated with the file, file metadata, including attachments if any, file type, document notes and comments, redactions if any, and much more. The details of all the information you can find in the right panel and the actions you can perform are described below.
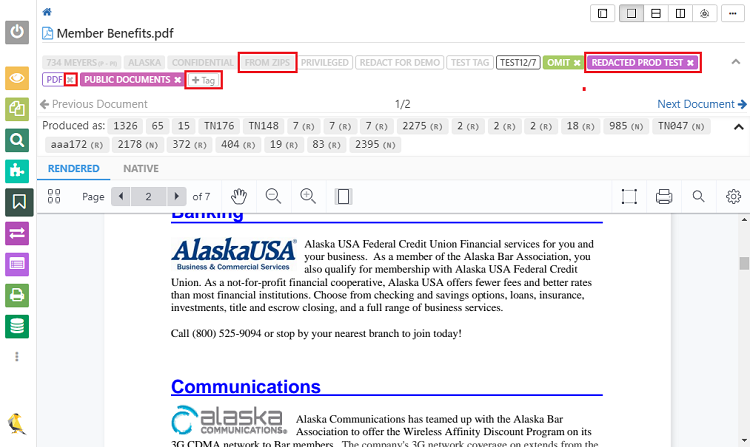
Tags Section
Add and remove tags
You can quickly add or remove tags and quick tags from the tag section in the right action panel.
- Click on a quick tag to toggle it on or off
- Click on the ‘Tag...’ button to add a new or existing tag
- Click on the ‘x’ on a tag to remove it from the document
Find out more about tagging files here.
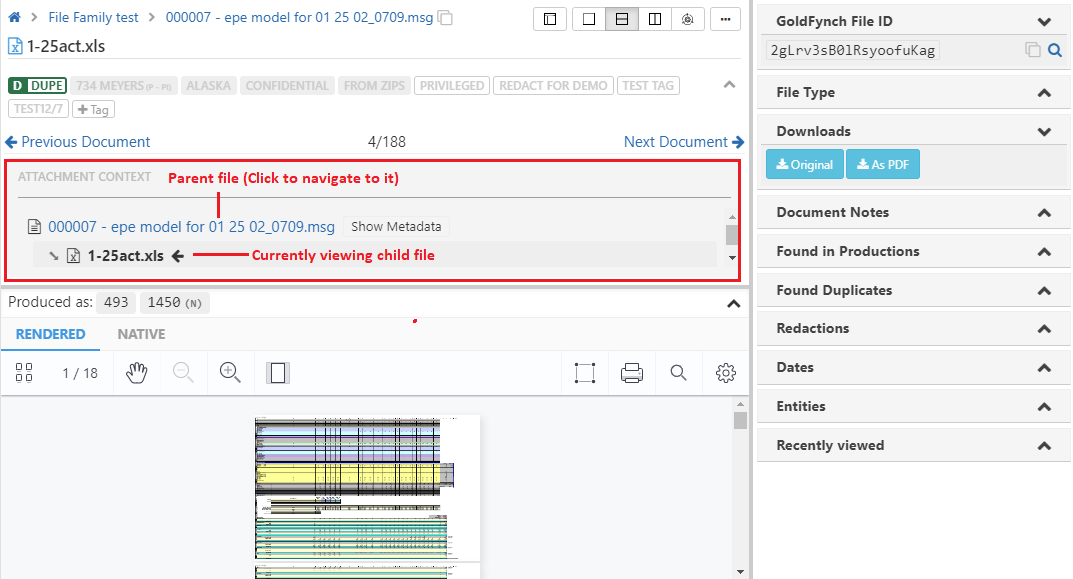
Attachment context
The Document Viewer's Attachment context section helps keep track of files linked to each other, such as zipped files and their contents, or emails and their attachments.
- Click on one of the file names in the list to go to that file in the Document Viewer
- Even if the 'parent' or one of the 'child' (attachment) files is moved to a different folder in your case, their relationship will be maintained and viewable from this panel
Details section
File Information
The ID, category, file type, MIME type, message class (if applicable) and file size are displayed under the 'File Information' section of the right panel.
- ID refers to the GoldFynch file ID which is the unique ID assigned by GoldFynch to each file in the case. The GoldFynch file ID helps identify which file is used in a review set or production, especially in cases where duplicates exist.
- You can search for all documents with the same category, file type, MIME type, or message class by clicking the search icon next to the appropriate option

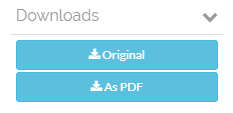
Download files
In the right panel, under the 'Downloads' section, there are a few options to download the file you are viewing:
- Click on the 'Original' button to download the native version of a file
- Click on the 'PDF' button to download an OCR-processed (searchable) file if one exists
Learn more about 'native' file formats in the first section of this article.
Document Notes and Annotations
The 'Document Notes' section of the right panel lets you directly add notes to the document being viewed, and it also lets you comment on existing notes. These notes are different from tag application notes and are extremely useful during reviews.
GoldFynch lets you highlight portions of a document and add comments to the highlighted text. These are what will be visible in the 'Document Annotations' section of the right panel. The 'Document Annotations' section of the right panel will be visible only if an annotation exists in the document being viewed. When this section is visible, you can find it right below the 'Document Notes' section.
Learn more about Document Notes and Annotations
View the productions the file is in and view/download its produced format
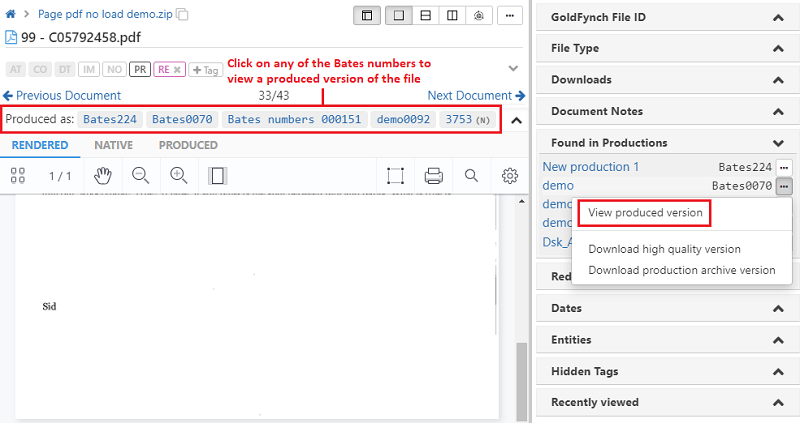
The productions the file is a part of are listed under the Found in Productions section of the right panel, and the Bates number of the file in the various productions is listed above the Toolbar as Produced as:
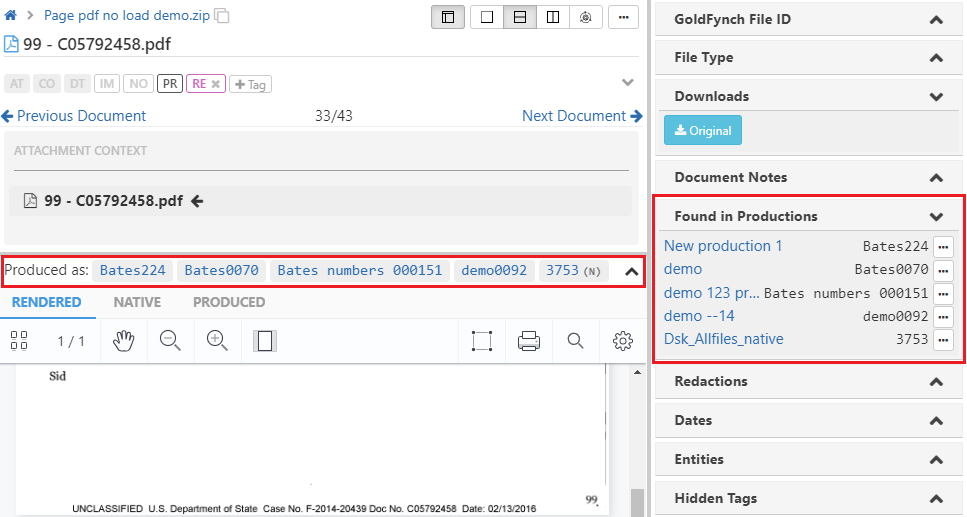
You can click on the name of the production to open up the production log, and the file that was open in the Document Viewer will be highlighted in the log.
Additionally, you can -
-
View the produced version of the file from a specific production. To do so -
-
Click on the
...button against the production -
Click on the
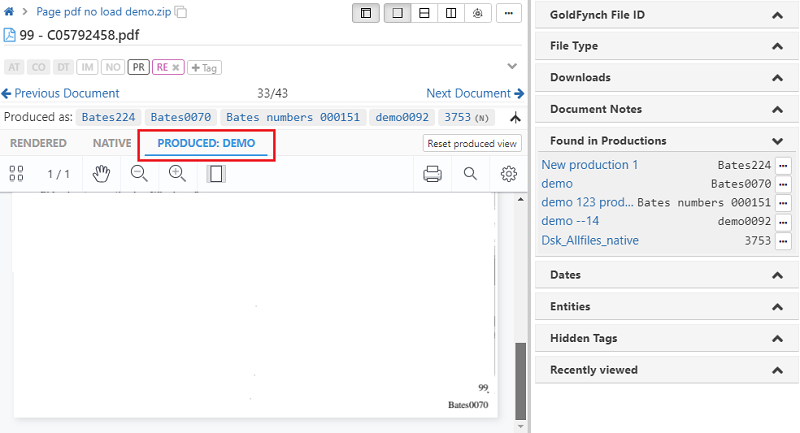
View produced versionoption. GoldFynch will display the produced version of the file in theProducedtab of the Document Viewer. You can see the name of the selected production at the top of theProducedtab.
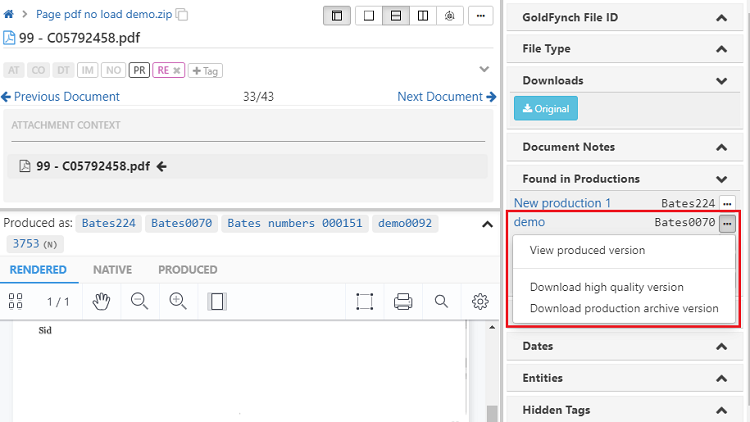
-
-
Download the produced version of an individual file from a specific production without downloading the entire production. You will have the option to download either the 'Produced Archive version' (i.e., the produced format) or the 'High quality version' (i.e., a PDF version). To start the download, you will need to -
-
Click on the
...button against the production -
Click on the download option you want, and the download will begin
-
Note that a file can be included in the same production many times, in both its native and non-native formats.
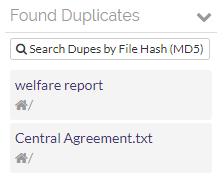
Find duplicates of the file
The 'Found Duplicates' section of the right panel, lists (identical) duplicates of a file, even if their metadata, like names, are different, in your GoldFynch case. It also allows you to search for files by their MD5 Hash (unique identifier) values. Note that this does not account for Message-ID-based strategies. To run a comprehensive de-duplication for your case, use the de-duplication tool.
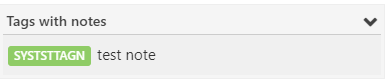
View tag application notes
The 'Tags with Notes' section of the right panel displays all the tag notes of tags that are attached to the open file. This section is visible only if there are tags with notes. All tags in the Tag bar with a "sticky note" against them should be listed in this section, along with the note associated with each tag.
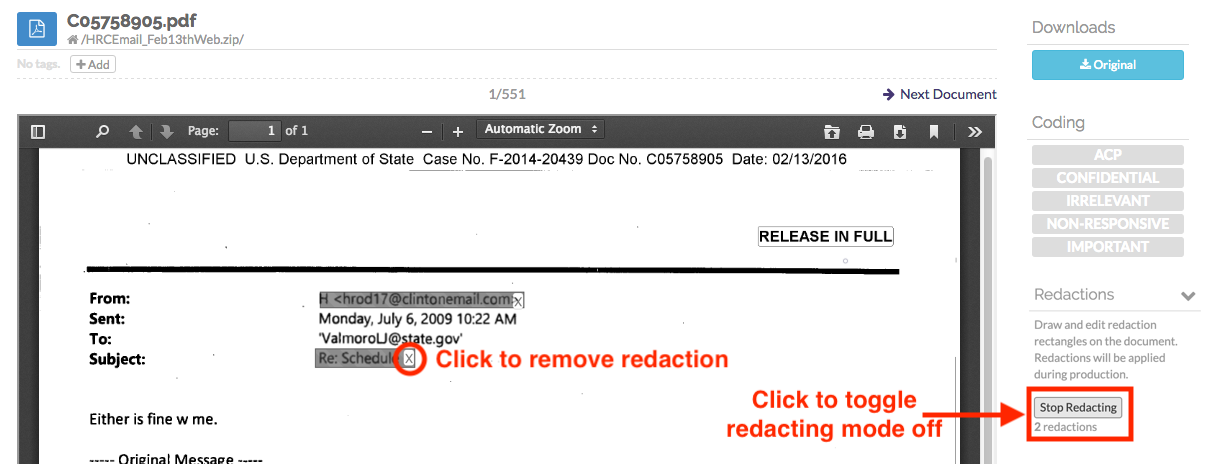
Redact information
Redaction is an important part of document review, and it is carried out in the Document Viewer. Once you have redacted information, it will remain visible and searchable for you in GoldFynch. When it is produced in a non-native format (e.g., PDF, TIFF), however, all information placed below a redaction box will be covered and made unsearchable.
Learn more about redaction here.
View dates in documents and set a document's Primary Date
Dates found in the document are automatically listed under the 'Dates' section.
Primary Dates serve as a single reference date-time for a file in GoldFynch. In the Document Viewer, the Primary Date is the one with a checkmark next to it in the 'Dates' section of the right panel.
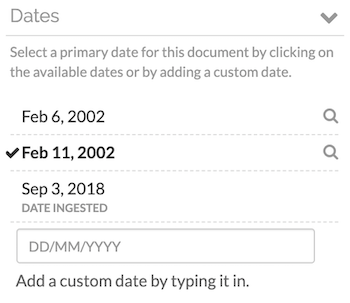
To assign a Primary Date, click on a date listed under the 'Dates' section, or enter a custom date into the box.
You can also find the 'Ingestion Date' of a file in this section. Ingestion Dates represent the date and time at which a file began uploading to GoldFynch.
Learn more about Primary Dates and Ingestion Dates here.
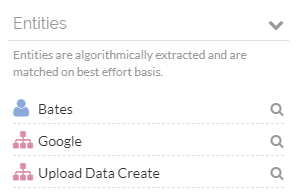
View extracted entities
Names, terms, and other keywords are automatically extracted from documents and listed under the 'Entities' section of the right panel.
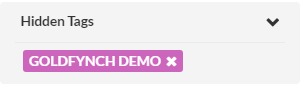
View hidden tags
You can find all the hidden tags attached to the file in the 'Hidden Tags' section of the right panel. You can remove a hidden tag by clicking the 'x' next to it.
Click here to learn more about hidden tags
Recently viewed
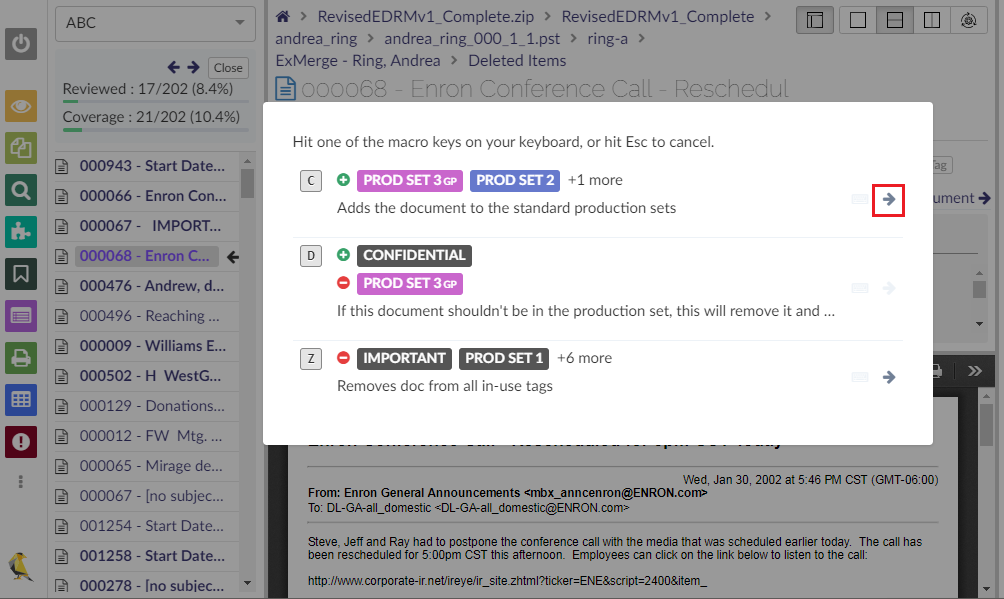
Executing Review Macros
GoldFynch lets you use macros (shortcuts) to quickly assign and remove tags in the Document Viewer. To use a macro, you need to first hit the trigger command .. (two periods hit in quick succession). GoldFynch will display a list of active macros with the shortcut keys for each macro. All you need to do is press the shortcut key of the macro you wish to use, and its action will be carried out.
Click here to learn more about review macros
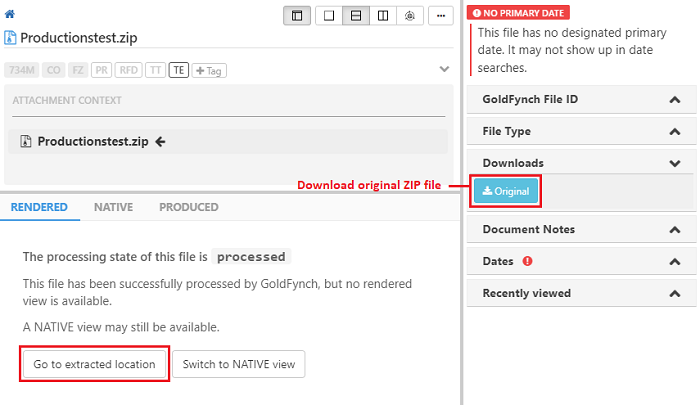
Viewing container files
Viewing container files in the Document Viewer differs slightly from viewing other files. They don’t contain their own content to display, but you can still perform a few actions on them.
- Click on the
View Container Filetext next to an extracted container folder in theFilesview to view the container file
Once opened in the Document Viewer,
-
Click on the
Originalbutton underDownloadsin the right panel to download the original zip/compressed file that was uploaded (which you can unzip on your computer to view its contents) -
Click on the
Go to extracted locationbutton to view the extracted files in theFilesview -
Click on the
Delete the container filebutton to delete the file
Learn more about compressed, extracted, and container files here.
Viewing files in different formats
Using GoldFynch's Document Viewer, you can view files in any one of the following formats -
- Rendered - This is the processed form of the file.
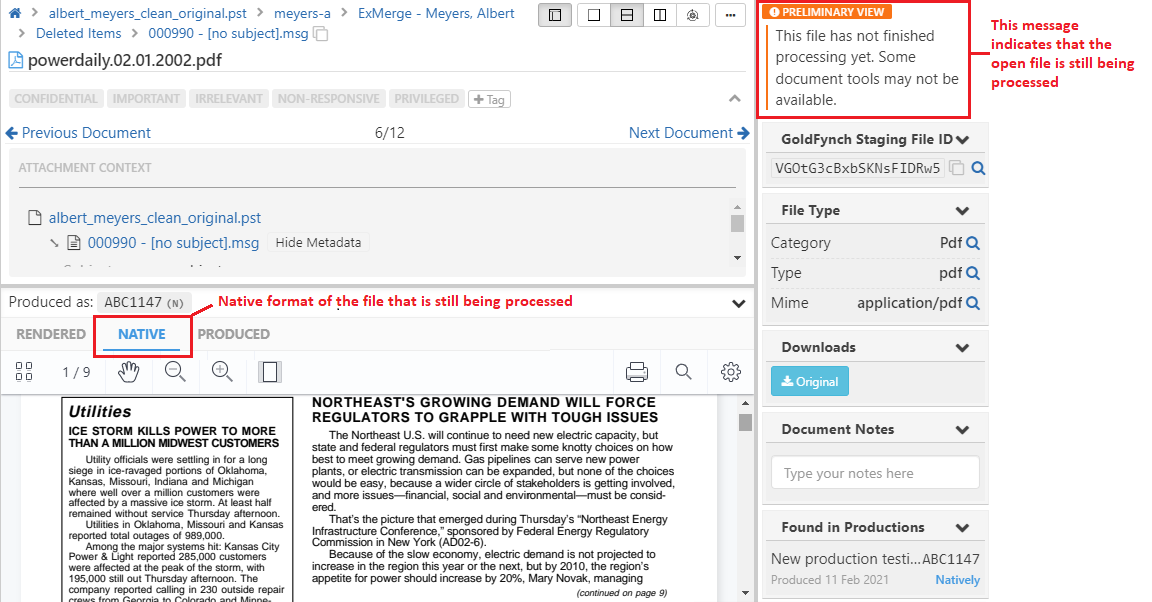
- Native - You can view the native version of the file when you select the native tab on the viewer widget. You can even view processing and errored files in their native form using this feature. At present, this feature is available for PDFs, image files, plain text files, CSV files, and some video formats.
- Produced - You can view the produced version of a file from a specific production here.
Viewing a rendered file in its native form
-
Click to open the file
-
Click on the native tab in the viewer section of the Document Viewer to view the file in its native form
Viewing a processing or errored file
Similar to viewing a rendered file, you will need to click to open the file. The Rendered tab will display a message indicating the file's processing state, along with buttons to download the file.
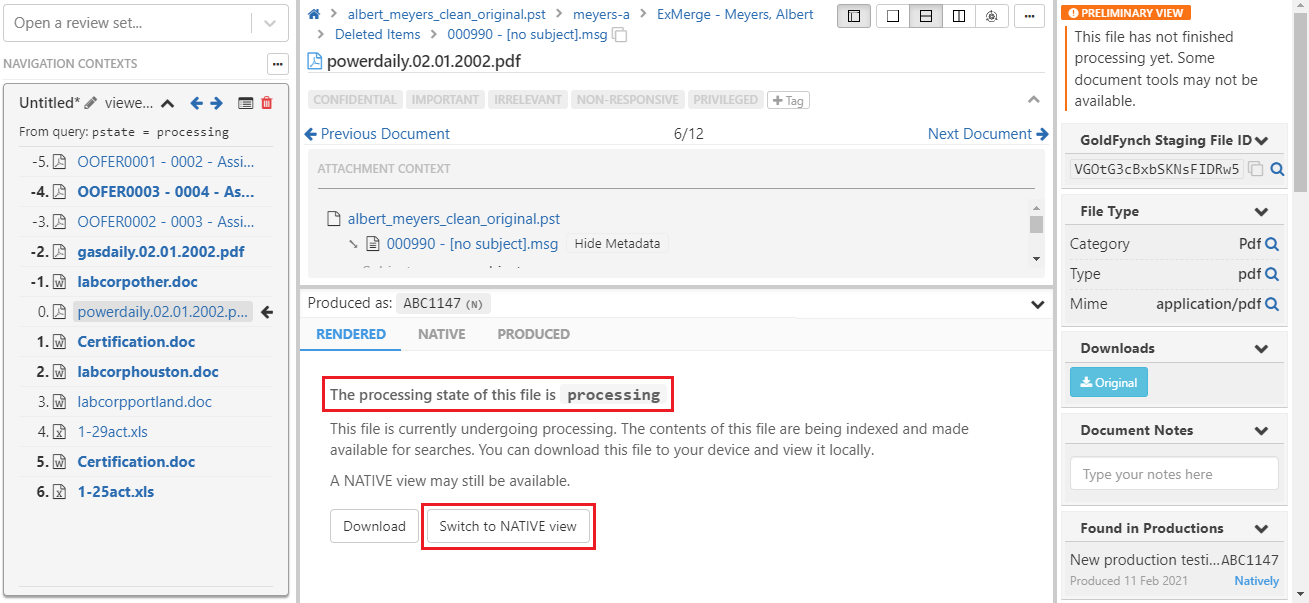
Click on the Switch to Native view button to view the file in its native form.
In the case of errored files, you can also navigate to the issues view by clicking on the Open issues page button that will be displayed in the Rendered tab of the Document Viewer widget.
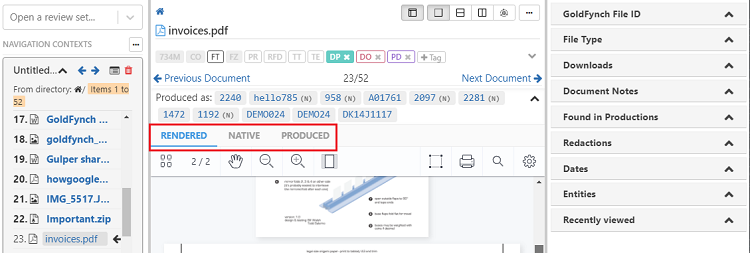
Viewing a produced version of the file
GoldFynch will display the produced version of a file in the Produced tab of the Document Viewer widget. You can view the produced version of a file in the Document Viewer in one of the following ways -
-
By clicking on the Bates number in the
Produced assection -
From the
Found in Productionssection in the right panel, by clicking on theView produced versionmenu option. This has been described in detail in the Found in Productions section of this document. -
By clicking on the name of the file in the Production Log
-
By selecting the Production from the dropdown in the
Producedtab
When you use any of the options described above to view the produced version of the file, it will be displayed in the Produced tab of the Document Viewer. At the top of the tab, the production name from which it was opened will be displayed.
Note: In the case of 'Native Only' productions, since the document is produced natively, no produced version will be displayed in the Produced tab of the Document Viewer widget.