


Step 4: Tagging and Redacting Files
Tags are labels used in GoldFynch to categorize, reference and filter files. During the production process, they are used to include/omit files from productions, as well as to apply stamps to documents.
The ‘Tags’ view
Tags are managed from the ‘Tags’ view.
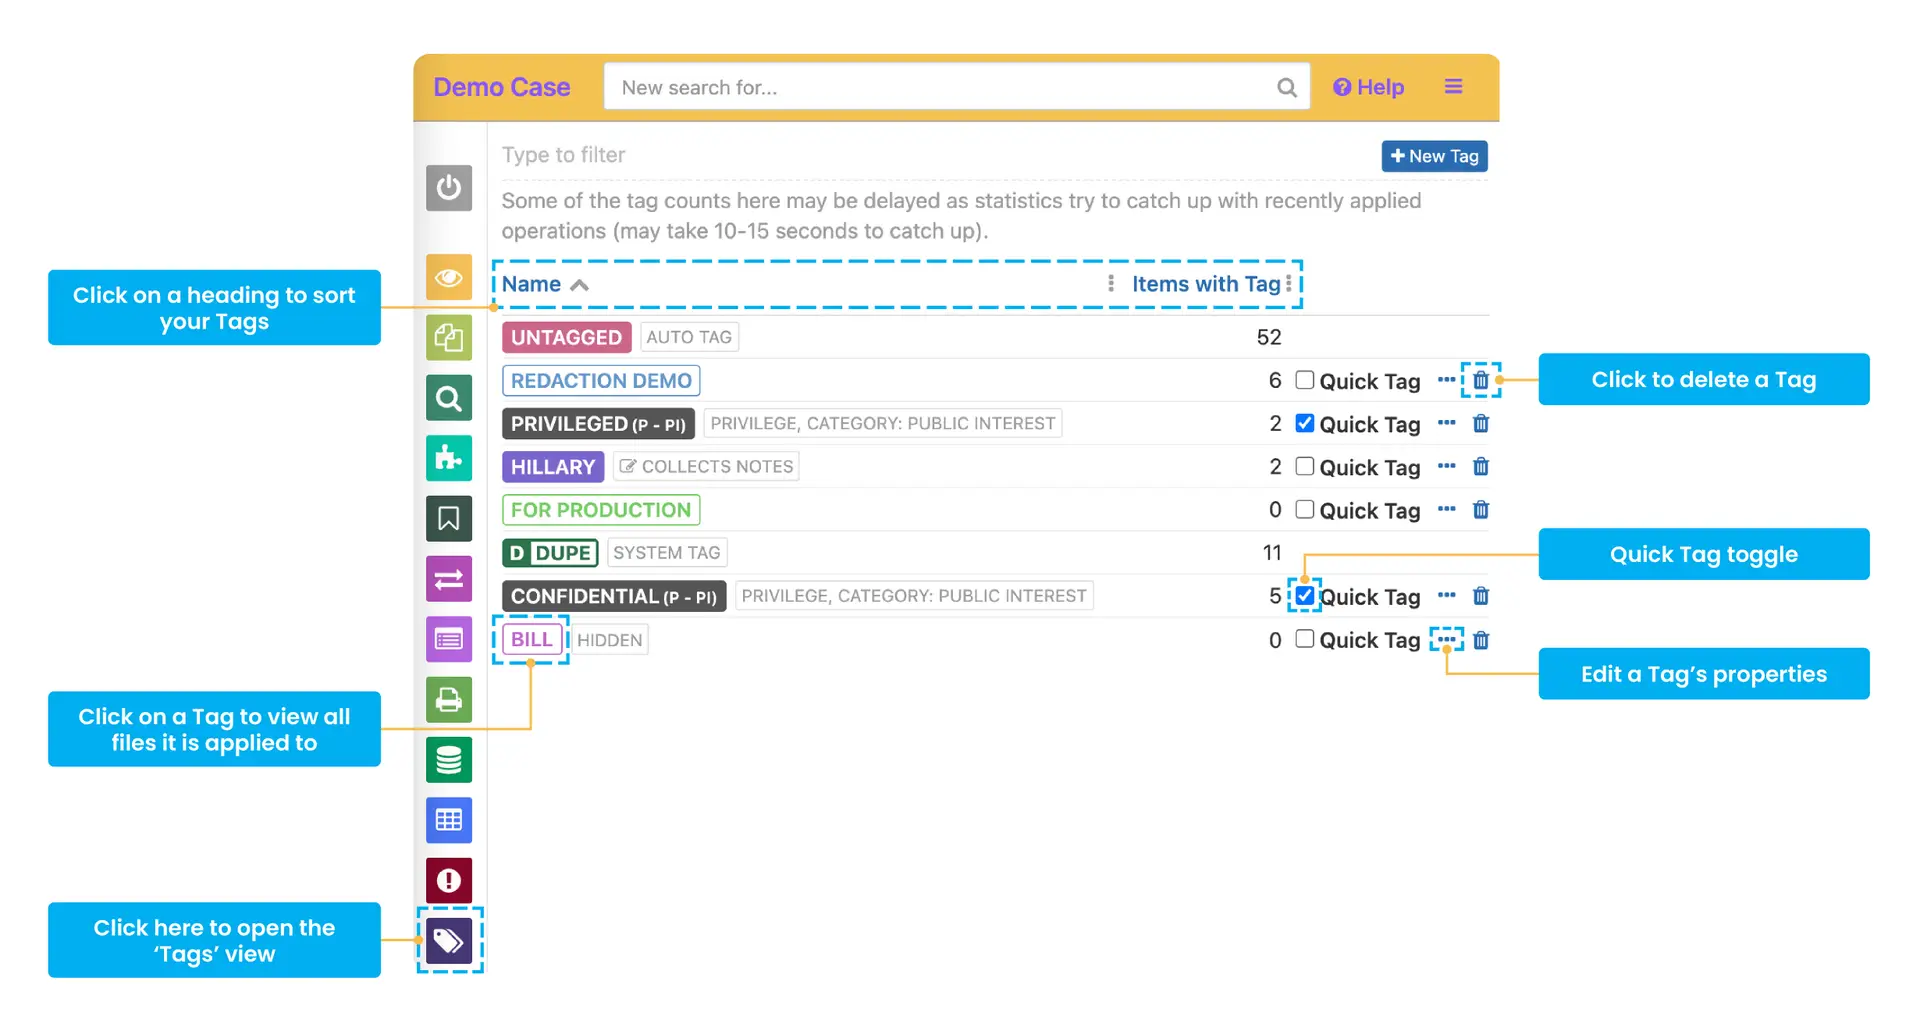
From here you can:
- Click on the ‘+New Tag’ button to create a new tag
- Click on a tag name to display (and then manipulate) files it is assigned to in the ‘Search’ view
- Check the ‘Quick tag’ box to turn a tag into a quick tag. These tags are displayed prominently on screens from which you can apply tags, so they can be easily found and applied
- Delete tags
- Sort tags
Click on the ‘…’ option against a tag to open the ‘Tag Preferences’ screen, from which you can:
- Rename the tag
- Change its default family tagging behavior (see the next section)

Tagging families of files
When you tag (or remove a tag from) a file, GoldFynch can spread the change to other files in its file ‘family’ - for example, when tagging an email, GoldFynch can spread the tag to its attachments - its ‘child’ files. And the tag can be set to remember this behavior, automatically spreading the change without requiring a prompt each time.
Tags that are set to automatically spread behavior look like this:
Tags that raise prompts, or just apply changes to themselves look like this:
Quick tags are always black in color. Here’s what Quick tags that spread to families look like:
Quick tags that prompt, or just apply to the files alone look like this:

If you are applying a tag that doesn’t have its family tagging behaviour set already, you will be prompted on how you want the tag to be applied - choose between the ‘Apply to item only’ and ‘Apply to entire family of each item’ options.
Find out more about tagging files of families here.
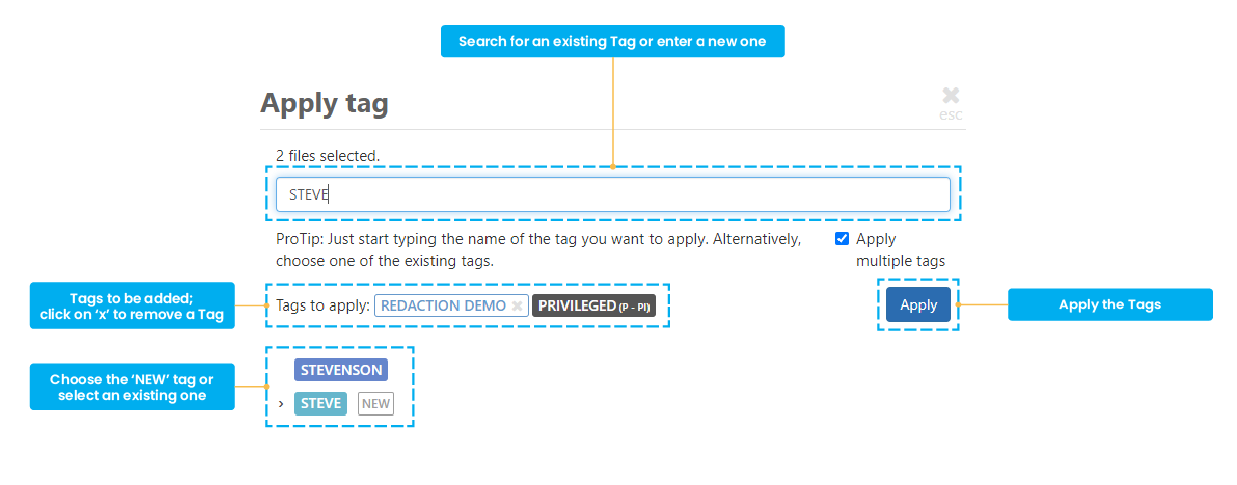
Applying tags to files
Tags can be applied and removed from numerous screens in GoldFynch. Just look for the ‘+Tag’ button, which will open the ‘Apply tag’ screen:
Some of the places you can find the +Tag button include:
- The Tag bar in the Document viewer
- The Tag bar of each search result in the ‘Search’ view
- The action panel that appears on the right of the screen in the ‘Files’ view when you check a box against a file name
- The ‘Issues’ view
Click here for a closer look at applying tags.
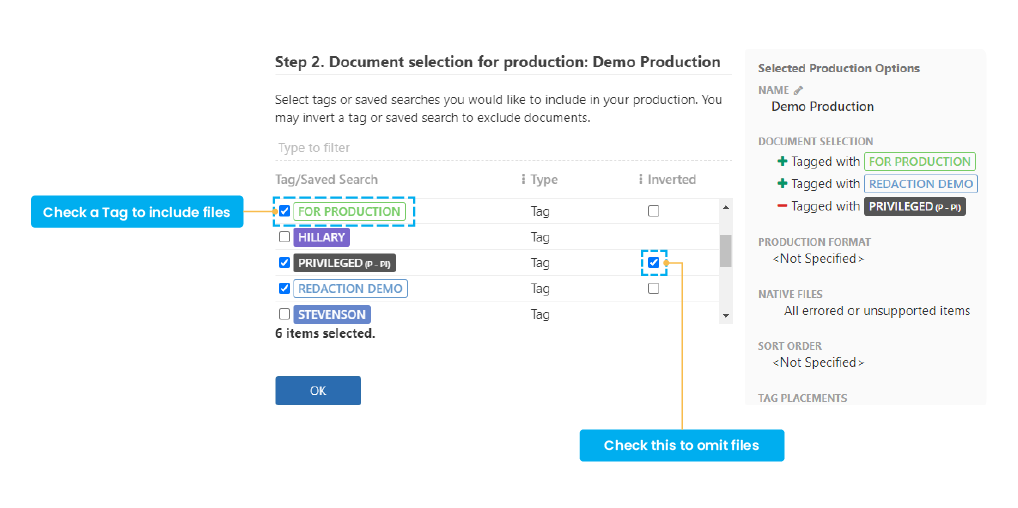
Tags during production
Files are included or omitted from productions by using tags - remember this during your document review!
In step 2 of production, click on a tag’s row to include files that have that tag attached to them, and check the ‘Invert’ checkbox to omit all files with the ‘inverted’ tag.
Tags can also be used to place stamps on produced documents that they are assigned to (similar to Bates Stamping, but using text.)
Learn more about using tags in productions here, and find out how tag stamping works here.
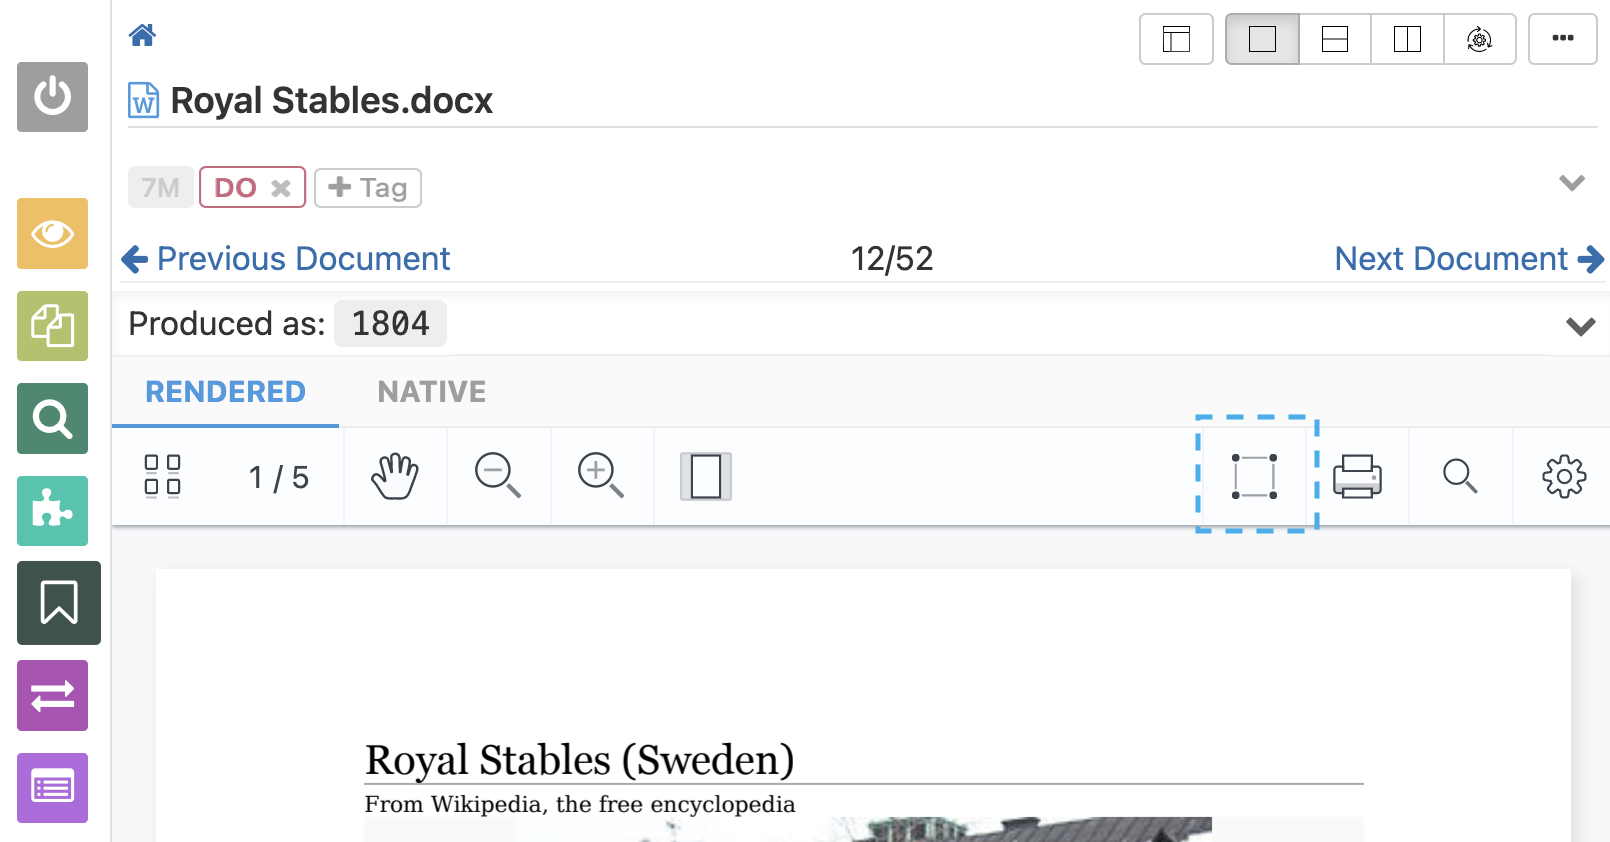
Redacting information
To redact information in your documents when using the ‘New’ viewer style
- Click on the ‘Create Redaction’ button, then click and drag the mouse over the section of text you wish to redact. Repeat to create new boxes over each required section
- When you are done, click on the ‘Create Redaction’ again to toggle off redaction mode
To redact information in the ‘Old’ viewer style:
- Click on the ‘Draw’ button in the redaction section of the right panel, then click and drag the mouse over the text to redact
- Repeat this across all the information you wish to redact, then click on ‘Stop Redacting’
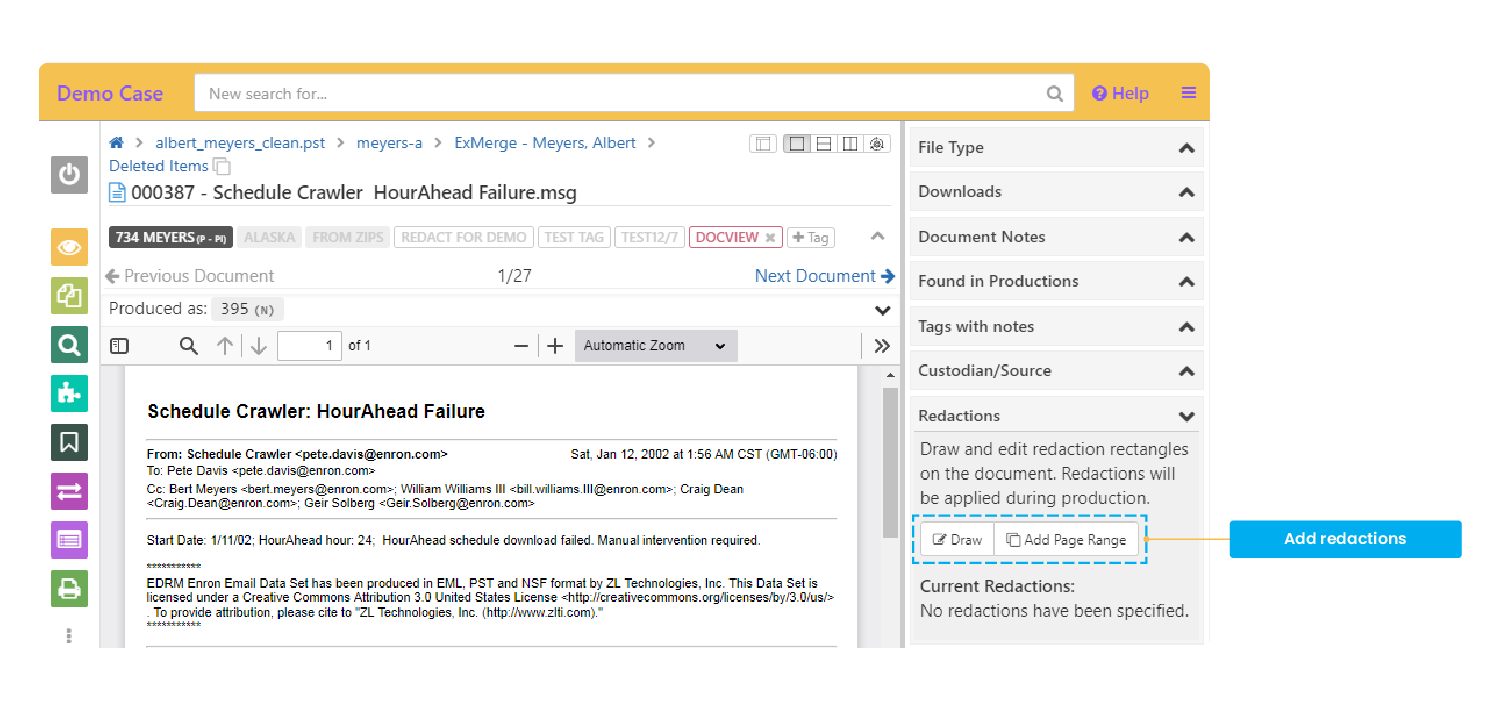
Other redaction controls:
- You can also redact page ranges using the ‘Add Page Range’ button
- Click on the ‘x’ mark in a redaction box to renmove the redaction
- All redactions in the current document are listed in the right panel. Click on the arrow against one to navigate to the redaction, or the trashcan icon against one to remove that redaction
You will continue to be able to see the redacted data in the ‘Docs’ view, but all covered information will be masked (and unsearchable) in any produced, non-native documents.