Adding, Removing, and Reviewing Tags
Tags are versatile and you will find yourself using them for many functions. They are primarily applied to files through the 'Apply tag' screen, which is accessed from a number of pages, including the 'Files' view, the 'Search' view, and the Docs view. Below is a breakdown of the 'Apply tag' screen, as well as how to access it.
NOTE: Tags can be created, edited, and deleted by accounts with the 'User' permission level and higher. Reviewer accounts can add and remove tags from files.
Tagging from the 'Files' view via the 'Apply tag' screen + applying multiple tags
Step 1. Navigate to the 'Files' view by clicking on the button in the left pane
Step 2. Check the boxes against the files and folders you wish to tag NOTE: All files within checked folders will be tagged
Step 3: Click on the 'Tag' button in the right action bar that appears
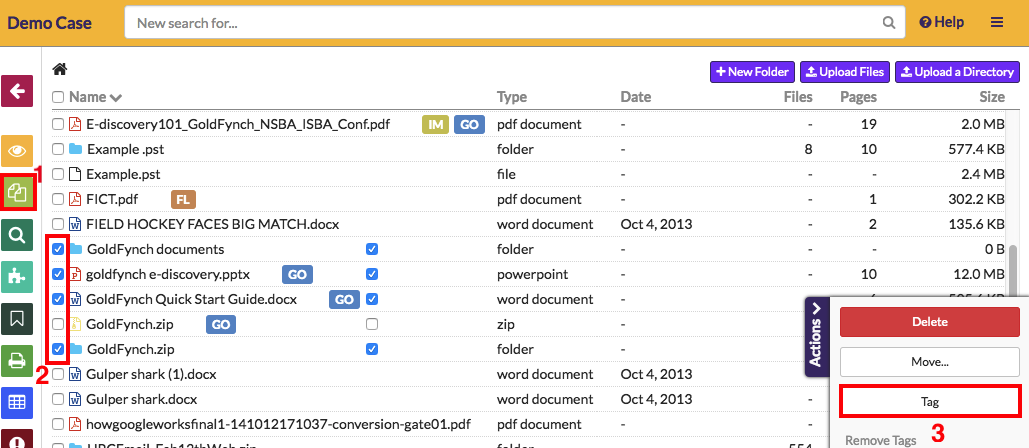
Step 4: Click on a tag to apply it to the document
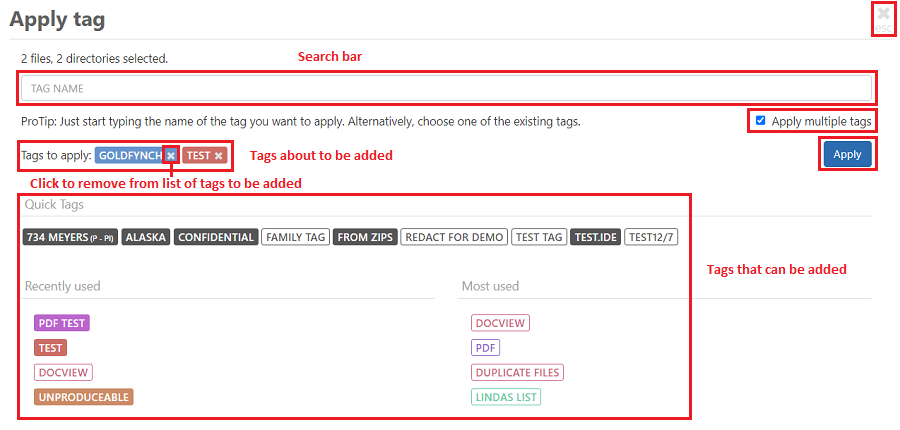
- These may be from the 'Quick Tags,' 'Recently used,' or 'Most used' tag lists
- Otherwise, type into the search bar to pull up a list of any tags that match the entered text, then click on one of the tag search results to assign it
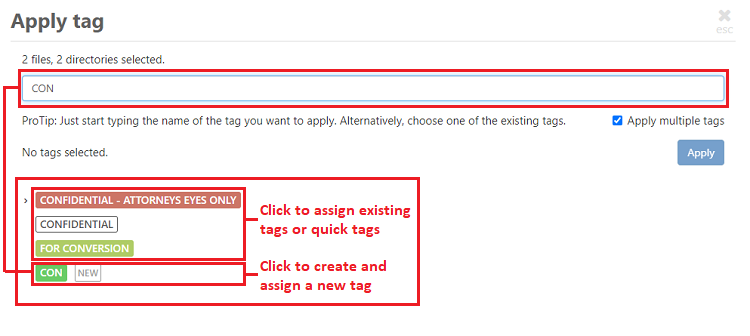
- If you would like to create a new tag, type out what you would like to name it in the search bar, then click on the tag with 'NEW' next to it in the tag list
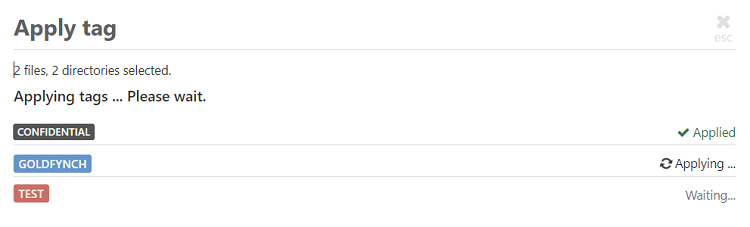
- You can return to the previous screen from the 'Apply tag' screen by clicking on the
Xbutton in the top-right corner or hitting the 'esc' key - There is a brief status screen displayed to track the progress of the tag assigning process. After this, the assigned tags view will close automatically.
Applying multiple tags
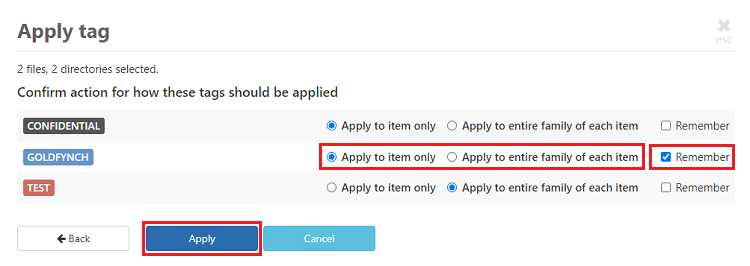
If you would like to apply more than one tag at a time, check the 'Apply multiple tags' checkbox on the 'Apply tag' screen. This will prevent the 'Apply tag' screen from closing after a tag is applied, and will instead list all of the tags that have been selected to be added. Click on the 'Apply' button to add all the remaining selected tags and return to the previous view.
Clicking on the x mark within the box of a selected tag to remove it from the selected tag list
Tip: While in the 'Files' view, tag names are abbreviated next to the names of the files they are attached to. You can expand the tag names by moving the mouse over the abbreviated tag
Applying tags to a file's family
When you apply a tag, GoldFynch will check whether you want to extend the tag to the file's family and will let you set your choice as the file's default behavior if you wish to. Find out more about tagging families of files here.
Tagging files in bulk
You can use the 'Files' view, as well as GoldFynch's search system to tag files in bulk. Find out how to in the first part of this solution.
Removing tags from the 'Files' view
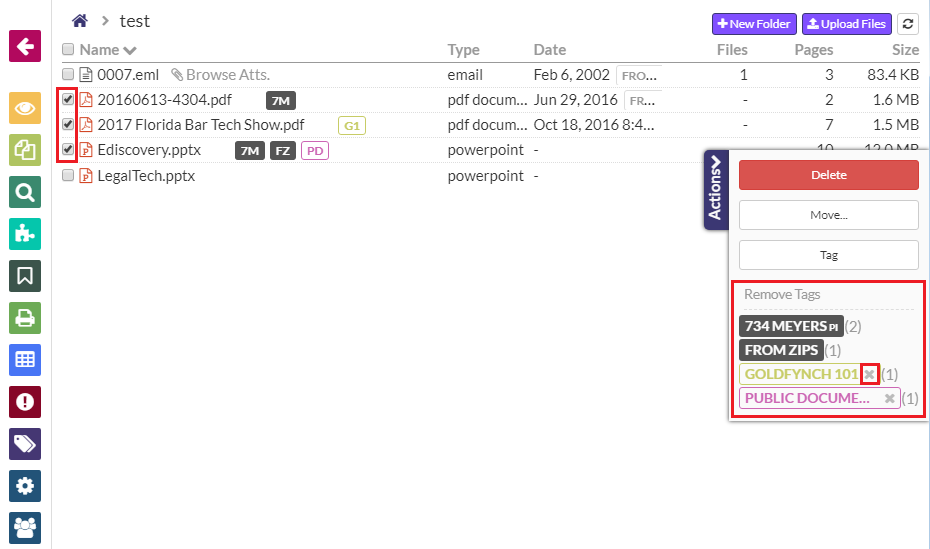
Step 1. Navigate to the 'Files' view by clicking on the button in the left pane
Step 2. Select one or more files from which you want to remove tags by checking the checkboxes next to their names
Step 3. Click on the x against the tags you wish to remove -- these are listed in the 'Remove Tags' section of the right action pane that appears (NOTE: the x mark doesn't appear against quick tags - for these tags, just click on the tag name itself)
Step 4. Click on the Yes button on the 'Confirm Bulk Tag Removal' prompt that appears
Adding and removing tags from the 'Docs' view
To tag an individual document that you are viewing in the 'Docs' view, follow these steps:
Step 1. Open a document in the 'Docs' view (by clicking on the document in the 'Files' view, clicking on a search result, etc.)
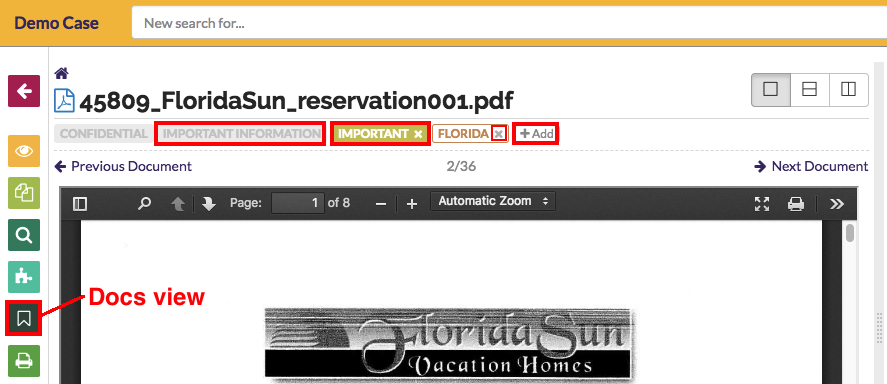
Step 2. Click on the +Add button at the top of the screen, just below the document's name
Step 3. Assign tags from the 'Apply tag' screen the same way you would do from the 'Applying tags to files from the 'Files' view' section above
NOTE: You can directly remove an attached tag by clicking on the 'x' next to each it from the 'Docs' view, as well as toggle a quick tag on or off by clicking on its name
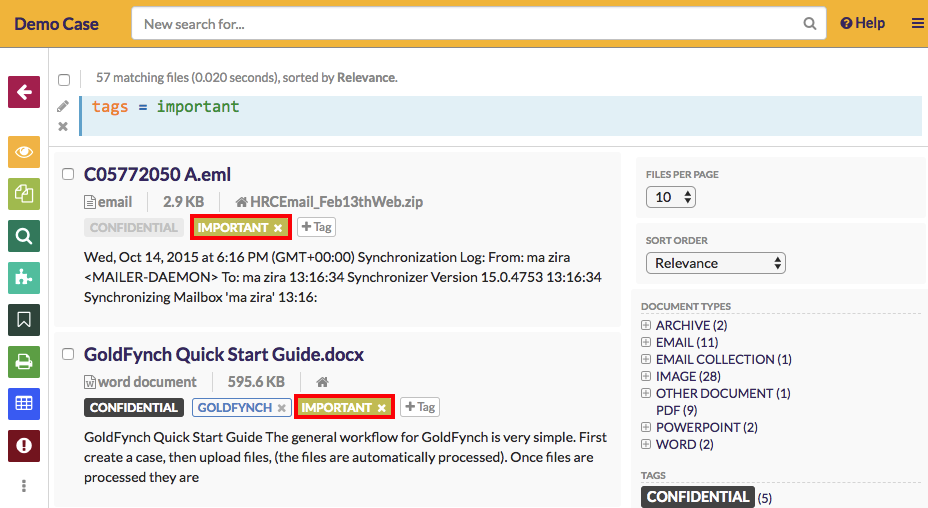
Adding tags from the 'Search' view
1. After performing a search, click on the +Tag button against one of the search results
2. Tag the file as you would from the 'Apply tag' screen
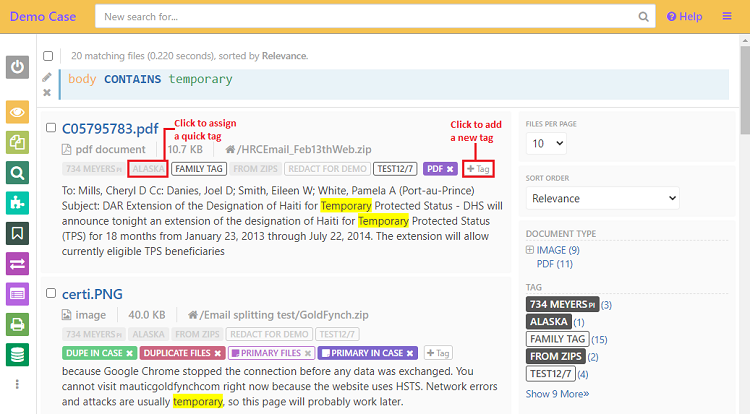
Click on a quick tag to directly assign/remove it to results of searches (in the 'Search' view.)
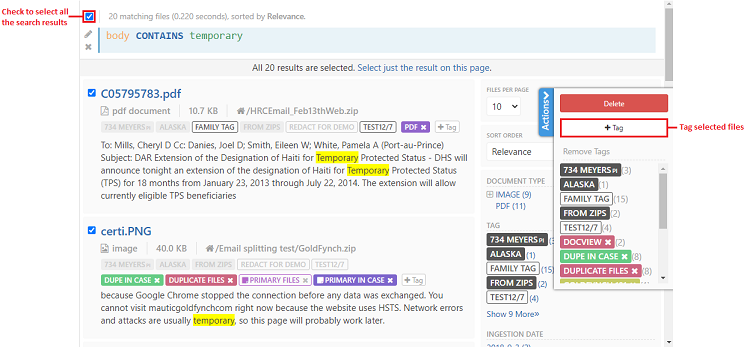
To tag search results in bulk:
1. Check the checkbox next to the search query to select all the search results
2. Tag the files as you would from the 'Apply Tag' screen
Viewing tagged files
Step 1. Navigate to the 'Tags' view by clicking on the button in the left pane
Step 2. Click on the name of a tag. This will display all the files it has been attached to in the 'Search' view
Creating and Maintaining Tags
When you create a new Goldfynch case some default tags that are set up, they are Privileged, Non-Responsive, Irrelevant, Important and Confidential. All other tags you wish to create can be done through the Tag View Screen. Maintenance of tags and tag preferences can also be done from the Tag View screen.
Click here to learn how to create and maintain tags
Quick Tags
GoldFynch cases also start with a set of automatically-generated tags known as 'quick tags' that are highlighted for frequent use (e.g. the 'confidential' tag.) They are always visible and accessible on screens that let you add tags, and you can tell them by their grey color.
You can also easily convert tags to quick tags and vice versa to make sure you have relevant ones accessible on your interface (e.g. you can create an "ACP" or “Attorney-Client Privilege” tag and change it to a quick tag.)
Learn how to create and assign quick tags
Privilege Tags
GoldFynch gives you the ability to set tags as privileged. Setting tags as privileged gives you the flexibility to retrieve and perform various actions such as searches, reports, etc., on these files in bulk. The privilege tag also helps you to invert files in bulk from your productions and can be used to generate privilege logs.
Find out more about creating privilege tags
Hidden Tags
Goldfynch lets you create hidden tags. A hidden tag behaves just like a normal tag, except that it is not shown as attached to files in the document viewer, the files view, or the search results page.
Tagging file families
When tagging files in GoldFynch you can choose to either tag an individual file, or tag the file along with its entire family. A file 'family' is a group of associated files, like how an email (a 'parent' file) would be associated with its attachments--its 'children'. So if you tag an email and its family as 'confidential,' its attachments would get tagged as well. GoldFynch also lets you set each tag's default behavior for tagging file families.
Learn how to tag files of families, and set the default family tagging behavior of tags
Tag application notes
When you tag a file (or files) GoldFynch gives you the option of attaching 'notes' to the tag(s). This allows you to provide context for why you attached that tag to a file, but can also be used to convey any other information you feel is relevant.
When a file's tag has a note attached to it, it has an icon next to the tag's name. If you hover the mouse cursor over such a tag, the note's contents will be displayed.
Learn more about tag application notes
Tags in productions
Tags are integral to the production feature of GoldFynch. When you are creating a production, you select tags, and all files assigned to these tags are shortlisted to be included in the production. Tags can also be used to exclude files from productions using the 'invert' function.
Learn more about the production process here, how tags are used in it, and how 'inverted' tags work