


Step 3: Navigate, Search, and View Files
Navigate through files just like the files and folders on your computer. Searching is as simple as Google: just type in a word, then hit search. And the Document Viewer gives you a host of useful information and tools.
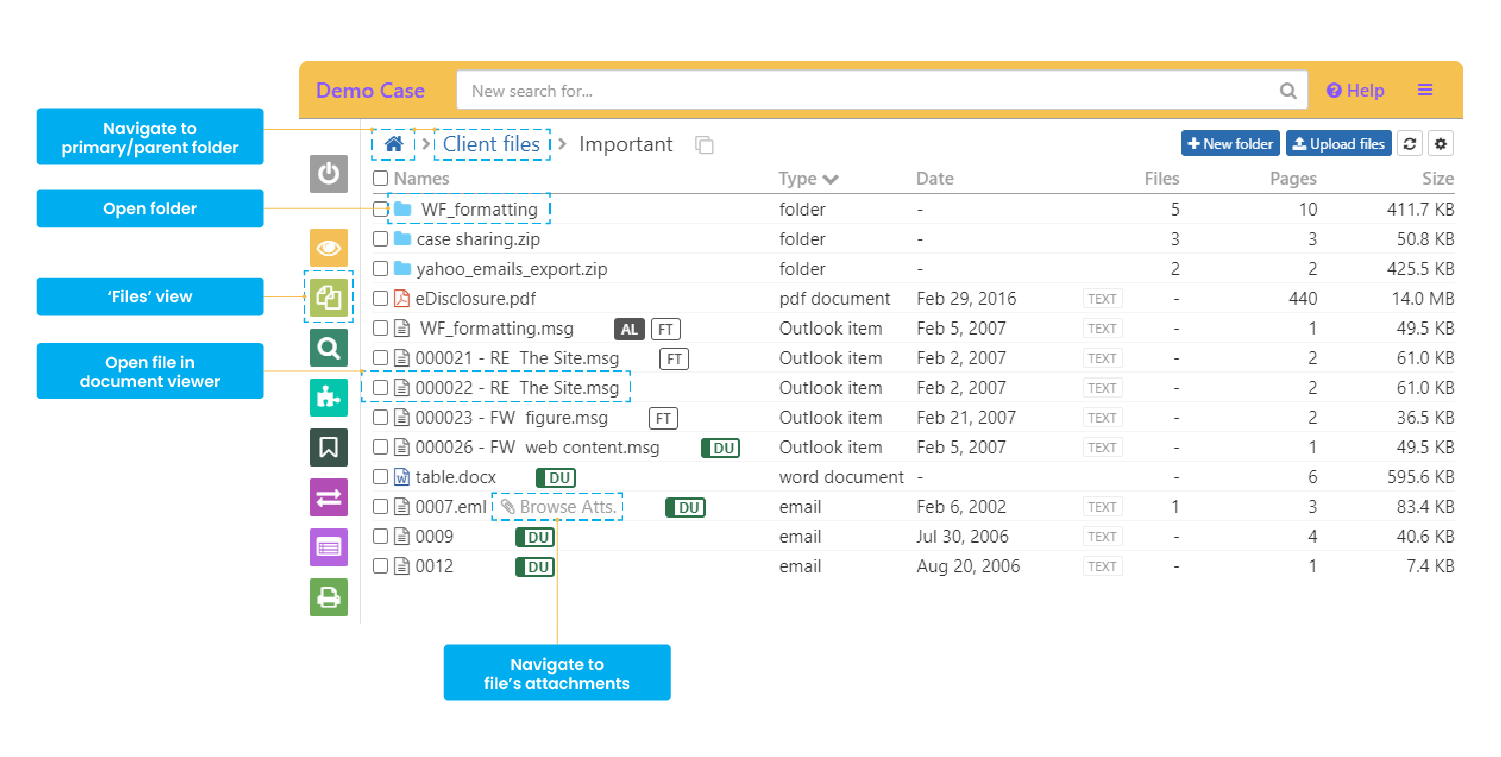
The ‘Files’ view functions similarly to your computer:
- Click on a file’s name to open it in the File Viewer (aka ‘Docs’ view)
- Click on folders to navigate into them and see the files inside
- Click on the home button or a parent folder’s name to navigate out of the current folder
- Click on ‘Browse Atts.’ to navigate to a file’s attachments
Click here to learn more about navigating through files in your case.
Searching in GoldFynch
GoldFynch’s search engine is versatile and can run a number of different search commands.
To run a Basic Quick search, type a word into the search bar and hit the return key - just like you would with Google - to get results of all instances of the word in your case.
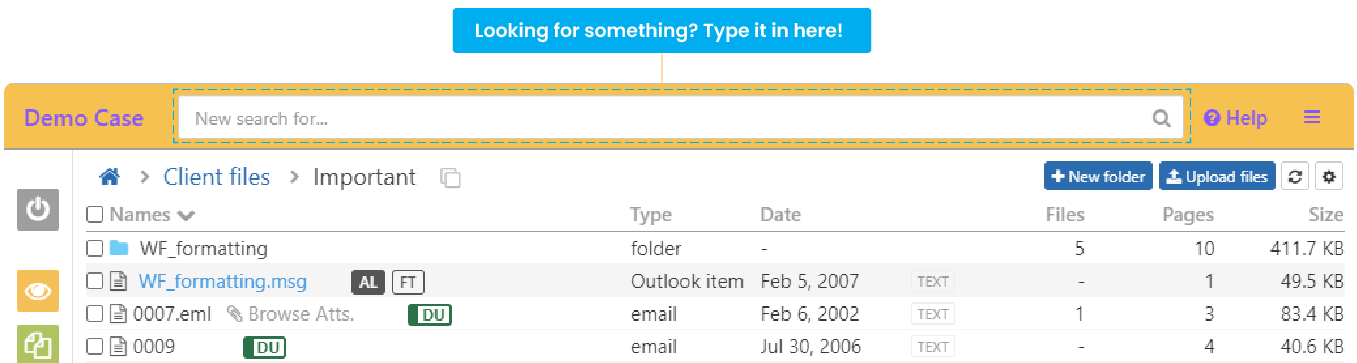
The search bar is accessible from all pages of the GoldFynch app.
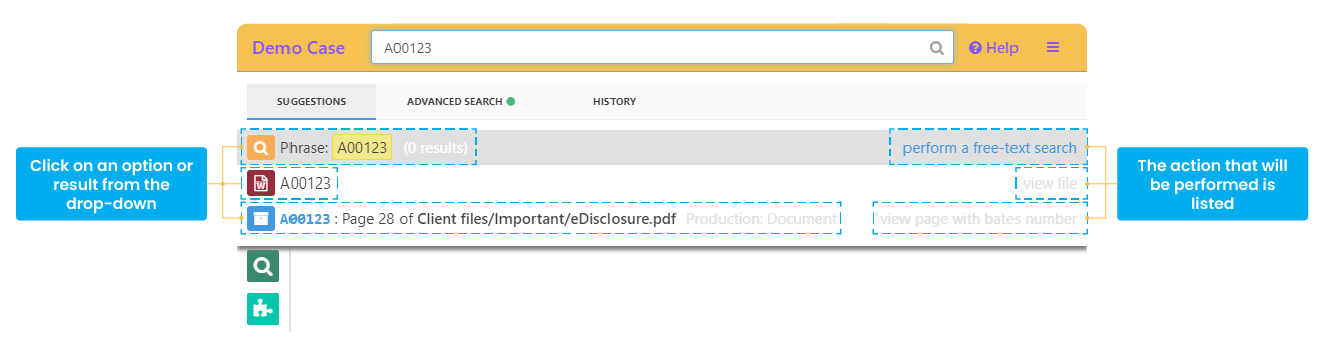
Alternatively, to perform a Special Quick Search to look for information of a specific type, type in one of the following, then click on the option from the drop-down list:
- a phrase (in quotes)
- a date
- an email address (prefixed with an email parameter like “to:” “from:” “cc:",etc.)
- a file type
- a file name
- a Bates number (of a page of production created in GoldFynch)
For example:
- “preventive measures taken” - finds the exact phrase
- to:support@goldfynch.com - finds all emails sent to the address
- pdf - displays all pdf files in your case
- 2017 - looks for all documents dated 2017
- WF_formatting - finds all file families with ‘WF_formatting’ in the name
- A00123 - will pull up all pages assigned that Bates number in existing GoldFynch productions
Run an Advanced Search (see our eDiscovery 101 article on Advanced Searches) to search for a wider variety of parameters (e.g. tags assigned, number of pages, etc.) and group search queries together, finding results that satisfy the combined query as a whole.
For example, you can construct a query to search for all emails with the tag ‘confidential’ that have ‘security’ in their subject line sent after 10th Jan 2014.
Regardless of the type of search, results are displayed in the ‘Search’ view:
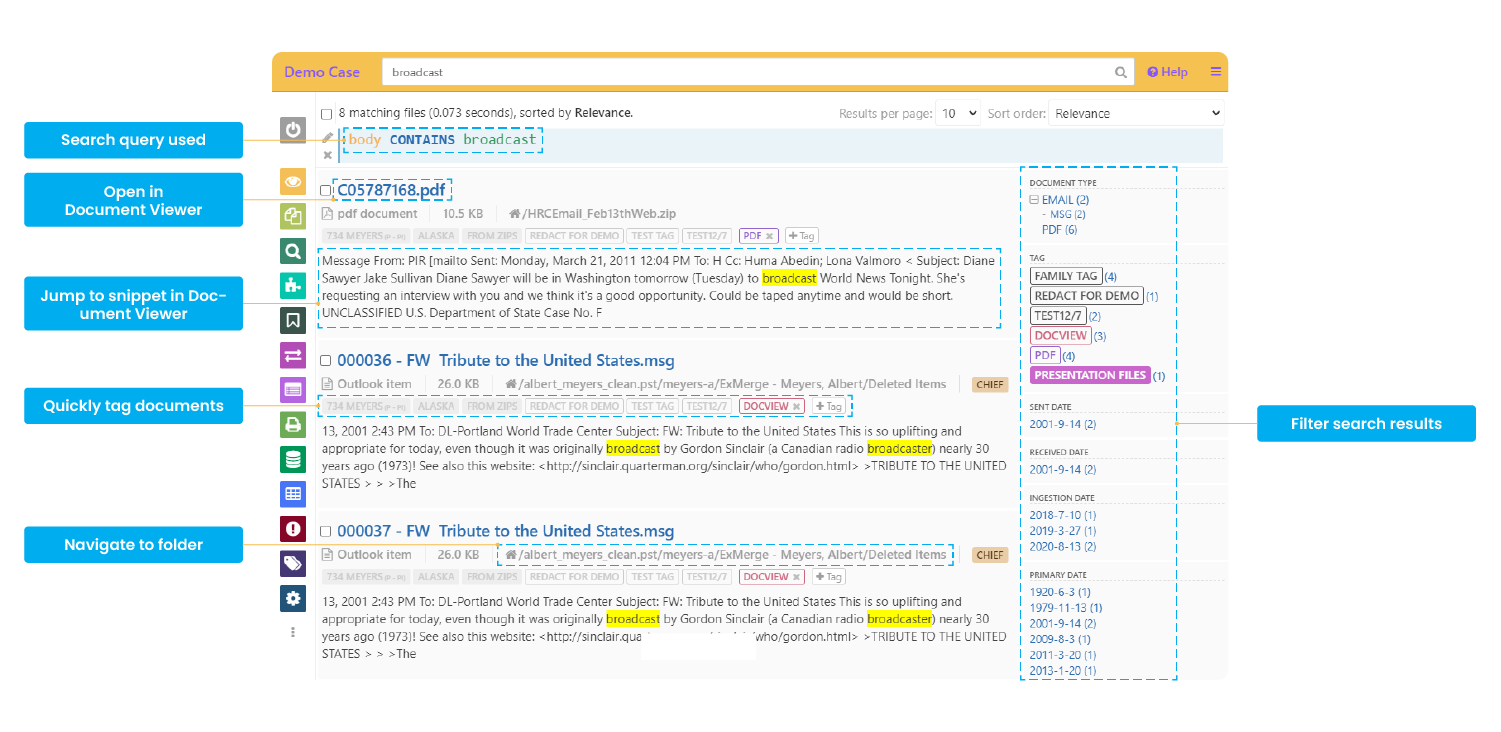
- Click on a file’s name or an excerpt to open it in the ‘Docs’ view
- Click on its file path (just below its name) to navigate to its folder in the ‘Files’ view
- Tag documents quickly using the tag bar
- Sort results using the dropdown menu in the right panel
- Filter results by date, tags and file type from the right panel
- Switch between the ‘classic’ style of filters (in the image above) and the ‘new’ style
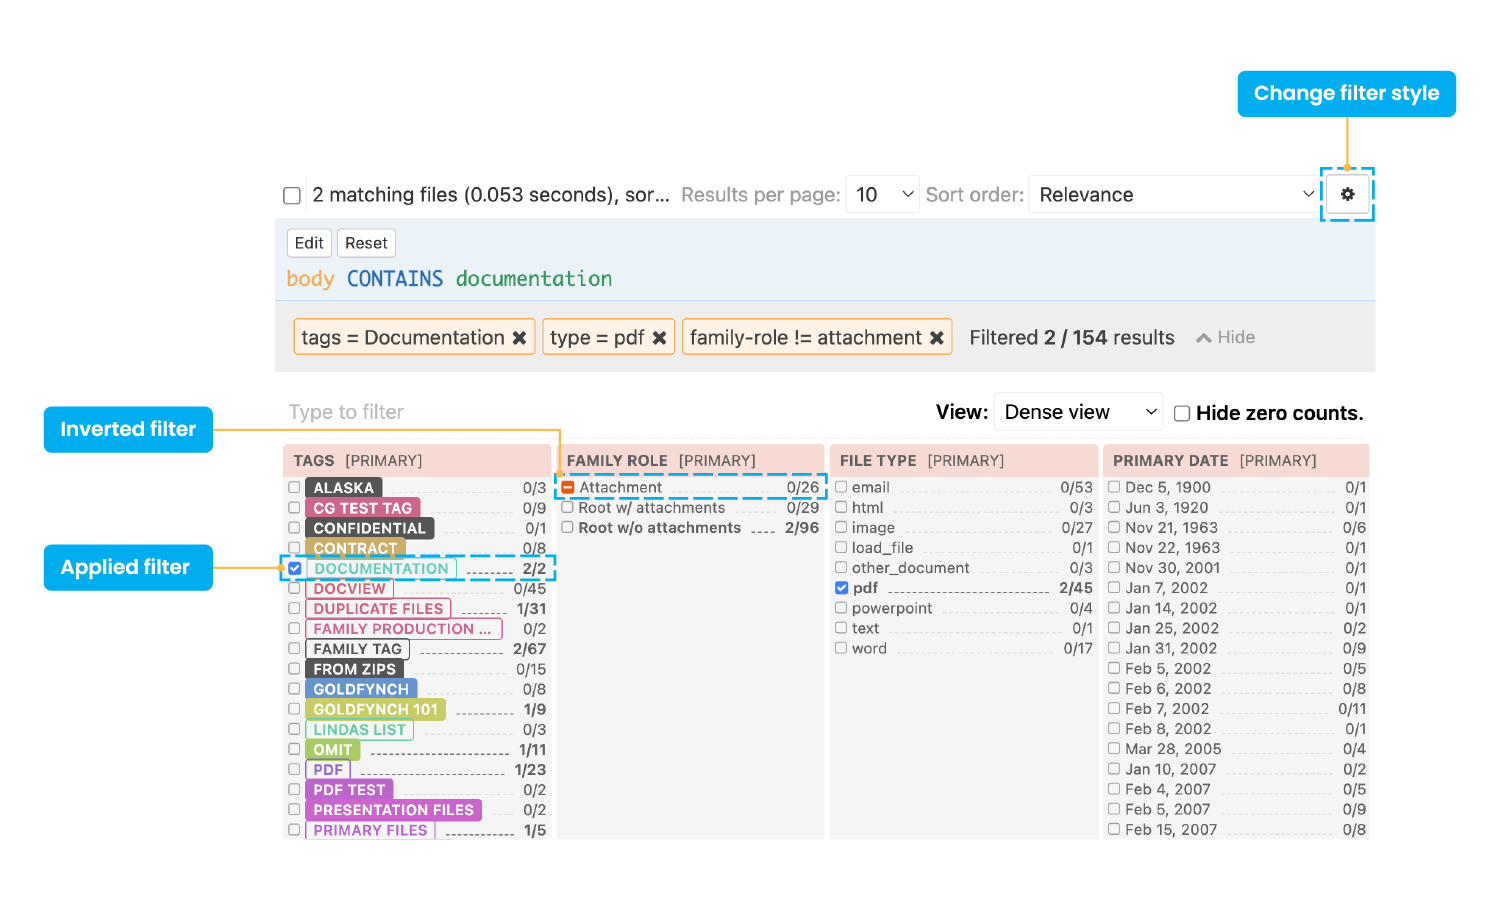
With the new style of filters:
- Check a filter’s checkbox to apply the filter
- Click on a checked filter’s checkbox to show a red “-” sign to “inverse” a filter, omitting all files that satisfy that filter from the listed search results
- Click on an inverted filter to remove an inverse/inverted filter
Click here for a detailed look into viewing search results.
Viewing files in ‘Docs’ view
There are many features that the Document Viewer provides:
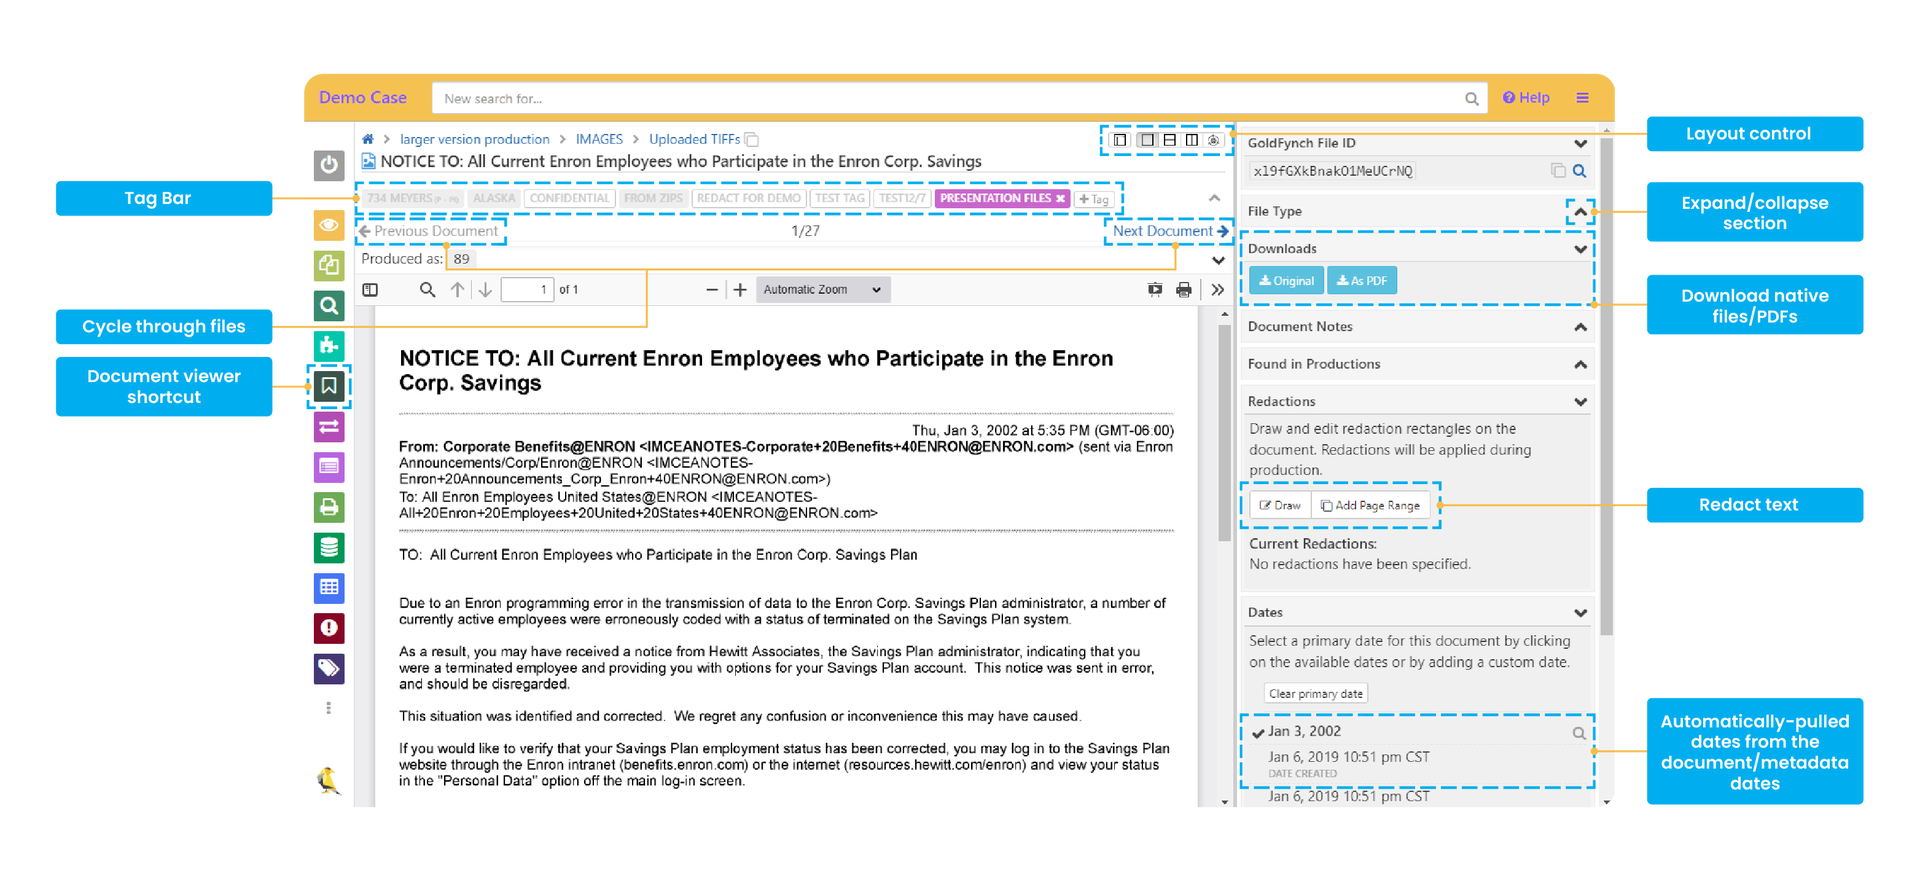
Add and remove tags
You can quickly add or remove tags and quick tags from the tag bar just below a file’s name.

Find out more about tagging files here.
Navigation Context, Attachment Contexts and Review Sets
-
Navigation Contexts displays a list of files related to the current file based on how you got to the current file - e.g. if it was from a search, you’ll see all other search results. If you open a file from the ‘Files’ view it will display all files in that folder
-
Attachment Contexts show relevant metadata about a file (when present), and other files that are part of the same ‘file family’ (i.e. emails and their attachments, zip files and the files they contain, etc.)
-
Review Sets can be created from Saved Searches or Tags to simplify batch review. Use the ‘Review-sets’ view to create and manage them (learn more here). In the ‘Document Viewer’, select review sets from the drop-down in the top-left corner of the screen to perform the batch review
Layout Control
The layout control of different sections of the Document Viewer can be controlled using the layout controls in the top-right corner
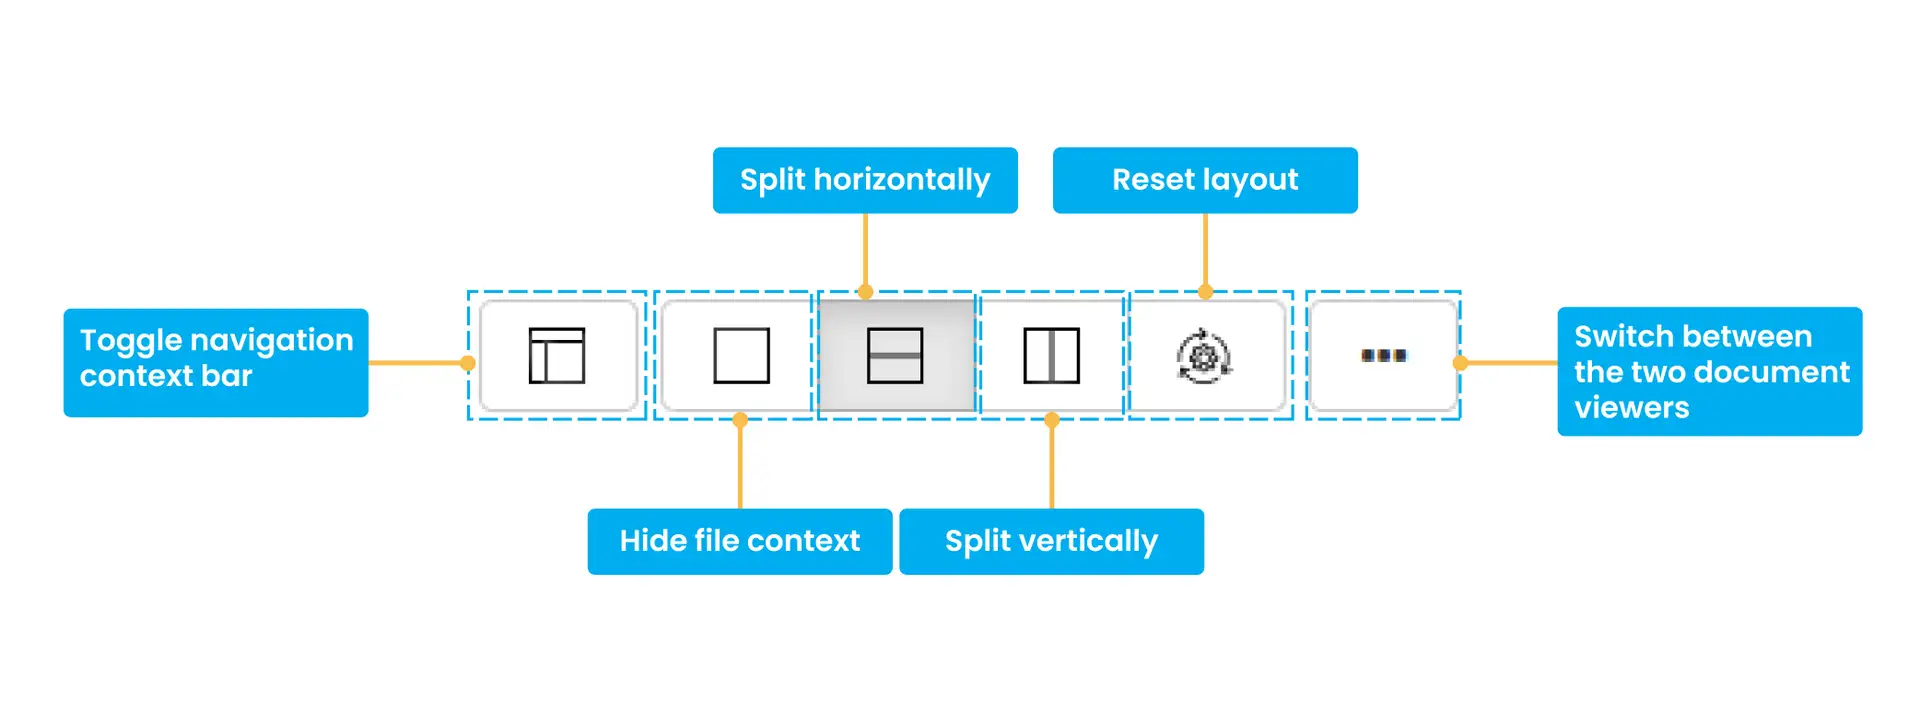
- Click on the “Reset Layout” button to set the default layout with the Attachment context panel displayed above the document and Navigation context to the left
- Click on the Navigation context bar toggle to display or hide it
- Click on the “Split horizontally” button to display the Attachment context panel above the document if it is not already visible
- Click on the “Split vertically” button to display the Attachment context panel to the left of the document
- Click on the Hide file context button to hide the file context
- Click on the three dots to swap between the newer and older versions of the Document viewer’s toolbar (a new version has recently been added with similar functionality)
The right panel
View the GoldFynch File ID
The unique ID assigned by GoldFynch to each file in your case is displayed in the “GoldFynch File ID” section. Use this to track an individual file as it appears across multiple productions and reviews in your case, and to tell it apart from duplicates in the case.

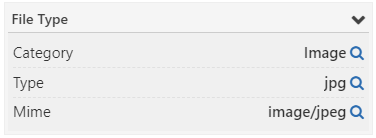
View File Type / Category
The “File Type” section of the right panel displays the category, file type, MIME type, and message class (if applicable) of the open document. You can also search for files with the same type or category or message class by clicking on the search icon against each option.
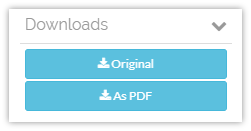
Download Files
Click on the ‘Original’ button under the ‘Downloads’ section in the right panel to download the native version of a file, or the ‘PDF’ button to download a PDF version.
Learn more about ‘native’ file formats here.
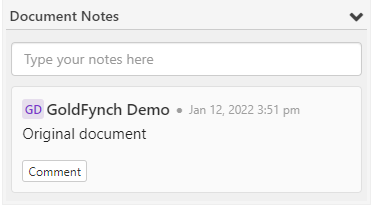
Add and view document notes
Use this to make notes about a document. You can also comment on the notes made by other users with whom the case has been shared.
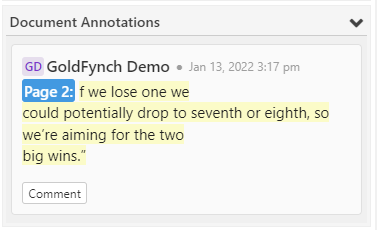
Make and view document annotations
Select a portion of the text in a document then click on the highlighter icon to create an annotation. Use these to highlight important portions in the document in the document that everyone in the case can see. These are listed in the right panel (the section is only visible if annotations are present in the document)
See productions that the file is included in
The productions the file is part of are listed under the ‘Found in Productions’ section of the right panel.
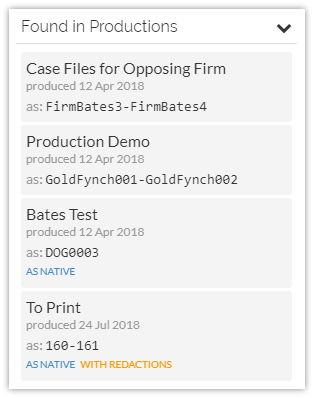
Note: it is possible for a file to be included in the same production many times, in both their native and non-native formats.
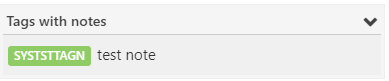
View notes attached to tags
If any tags have notes attached to them, they are listed here. This section is visible only when there are tags with notes attached to the document.
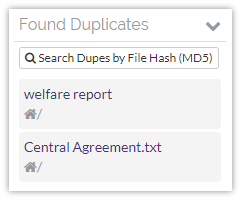
Find duplicates of the file
The ‘Found Duplicates’ section of the right panel lists (identical) duplicates of a file - even if their metadata, like names, are different - in your GoldFynch case. It also allows you to search for files by their MD5 Hash values.
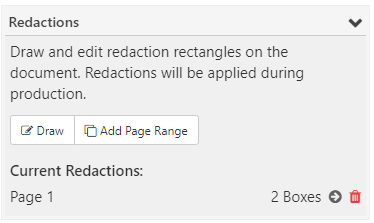
Redact content
- Use the controls here to draw the redaction boxes over portions of the document and redact page ranges
- Content under redaction boxes will remain visible, and the redactions are only applied to produced documents during the production process
- You can jump to and delete existing redactions using the buttons against the listed page numbers
Learn more about redaction in the next section
View dates (including Ingestion Dates) in documents and set a document’s Primary Date
Primary Dates serve as a single reference date-time for a file in GoldFynch. In the ‘Docs’ view, the Primary Date is the one with a check mark next to it in the ‘Dates’ section of the right panel. Dates from a document are extracted and listed in the ‘Dates’ section
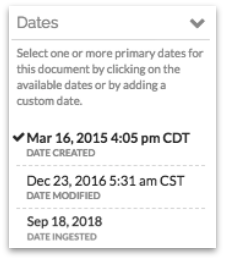
To assign a Primary Date, click on a date listed under the ‘Dates’ section, or enter a custom date into the box. Learn more about Primary Dates and Ingestion Dates here.
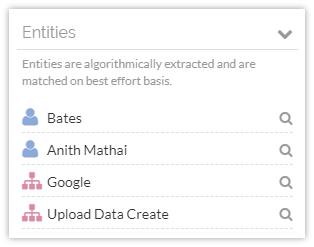
View extracted entities
Names, terms and other keywords are automatically extracted from documents and listed under the ‘Entities’ section of the right panel.