Review Macros
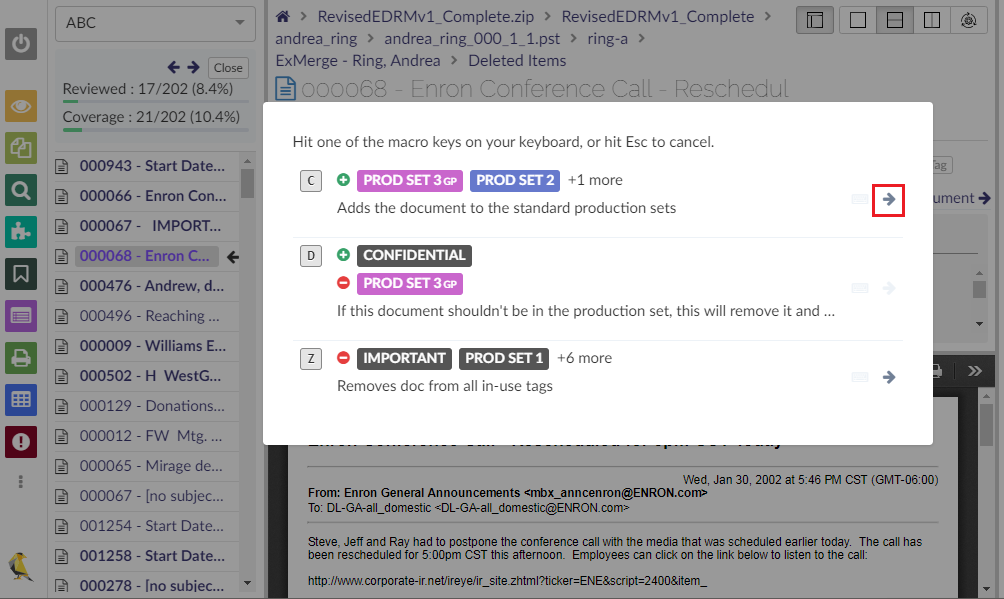
GoldFynch lets you set up "macros" - shortcuts to help you and your collaborators quickly assign and unassign tags to documents as you view them in the Document Viewer. Using a macro is very simple, first, hit the trigger command .. (which is two periods hit in quick succession). You will then see a list of existing macros. Just press one of the keys assigned as a shortcut and its action will be carried out.
Note: Review macros can only be created users who have Admin/Owner privileges. A review macro can be used by anyone the case has been shared with.
Creating a macro
Creating a macro for tags without notes
Step 1. Navigate to the Settings view by clicking the button in the left pane.
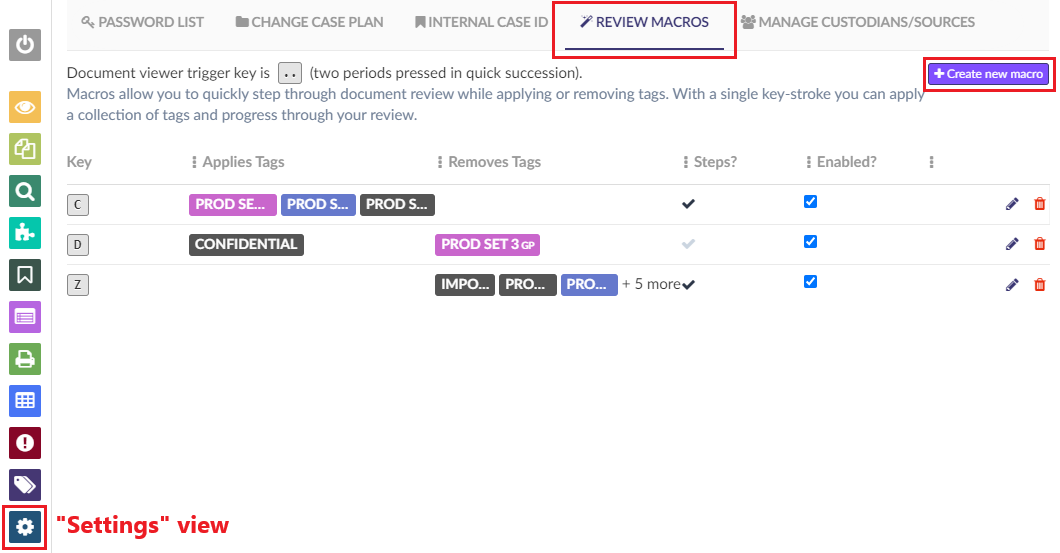
Step 2. Click on the Review Macros tab.
Step 3. Click on the Create New Macro button.
Step 4. Click on the edit icon(pencil).
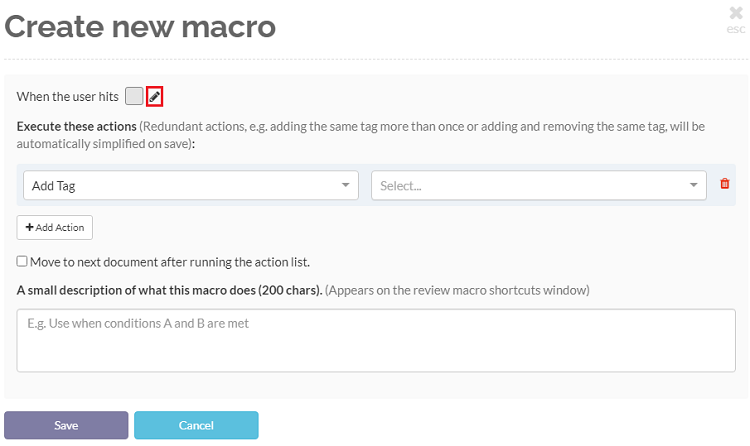
Step 5. Enter a letter from A-Z. This will be the key that will be used to execute the macro from the document viewer.
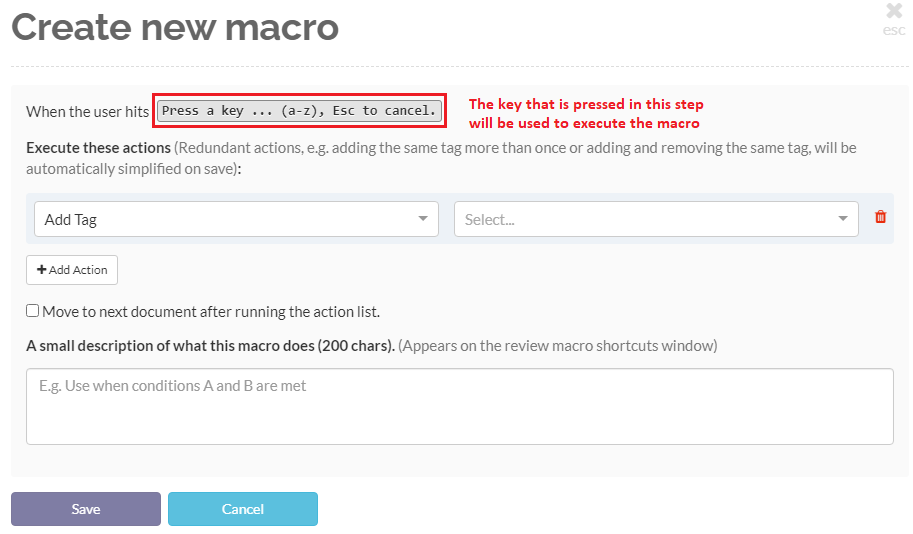
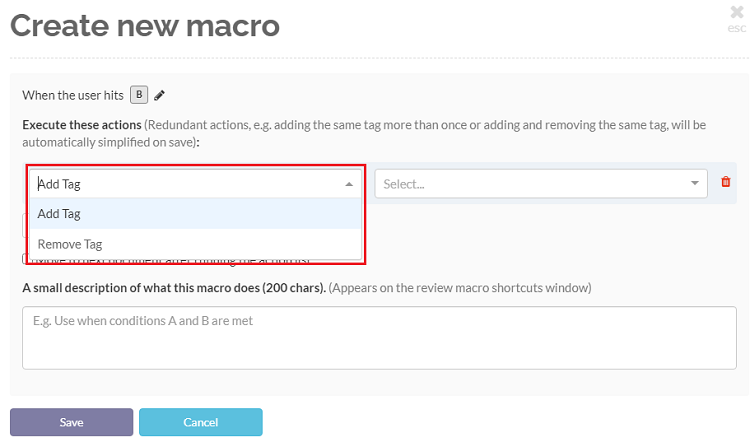
Step 6. Select either Add Tag or Remove Tag from the action dropdown list.
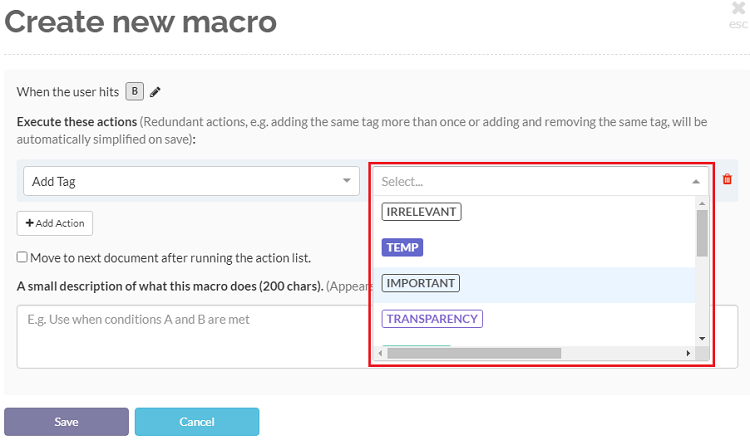
Step 7. Choose a tag.
Step 8. (Optional) Click the +Add Action button to add another step. Repeat steps 5 and 6 for each action you add to the macro.
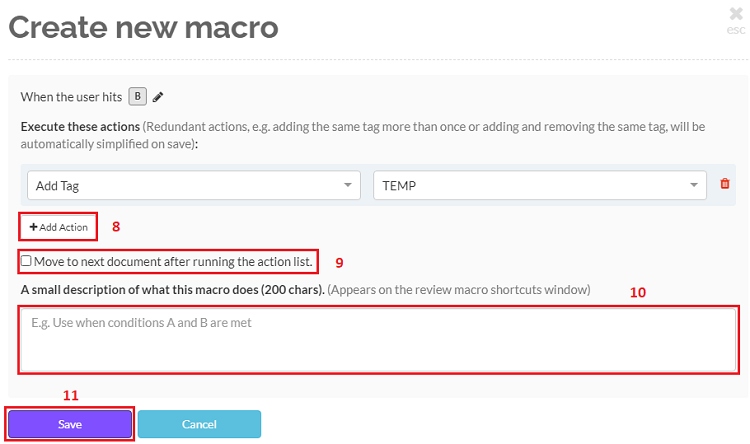
Step 9. (Optional) Check the Move to next document after running the action list checkbox to automatically move to the next document when the macro is executed.
Step 10. Enter a description for the macro in the textbox that is provided. This description will help reviewers understand what the macro is intended for.
Step 11. Click on the Save button.
Creating a macro for tags with notes
If you would like to create a macro that adds a tag that collects notes, you will need to choose the behavior that the macro should follow when it is executed.
The options available are:
-
Completely skip applying a note
-
Prompt users for a note
-
Prompt users for a note but have the text box filled with a pre-written message
-
Automatically assign a note without a prompt
In the example given below, we will be creating a macro that will prompt the user to enter a note with a pre-written message.
Step 1. Navigate to the Review Macros tab of the Settings view.
Step 2. Click on Create a new macro.
Step 3. Click on the edit icon(pencil) and enter a letter from A-Z.
Step 4. Select either Add Tag from the action dropdown list.
Step 5. Choose a tag that collects notes.
Step 6. Select the option Prompt for note with pre-filled text.
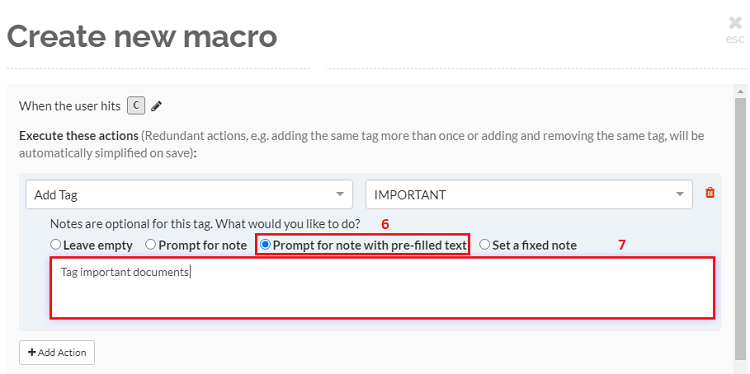
Step 7. Enter a note in the text box.
Step 8. (Optional) Check the Move to next document after running the action list checkbox.
Step 9. Enter a description for the macro.
Step 10. Click on the Save button.
Note:
-
If the tag is set to require a note then the option of skipping the application of the note will not be available.
-
In the case of privilege tags, the behavior will be assigned as per the settings of the tag in the 'Tag' view.
-
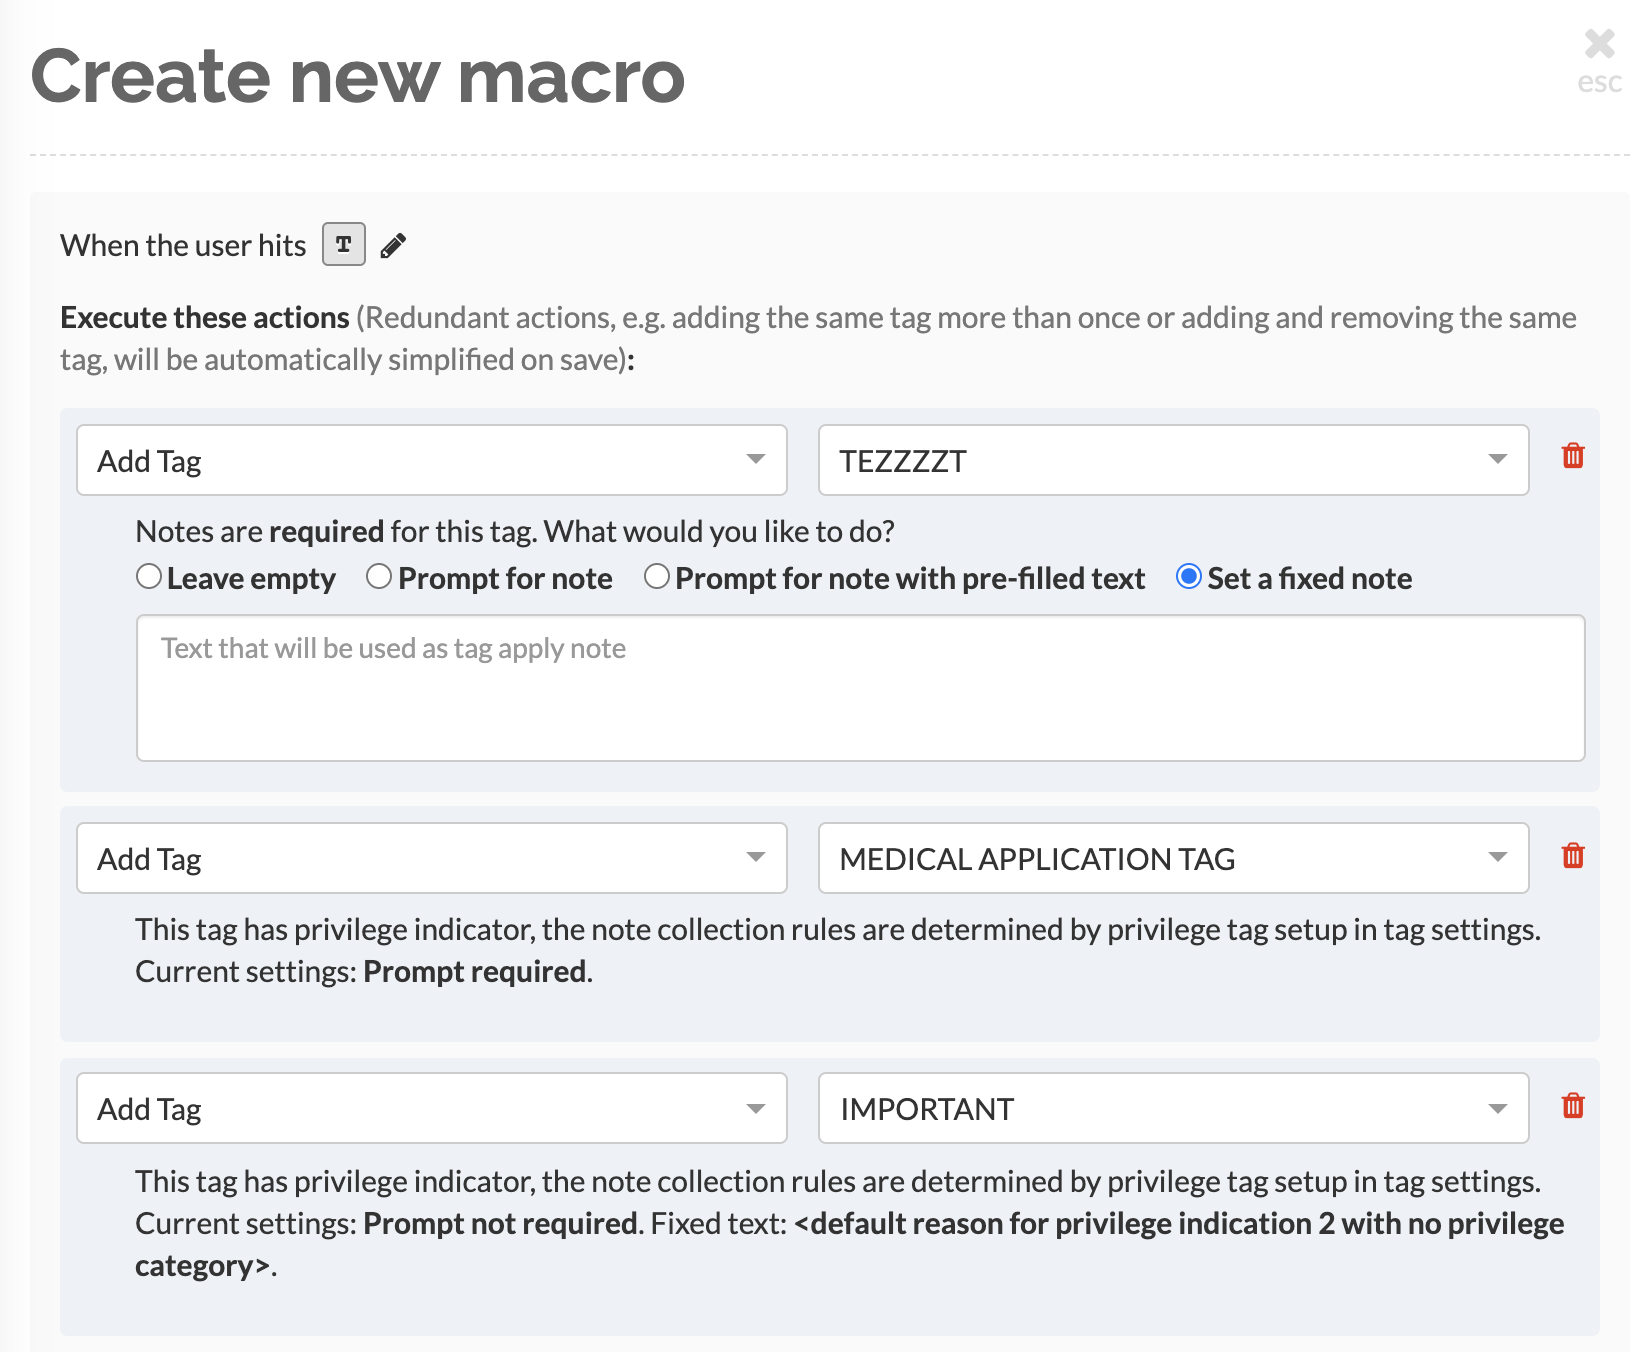
In the snapshot shown below you can see three different tags with different settings for collecting notes:
-
The first tag requires a tag but it is not a privilege tag.
-
The second tag is a privilege tag and has a prompt required setting.
-
The third tag is a privilege tag and no prompt is required as this tag has a fixed text that will be added to the document.
-
Maintaining Macros
Once a macro has been created you can edit, delete, or even disable it.
Editing a macro
Step 1. Navigate to the Review Macros tab of the Settings view.
Step 2. Click on the edit icon(pencil).

Step 3. Remove an action from the macro by clicking on the trashcan icon.

Step 4. Click on the Save button.
Note: While editing a macro you can do any of the following actions:
-
Add an action
-
Delete an action
-
Change the tags
-
Edit the note
Deleting a macro
Step 1. Navigate to the Review Macros tab of the Settings view.
Step 2. Click on the trashcan icon.
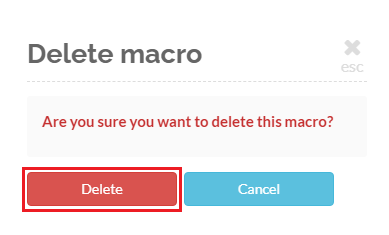
Step 3. Click on the Delete button in the Delete macro confirmation overlay.
Enabling/Disabling a macro
Step 1. Navigate to the Review Macros tab of the Settings view.
Step 2. To disable a macro uncheck the checkbox under the Enabling field.
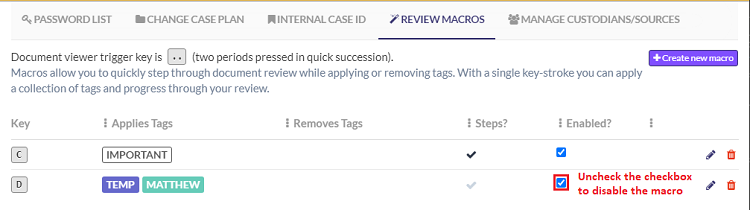
Note: A disabled macro can be enabled at a later date if required by checking the checkbox under the Enabling field.
Using Macros
Macros can be used when viewing a document in the Document Viewer to either assign or remove tags.
Step 1. Navigate to the document you wish to review in the document viewer.
Step 2. Hit the 'trigger command' .. (two periods pressed in quick succession).
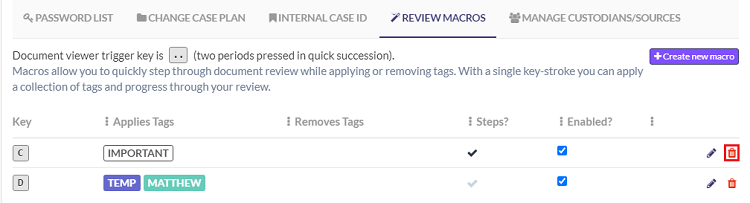
Step 3. Hit the key that a macro is set to, this will immediately perform the tagging actions. In the image below, "C", "D" and "Z" trigger three different macros. Furthermore:
- If the macro applies tags that collect notes, then the keyboard icon will be visible against it.

- If the macro is set to automatically move to the next document, then an arrow will be visible against it.