De-Duplication
GoldFynch's de-duplication function helps identify whether there are multiple copies of the same file present in a case, and lets you flag such files with a special "DUPE" tag.
You can use different Strategies (modes) to compare the files, and you can also select the Scope of the comparison to either your entire case or specific folders. Once the selections are made, an initial evaluation is executed and detailed statistics are displayed based on your Strategy and Scope.
The system then lets you run the de-dupe process to add the special "DUPE" system tag to all duplicate files.
De-Duplication Scope
When a de-duplication operation is run, all duplicate documents are collected into groups and within these groups, one or more will be designated as a primary candidate and all the others will be duplicates.
The de-duplication process can be run on a specific group of files as shown below;
-
Whole Case - All the duplicates in the case will be found
-
Whole Case vs. Folder - Compares all files in a single folder against the entire case to see if any of the files can be found. The "folder" files will be marked as duplicates
-
Folder A vs. Folder B - Compares all the files in one folder (also called Target) against all the files in another folder (also called Source)
Transfer of tags
If any of the dupe files have tags, the system will attempt to transfer the tags from the dupe items to the primary along with any attached tag notes. If the primary item already has those tags, just the note will be appended/transferred. If multiple dupes have the same tag with different notes, all the notes will be appended and applied to the primary item.
De-Duplication Strategy
The method used to compare the files and identify the duplicates is known as the de-duplication strategy. The different strategies available on GoldFych are:
-
Hash-based Strategy - Compares the item hashes directly and can be used for all types of files. Learn more about MD5 hash values here.
-
Message-ID based Strategies - These strategies are primarily used to compare eml/msg files and looks are Email-IDs/Message-IDs to find duplicates. If an item does not have a Message-ID it will be ignored. The Message-ID based options listed below compare the following parameters and require them to be the same to be flagged as duplicates.
- Message-ID alone
- Message-ID and Email/Message Subject
- Message-ID, Email/Message Subject, and Time of the Email/Message
Running De-Duplication
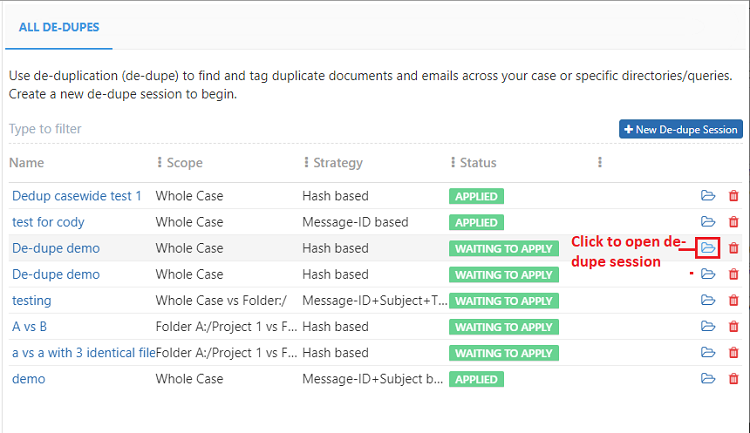
Step 1. Navigate to the De-Dupe view by click on the button in the left pane
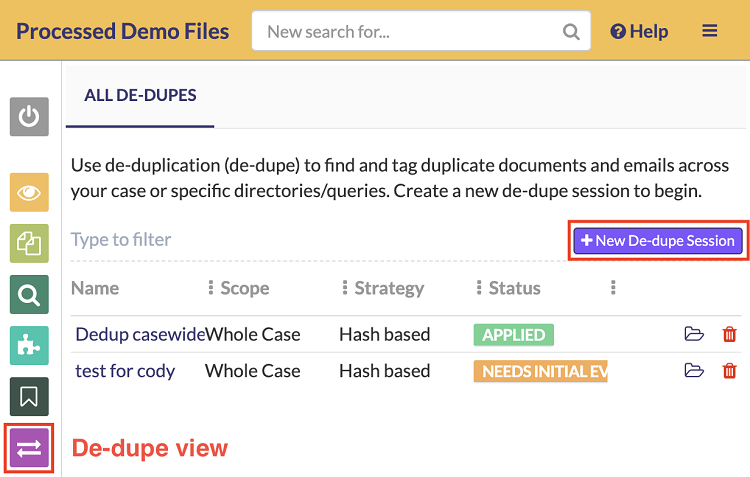
Step 2. Click on the +New De-dupe Session button
Step 3. Enter a name for the de-dupe
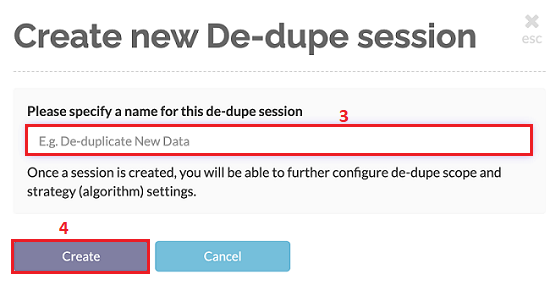
Step 4. Click on the Create button
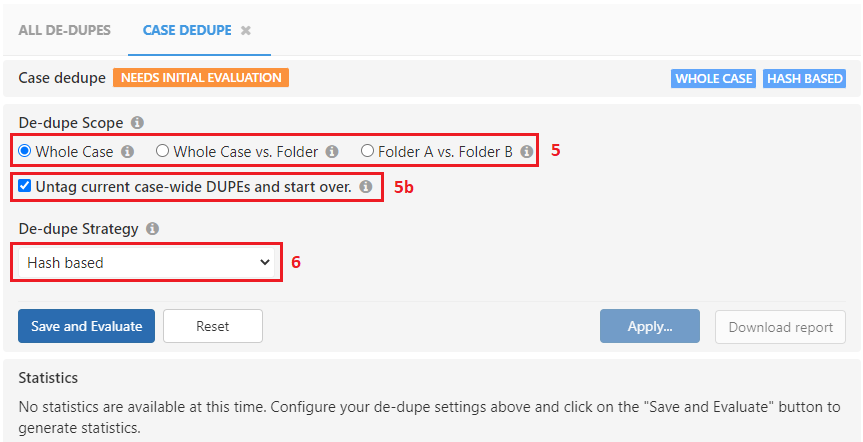
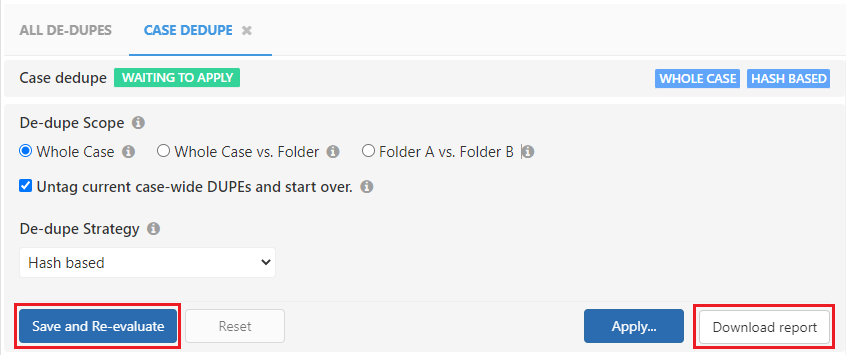
Step 5. Select the De-Dupe Scope
Note:
- If you select the
Whole Caseoption, it is recommended you check the "Untag current case-wide DUPEs and start over" checkbox (5b.) to provide an accurate evaluation based on current dupes present in the case - In case you have selected either the
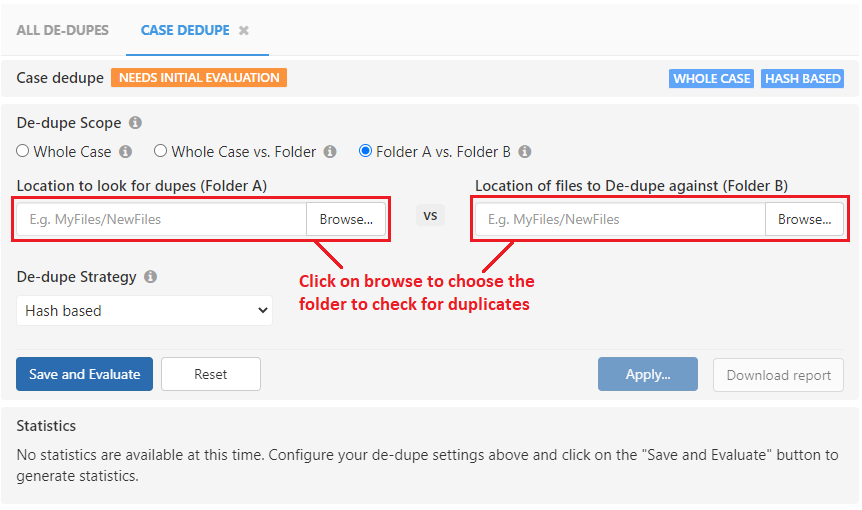
Whole Case vs. Folder Aor theFolder A vs. Folder Boptions, you will be prompted to select the folders you wish to compare. To do so, click on the correspondingBrowsebutton and select the folder to be used for the de-dupe process.
Step 6. Select the De-Dupe Strategy from the drop-down list
Step 7. Click on the Save and Evaluate button. Once the evaluation process is completed a report of the specified datasets along with information about the duplicates present in them will be displayed.
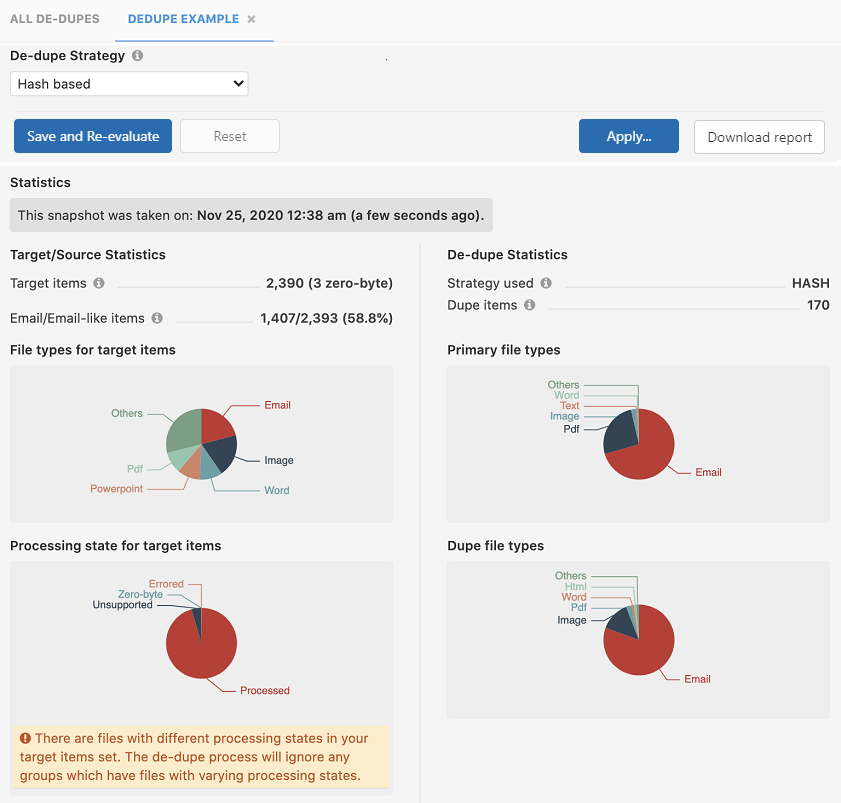
Note:
- If no duplicates are found you will not be able to proceed further
- You can download the duplicate file report by click on the the
Download Reportbutton - You can also save a de-dupe session and come back to it at a later time to apply it by clicking on the folder icon.
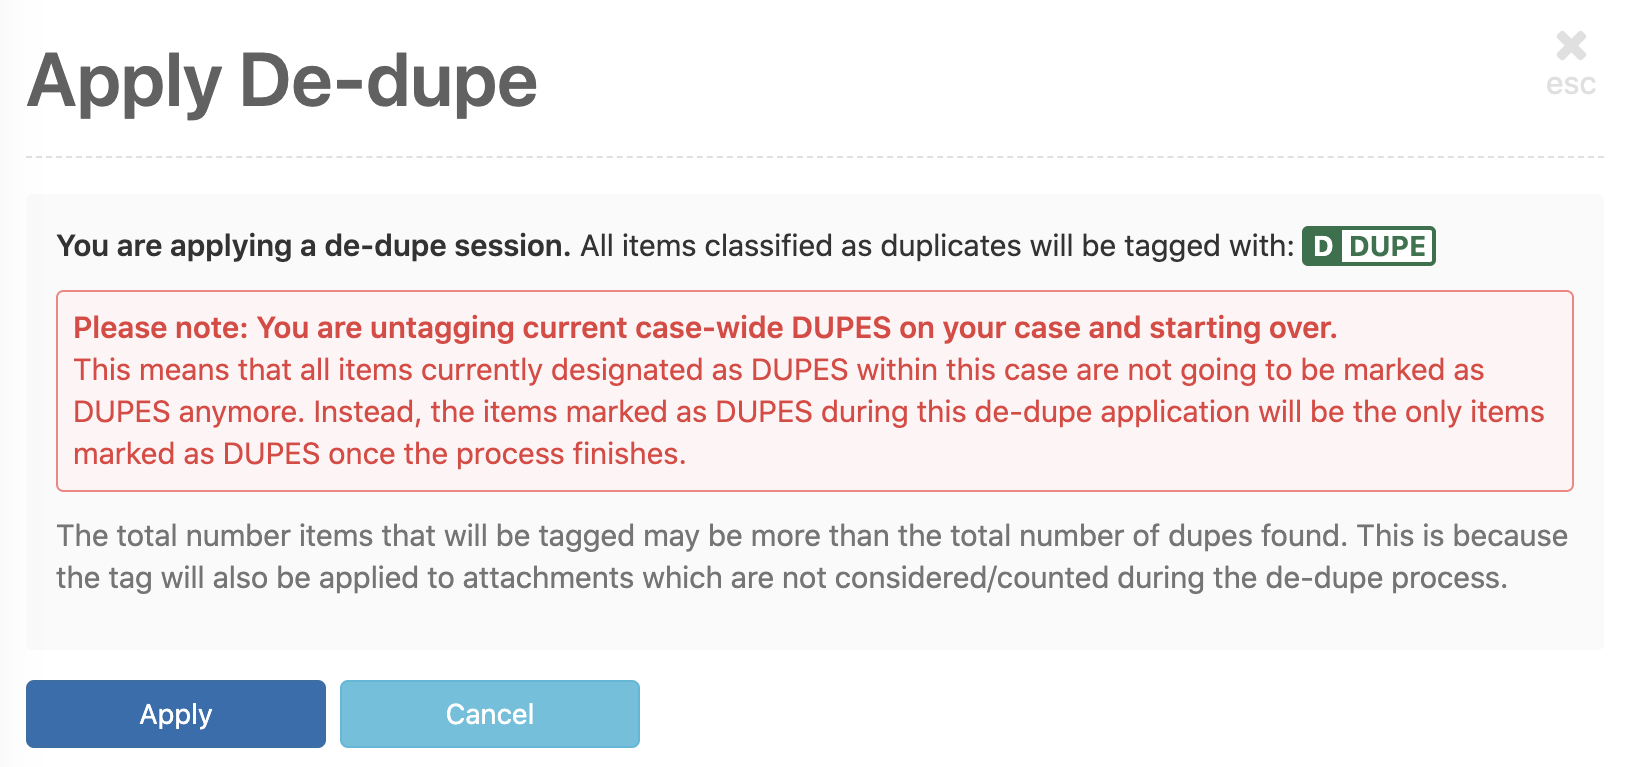
Step 8. Click on the Apply.. button to run the final de-dupe process.
Once the de-duplication process is complete you will see a confirmatory message at the top of your screen with the Scope and Strategy used.
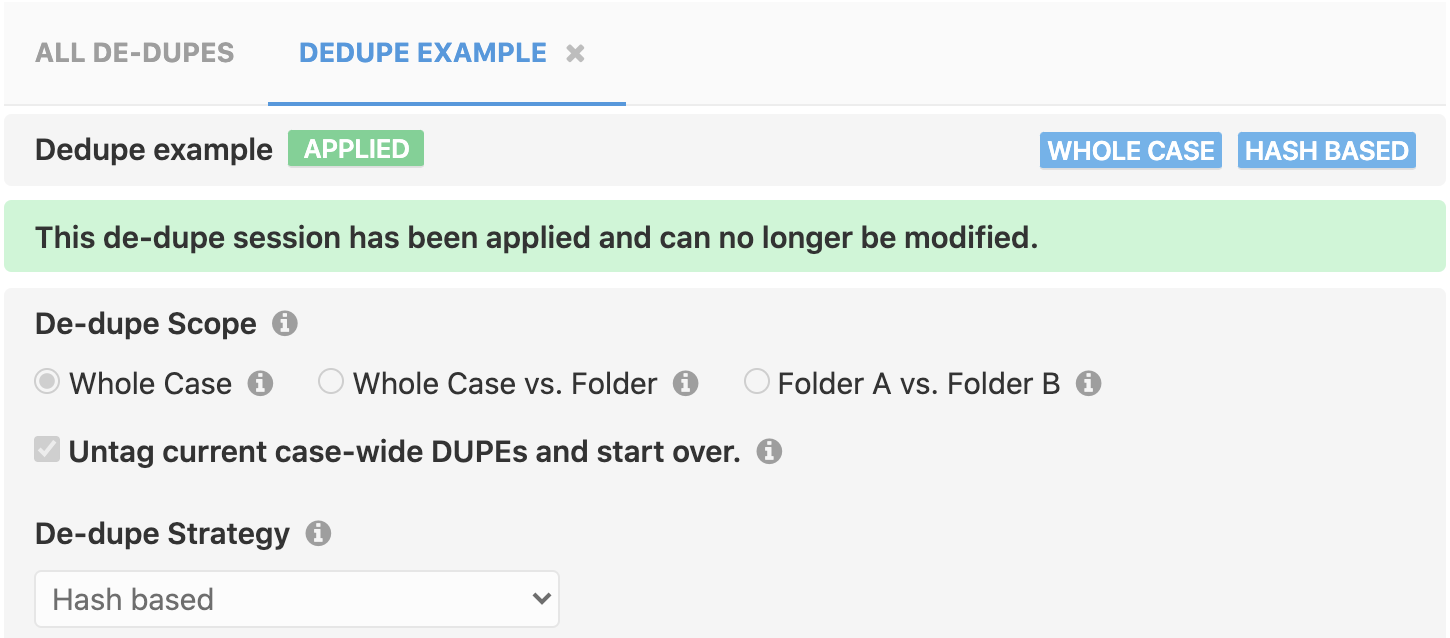
If a more recent de-dupe operation has been performed, the de-dupe session will indicate this instead.

Warning Notifications
The system scans for conflicts within the selected file set(s) that may affect the de-dupe process and will display warnings in the following scenarios:
- When files within a de-dupe session have different processing states - For example, if a file that is still processing is compared to an identical, fully-processed file it will not register as a dupe. This can affect the hash-based algorithms. The de-dupe process will ignore any groups which have files with varying processing states.
- When two or more items within a group have redactions. The de-dupe process will ignore any groups which have dupes with redactions.
- When there are items in the target item set that have tags. The system will attempt to transfer these tags and any attached tag notes to the primary item. If the primary already has tags, just the notes will be appended. If multiple dupes have the same tag with different notes, all the notes will be appended and applied to the primary item.
- After clicking on the
Apply...button an additional warning is displayed on the confirmation overlay if theUntag current case-wide DUPEs and start over.checkbox was checked. If you choose to proceed, all items currently designated as DUPEs in your case will be unmarked as such and instead only the items marked as DUPEs during the new de-dupe session will have the DUPE tag in your case.
Also note that the total number of items that are tagged may be more than the total number of dupes found during the evaluation. This is because the tag will also be applied to all attachments of dupe items (which are not considered or counted during the de-dupe evaluation process.)
Save and Re-evaluate a De-Duplication Session
You can re-evaluate a de-duplicate session as long as it has not been applied. The steps to do so, are given below:
Step 1. Navigate to the De-Dupe view
Step 2. Click on the folder icon against the de-dupe session you want to re-evaluate
Step 3. Make any changes that you wish and click on the Save and Re-evaluate button
Note:
-
Before you re-evalute the de-dupe session you can download the report of the last de-dupe evaluation by clicking on the
Download Reportbutton -
If you change the strategy or scope, then the message
Evaluation is required to compute new statistics. Your settings have changed since the last snapshot was takenwill be displayed.
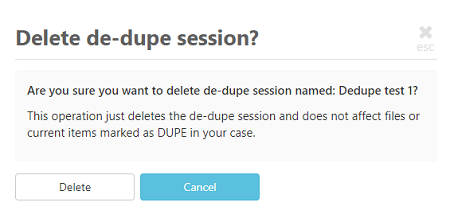
Delete a De-Duplication Session
This will only delete the de-duplication sessions themselves and not delete any files. Doing so allows you to clear out older sessions that have been run in the past, or unused sessions.
Step 1. Navigate to the De-Dupe view
Step 2. Click on the delete icon against the de-dupe session you want to delete

Step 3. Click on the Delete button on the Delete De-Dupe Session screen overlay
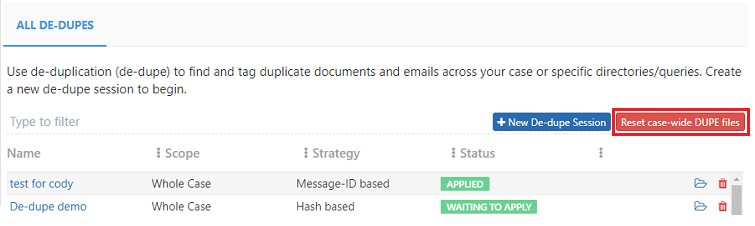
Reset case-wide Dupe files
Step 1. Navigate to the De-Dupe view
Step 2. Click on the Reset case-wide Dupe files button
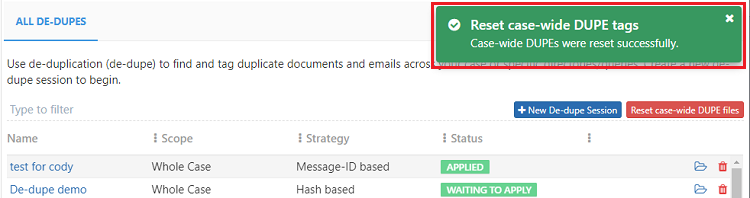
Step 3. Click on the Yes, reset DUPEs button on the confirmation screen overlay

A message that the case-wide dupe reset was a success will be displayed on the screen once the process has been completed
Generate a report of the duplicates in your case
A report of the duplicate files in your case can be generated using the de-duplication function. To do so, first, create a New De-dupe session then-
- Select a scope
- Check the
Untag current case-wide DUPEs and start overcheckbox - Select the De-dupe strategy
- Click on
Save and Evaluate - Click on
Download Reportto get the report of the duplicates in your case
Click here to know more about generating other reports in GoldFynch
Components of a duplicate file report
The components of the duplicate file report are -
- APP Link - This is a direct link to the document in your GoldFynch case (it is only accessible if you are logged into an account that has access to your case)
- APP ID - GoldFynch's internal ID which is used to trach each individual file that is uploaded
- APP Parent ID - This is the ID of the Parent document in case there is one. If there is no parent document then it is the same as the APP ID
- Keep ? - When the value is TRUE it indicates that the file is primary and FALSE indicates that it is the duplicate
- File Name - Filename of the document
- Pathname - Path of the document in GoldFynch
- Tags - Contains a list of all the tags attached to the document
In case the files are emails then the following fields will be populated with the available metadata -
- Subject
- From
- To
- Cc
- Bcc
- Sent
- Message ID
Note: If the source does not have the appropriate metadata then these fields will be blank even if they are emails
Example of using the de-duplication tag with other GoldFynch systems: Omitting dupes in advanced searches
The de-duplication system can be used for much more than just deleting and tagging duplicate files in your case. Once the DUPE system tag has been applied to duplicate files, you can perform operations on them using GoldFynch's other systems like its advanced search engine, review sets, productions, reports, and more.
After running the de-dupe process and tagging duplicate files in your case, you can omit such dupes from the search results of any search you run. To do so, add the following section to your search query while constructing an advanced search:
If you are creating a query in the Advanced Search view then:
- After creating your query, add a condition using the AND operator to the outermost level of your search query
- Set the parameter to “system-tags,” the connector to “is-not,” and the value to “dupe”

If you are typing your query into the search bar then add the following to the query:
AND system-tags != DUPE