Privilege Tags
GoldFynch gives you the ability to set tags as privileged. Setting tags as privileged gives you the flexibility to retrieve and perform several actions such as searches, reports, etc., on these files in bulk. The privilege tag also helps you to invert files in bulk from your productions. Additionally it helps in the generation of privilege logs.
Creating a privileged tag
A tag can be set to privileged either when you create it or later on from the tag view screen.
Creating a new tag with privileged status
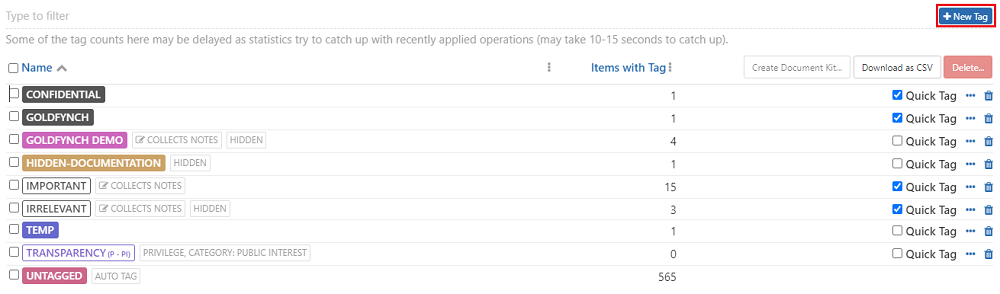
Step 1. Navigate to the Tags view by clicking the button in the left pane
Step 2. Click on the New Tag button
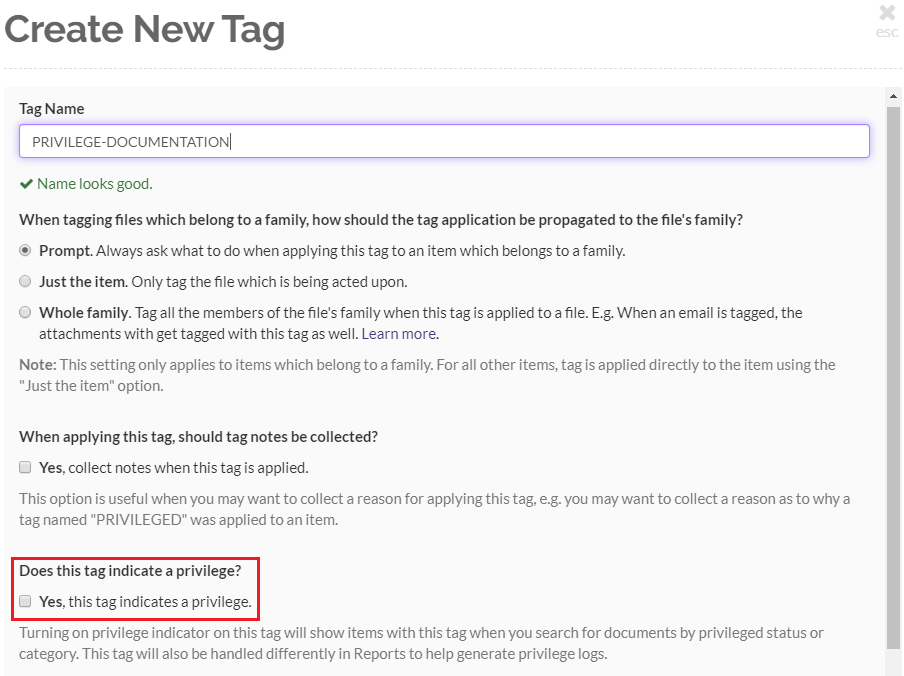
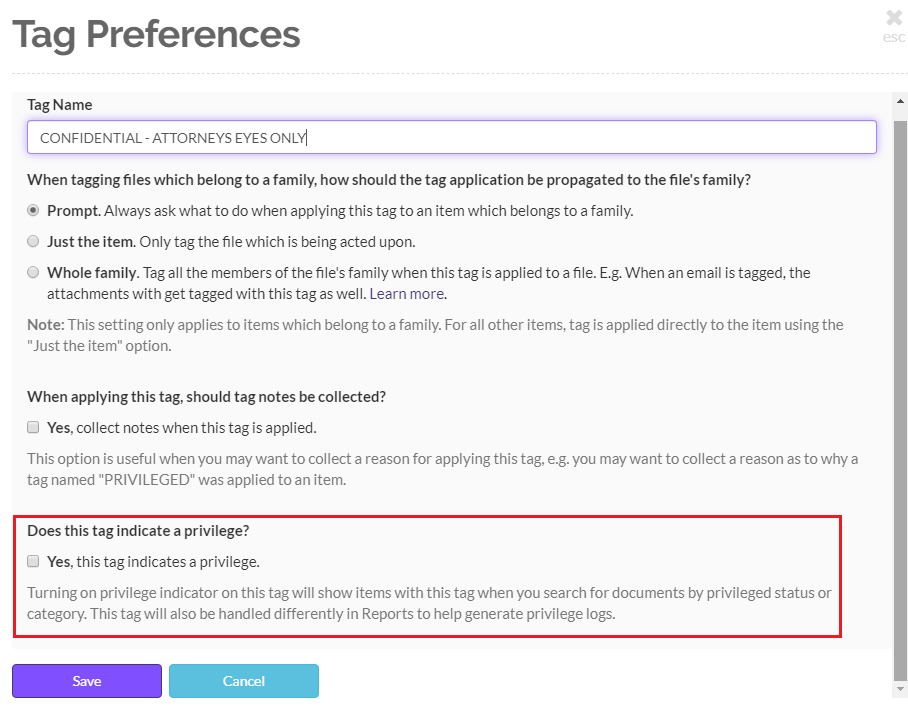
Step 3. Enter a name for the Tag and check the Yes, this tag indicates a privilege checkbox
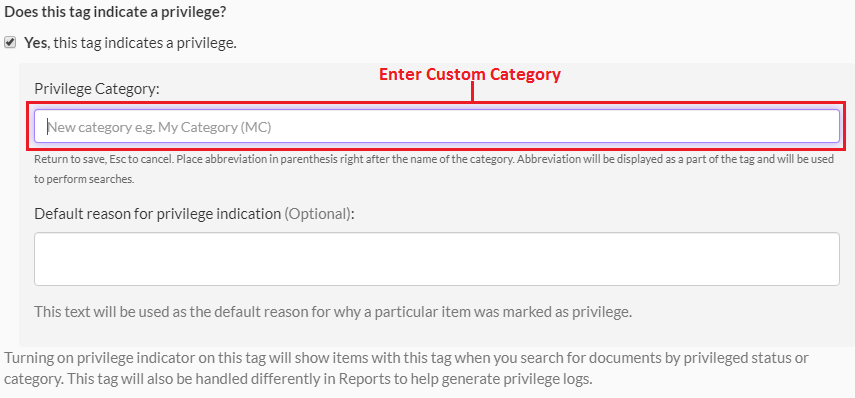
Step 4. If you would like to you can select a privilege category from the drop-down menu in the create new tag screen overlay, or enter a new category by clicking on the Custom option.
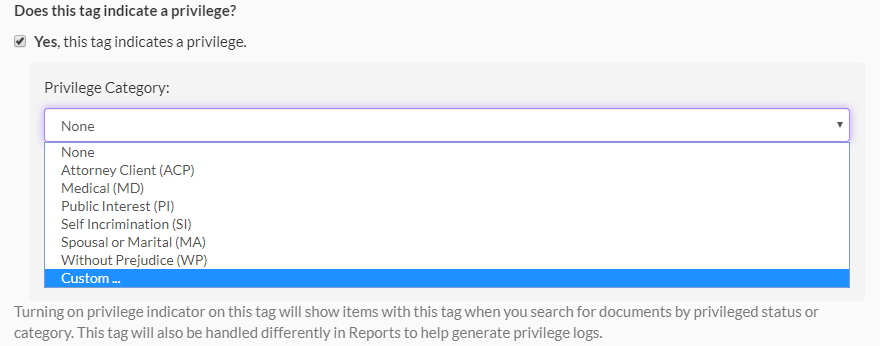
Note: While entering a custom privilege category in the create new tag screen overlay you will need to enter the category name followed by an abbreviation in parenthesis. The abbreviation will be displayed as part of the tag and will be used to perform searches
Step 5. (Optional) Enter a note that you would like to be displayed alongside the tag. The entered note will indicate why the tagged files are considered to be privileged.
Step 6. Click on the Create button. Once the tag has been created it will be visible in the tag view list.
Updating a tag to have privilege status
You can convert a regular tag into a privileged tag by editing the tag's settings following these steps:
Step 1. Navigate to the Tags view by clicking the button in the left pane.
Step 2. Click on the ... button against the tag you wish to update. The tag preferences screen will be displayed.
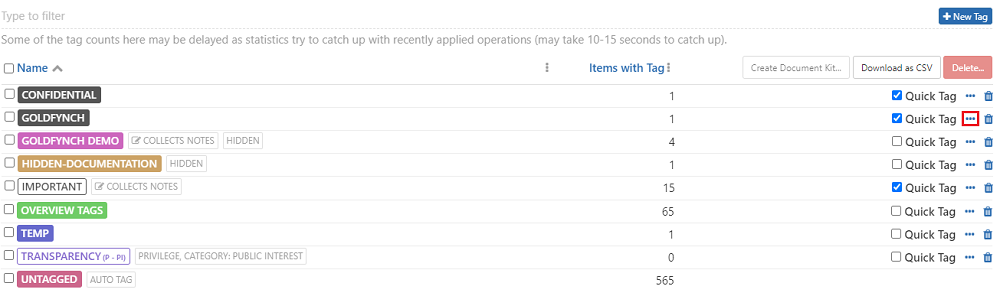
Step 3. Check the Yes, this tag indicates a privilege checkbox
Step 4. Similar to while creating a new tag you can select a privilege category or add a custom category if required.
Step 5. Add a note to the tag if required.
Step 6. Click on the Save button at the bottom of the tag preferences overlay to update the changes made.
Note: The "Default reason for privilege indication" note that is entered while setting up a tag as privileged can be overwritten or additional notes can be added to it, if the privilege tag has been enabled to collect tag application notes.
Functions where privileged tags can be used
-
Advanced Search Function - In the advanced search function there are two parameters privileged and privileged-category which can help you easily search for files that have privilege tags and privileged-categories assigned to them. Click here to see how these parameters can be used while performing an advanced search
-
Production - During the production process documents tagged as privileged can easily be excluded from the production by selecting the invert options under Step 2. Select tags for production. Learn more on how tags are used in the production process
-
Reports - While creating reports you can easily select how documents with privilege tags are handled. There are options to limit the inclusion of tag names and tag notes only to the documents with privilege tags assigned to them. This also helps in the generation of privilege logs. Learn more about reports and privilege logs