Uploading Productions with Load files to GoldFynch
GoldFynch gives you the ability to upload productions with load files, and it will soon have a self-sufficient workflow to apply load files to your case on import. Currently, when you upload a production with a load file, you can request a production import. The import will be run within 24-48 hours by the GoldFynch team.
Uploading the production
Step 1. Zip the production on your computer if it is not already zipped.
Note: There is no additional charge for the service unless the data is malformed. In the case of malformed data, you will be notified and your approval will be required to proceed with the import (view GoldFynch's preferred formatting guidelines).
Step 2. Navigate to the Files view
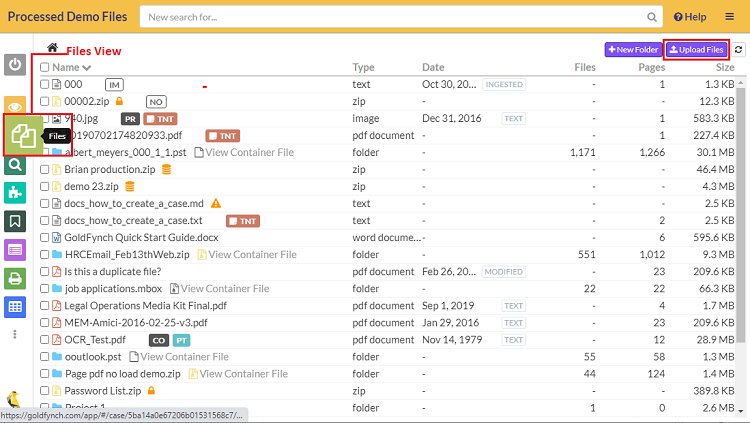
Step 3. Drag and drop the zipped production onto the Files view. Alternatively, click on the Upload files button and then select the zipped production from your computer.
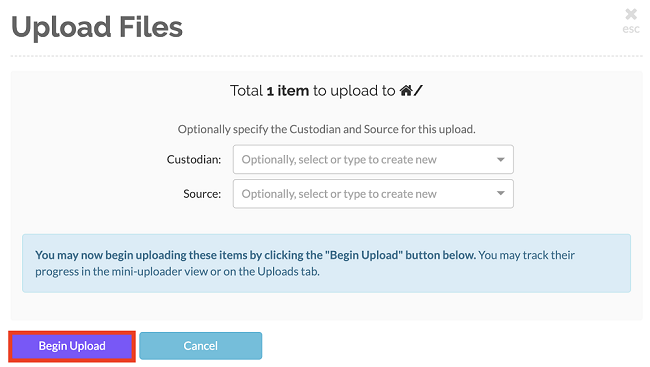
Step 4. Click on the Begin Upload button in the upload files screen overlay
Note: Click here to learn more about uploading files to GoldFynch
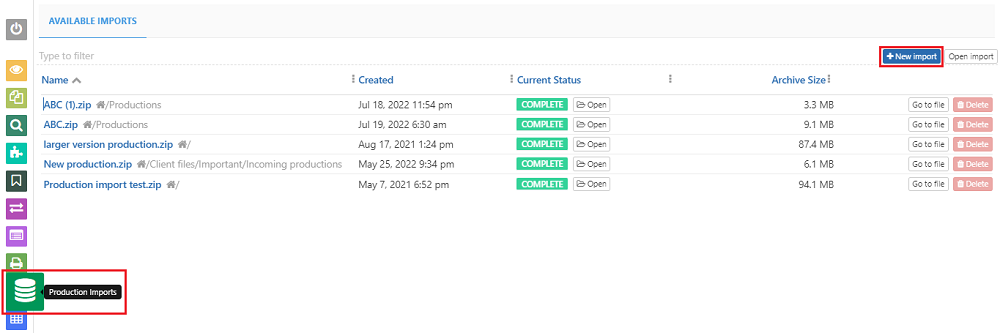
Step 5. When the upload completes, navigate to the Production Imports view screen and click on the +New Import button
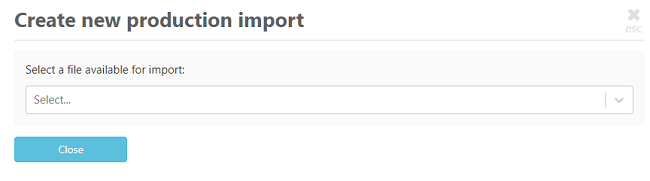
Step 6. Select the file to be imported from the drop-down
Step 7. Select the document reconstruction option. This option lets GoldFynch know how you would like a file to be reconstructed in case a document is provided both in its native form and a rendered representation (TIFF/JPEG image). The available options are:-
-
Use provided renderings - This option will preserve any on-page Bates stamps that were applied to the renderings but the renderings may be of lower visual quality
-
Generate new renderings - GoldFynch will generate new renderings from the native files, which will likely be of higher visual quality but will no longer contain any on-page Bates stamps. Also, the page counts may differ from the provided rendering
Note: By default, the
Use provided renderingsoption is selected
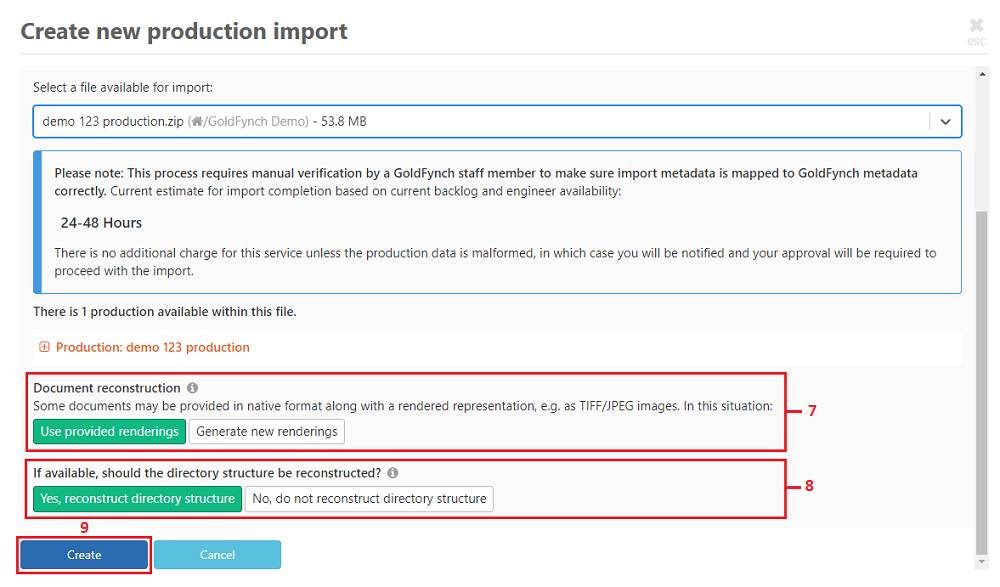
Step 8: Select a directory reconstruction option. By default, the Yes, reconstruct directory structure option is selected. When this option is selected then GoldFynch will try to reconstruct the directory structure if there are any original/mailbox directory structures available in the load files. Otherwise, a flat-file structure will be created
Step 8. Click on the Create button to submit the production import request. The GoldFynch team will then run the import process and contact you once it is complete. You can also track the progress of your production import from the Production Import view
Note:
-
The production import process requires manual verification by a GoldFynch staff member to make sure that import metadata is mapped to GoldFynch metadata correctly. So based on the size of the import a time estimate will be given before you submit the Production import request
-
You can also initiate the production import process using any one of the following pages -
- Overview screen - Click on the
Create Importbutton next to a production load file found under theProduction Importssection of the overview screen - Files view - Click on the Archive symbol found next to the production load file in the Files view listing
- Overview screen - Click on the
Some important points to be taken note of while uploading productions
-
If the production is too big to zip, get in touch with the GoldFynch team, who will set up an FTP server for you. Learn how to upload files using an FTP server here.
-
To get the best results, please upload the entire production, including any image and text folders. GoldFynch's import process may use these files if the native version of a particular document is not available.
-
Make sure that the database files(.csv, .dat, .opt) are included, in the zip file, either in the ROOT directory or inside a DATA directory.
-
Ensure that the network connection does not go down and that the computer that is uploading the file is not turned off.
Take a look at the guidelines for importing productions for more information related to uploading productions.
Viewing information related to the uploaded production
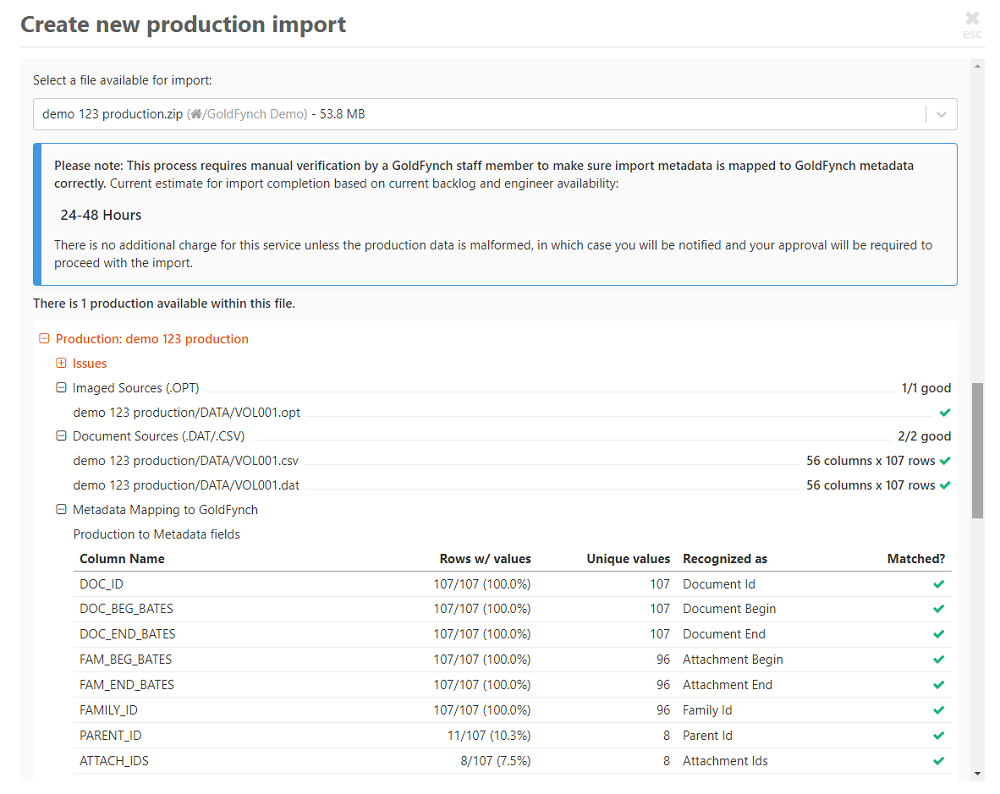
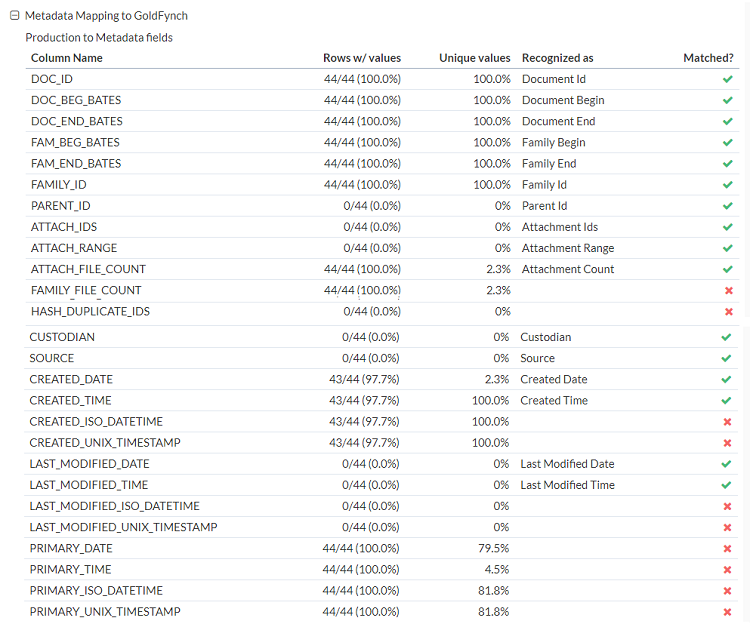
You can view information related to each production that has been uploaded from the Requested Production Import overlay. The information displayed is related to:
- The names and file paths for sources of files (e.g. .OPT for images or .DAT/.CSV for documents)
- Metadata Mapping to GoldFynch - Using this, you can see how each field on the load file has been mapped to a corresponding field on GoldFynch
Follow the steps given below to view the information related to the production that has been uploaded:
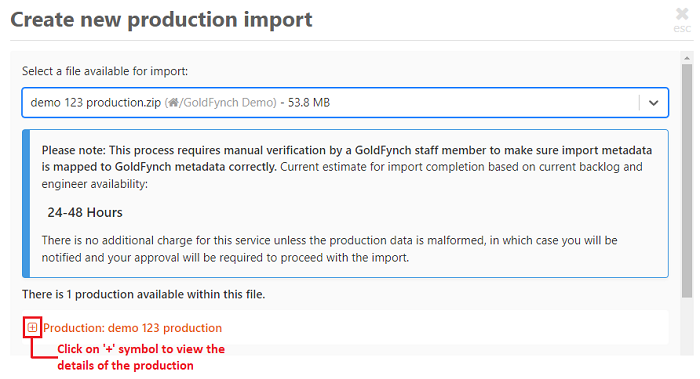
Step 1. Navigate to the Production Import view and click on the +New Import button
Step 2. Select the uploaded production from the drop-down
Step 3. Click on the + against the production to view the different categories of information related to the production
Step 4. Click on the + against each information category to view the details related to it
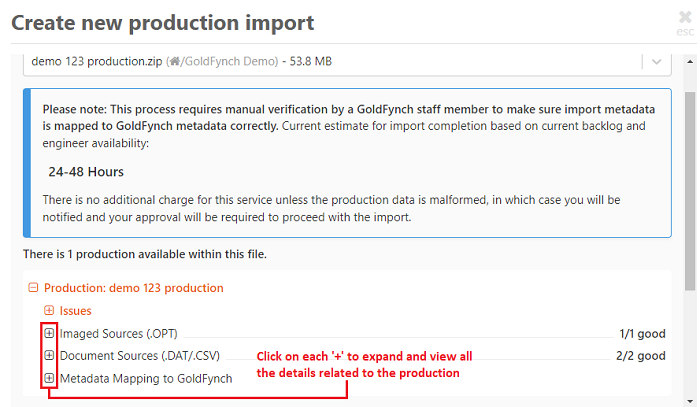
Once you expand a category you will be able to view the information related to it, as shown in the image below.
Issues with uploaded load files and file formatting
Any issues found related to the uploaded load file or the formatting of files in a production will be displayed as warning messages under the issues section of that Production. The GoldFynch team will get back to you regarding any issues found before they being the production import.
To view, the issues related to the uploaded load file follow Steps 1 - 4 of the previous section. In Step 4 click on the + against the Issues category
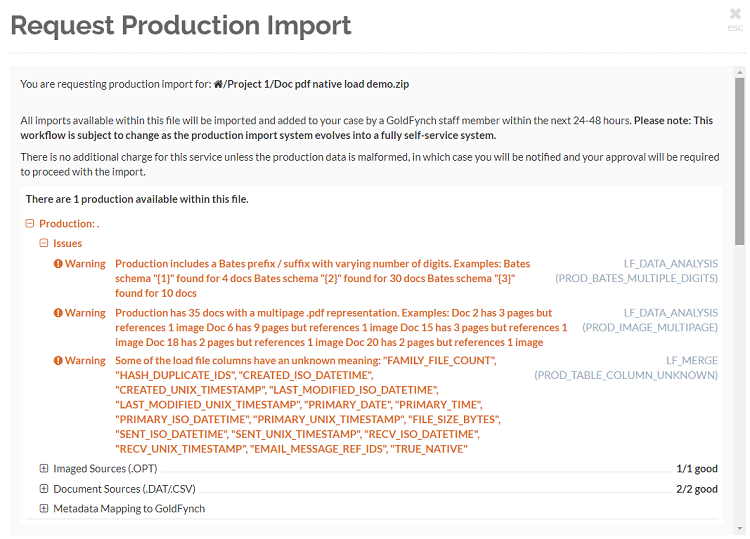
Any fields in the load file that do not match the required GoldFynch metadata fields will be listed under Metadata mapping to GoldFynch section of the selected production. It is possible to rectify issues here by formatting your production according to the GoldFynch file formatting guidelines listed here and then re-uploading it.
Production Import Summary
The Overview page of your case has a Production Import section. At a glance you can see -
- A summary of the production imports that can be imported, errored, queued, awaiting feedback and completed
- The names of the production datasets which can be imported
- The names of the production datasets which are queued for imported, awaiting feedback and errored
- The completed production imports
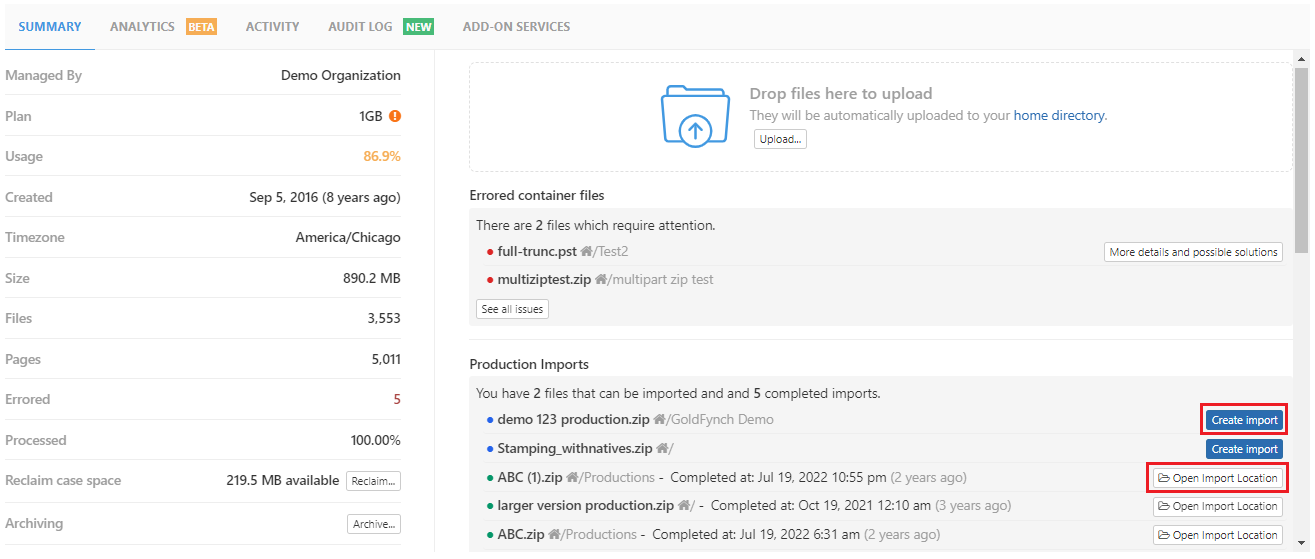
Some actions that can be performed from the production import section are -
- Create a production import - All the production datasets that are available for import will have a
Create Importbutton alongside them. Clicking on theCreate Importbutton on the overview screen will initiate the production import creation process from Step 6 of the the process described here - Navigate to the import location - You can easily navigate to the import location of all completed production imports by clicking on the
Open Import Locationbutton