 GoldFynch Documentation
Applying redaction stamps
Adding redaction stamps/labels during the redaction process helps easily identify why the reviewer redacted that portion of the document. Additionally, it reduces the time spent verifying the reason for the text's redaction, thereby shortening review time.
GoldFynch lets you apply two types of redaction stamps to a redaction:
-
Managed redaction stamps, which are created in advance and available to all users with access to the case. Learn how you can create and manage redaction stamps.
-
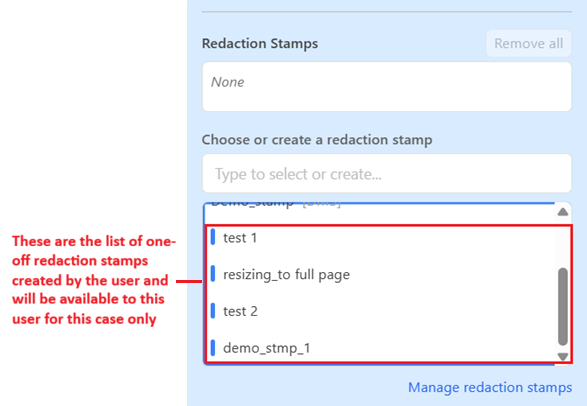
One-off redaction stamps, which are created by a user on-the-fly and are available only to that user.
Note: You can apply redaction stamps to redactions only when using the "New document viewer" layout
Adding a managed redaction stamp
Step 1. Open the document you are reviewing in the New document viewer layout
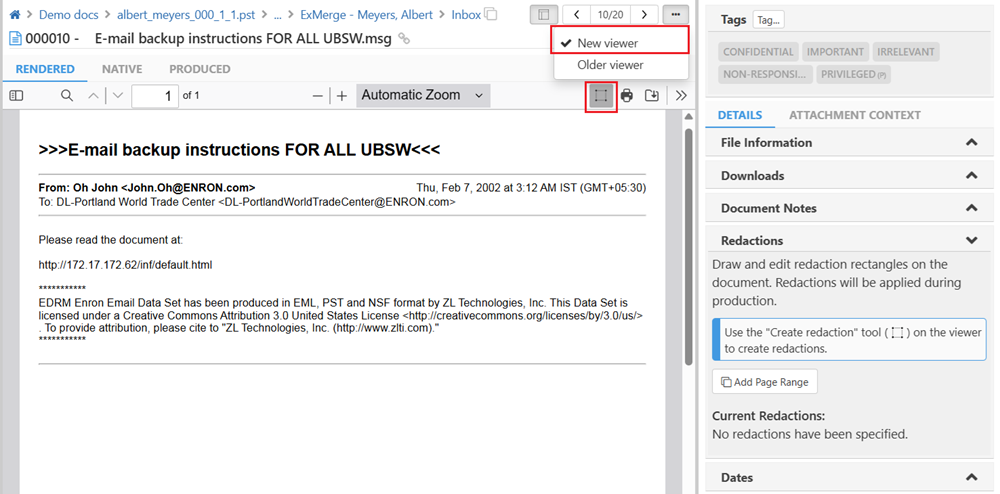
Step 2. Click on the 'Draw' redaction icon in the document viewer toolbar to add redactions
Step 3. Draw the redaction box over the text you want to redact
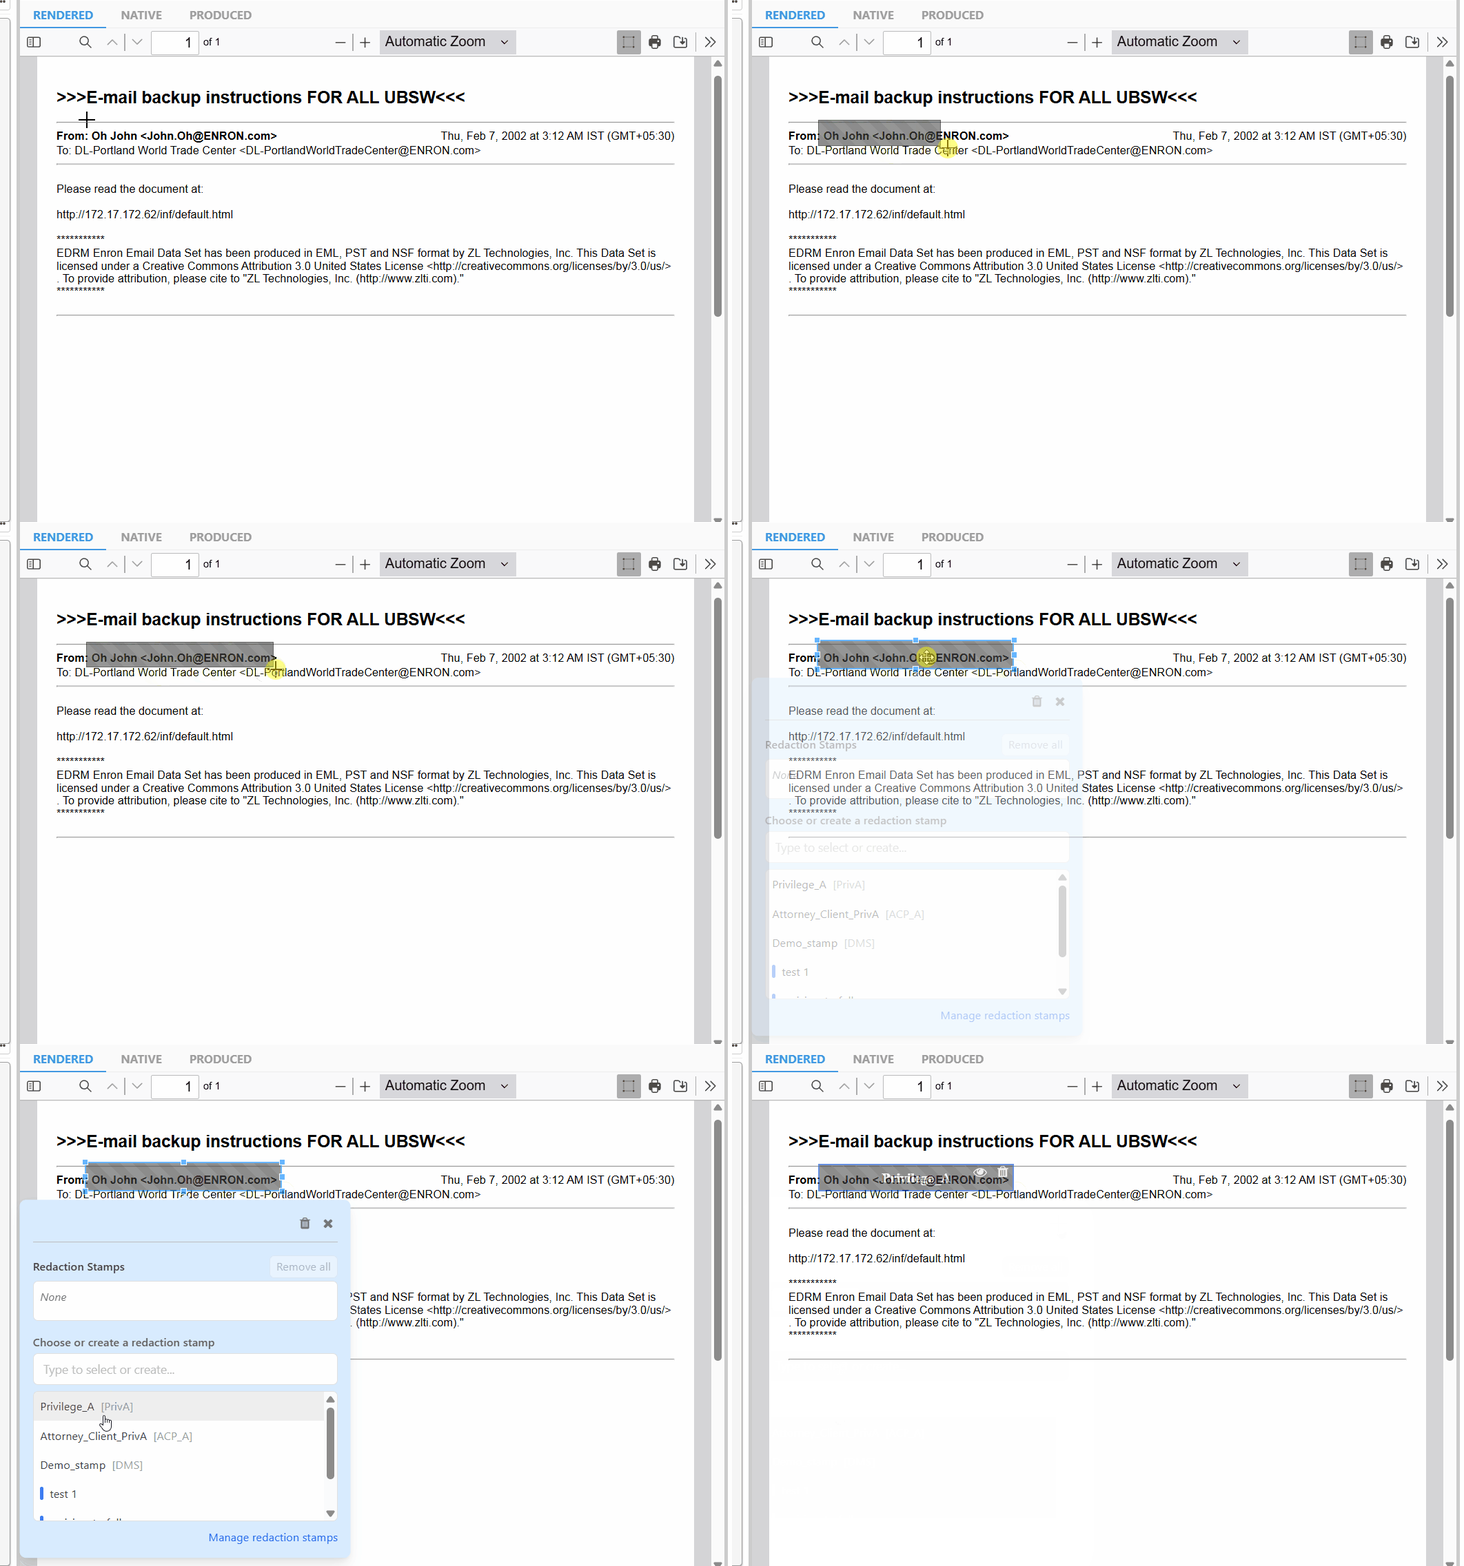
Step 4. Click on the redaction box to view the 'Redaction stamp' pop-up window
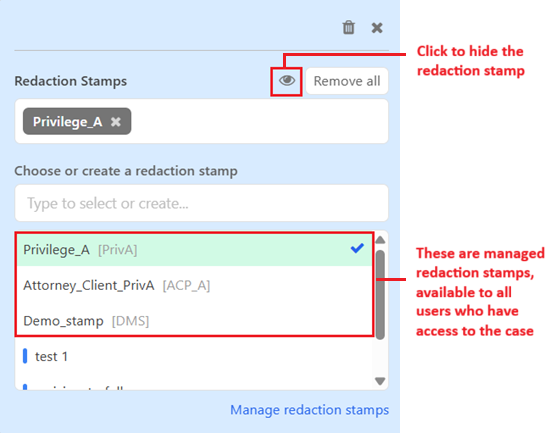
Step 5. Select one or more of the managed redaction stamps from the list in the box
Step 6. Close the 'Redaction stamp' pop-up window by clicking on the x in the top-right corner. This will save the redaction stamp to the redaction.
Note:
- Managed redaction stamps will have their abbreviation listed against them
-
Toggle the eye icon on the redaction pop-up window to hide the redaction stamp
-
You can add multiple redaction stamps to a redaction; select from the list or add a one-off stamp and close the redaction stamp pop-up window when you are done.
Adding a one-off redaction stamp
Step 1. Open the document you are reviewing in the New document viewer layout
Step 2. Click on the 'Draw' redaction icon in the document viewer toolbar to add redactions
Step 3. Draw the redaction box over the text you want to redact
Step 4. Click on the redaction box to view the 'Redaction stamp' pop-up window
Step 5. Enter a name for the on-the-fly redaction stamp
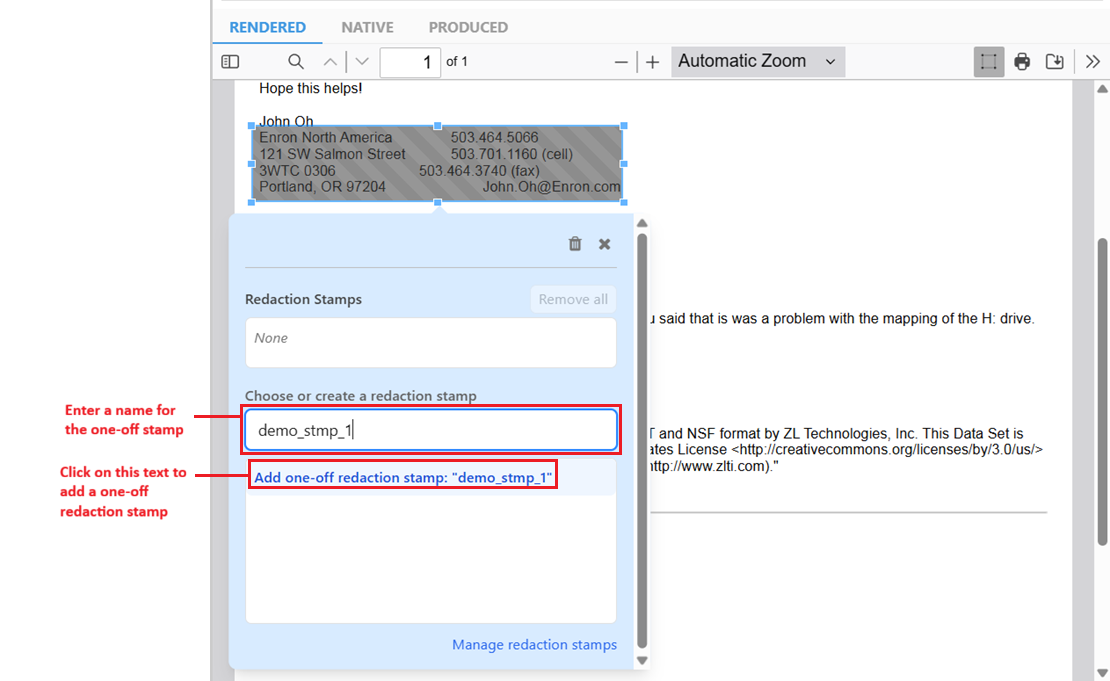
Step 6. Click on the Add one-off redaction stamp text that appears
Step 7. Close the 'Redaction stamp' pop-up window by clicking on the x in the top-right corner. This will save the redaction stamp to the redaction.
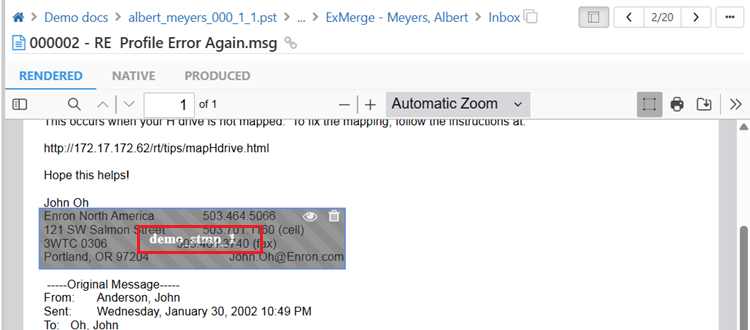
Note: Once you create a one-off/on-the-fly redaction stamp for a case, it will be available to add for any document in the case. However, it will only be available to the user who created it, not to all users who are shared on the case.
Adding a redaction stamp to an existing redaction
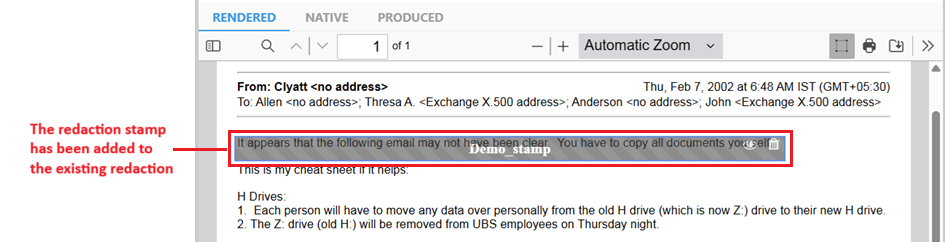
The GoldFynch app lets you add redaction stamps to pre-existing redactions in the case. This means you can redact information and add the redaction stamp later.
Step 1. Open the document you are reviewing in the New document viewer layout
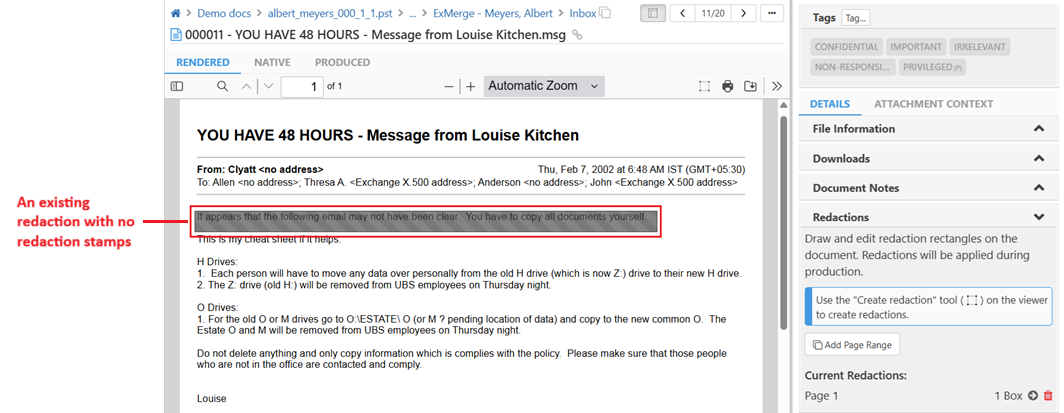
Step 2. Click on the 'Draw' redaction icon in the document viewer toolbar to enable editing of existing redactions
Step 3. Scroll to the redaction to which you want to add the redaction stamp and click on it to view the 'Redaction stamp' pop-up window
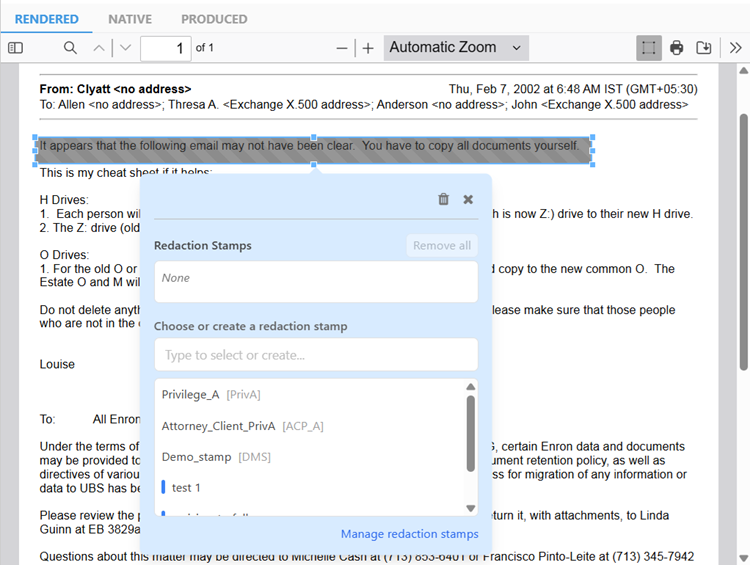
Step 4. Click to choose a redaction stamp from the list or add a one-off stamp
Step 5. Close the 'Redaction stamp' pop-up window to save it
Updating a redaction stamp associated with a redaction
Step 1. Open the document you want to update the redaction stamps in
Step 2. Click on the 'Draw' redaction icon in the document viewer toolbar to enable editing of existing redactions
Step 3. Scroll to the redaction where you want to update the redaction stamp and click on it to view the 'Redaction stamp' pop-up window
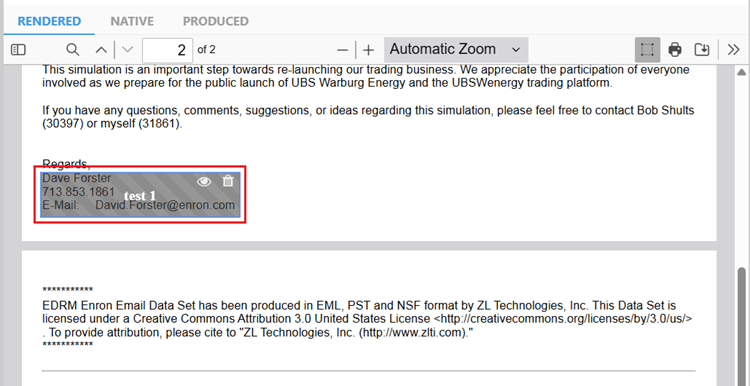
Step 4. Click on the x against the redaction stamp you want to update to remove it
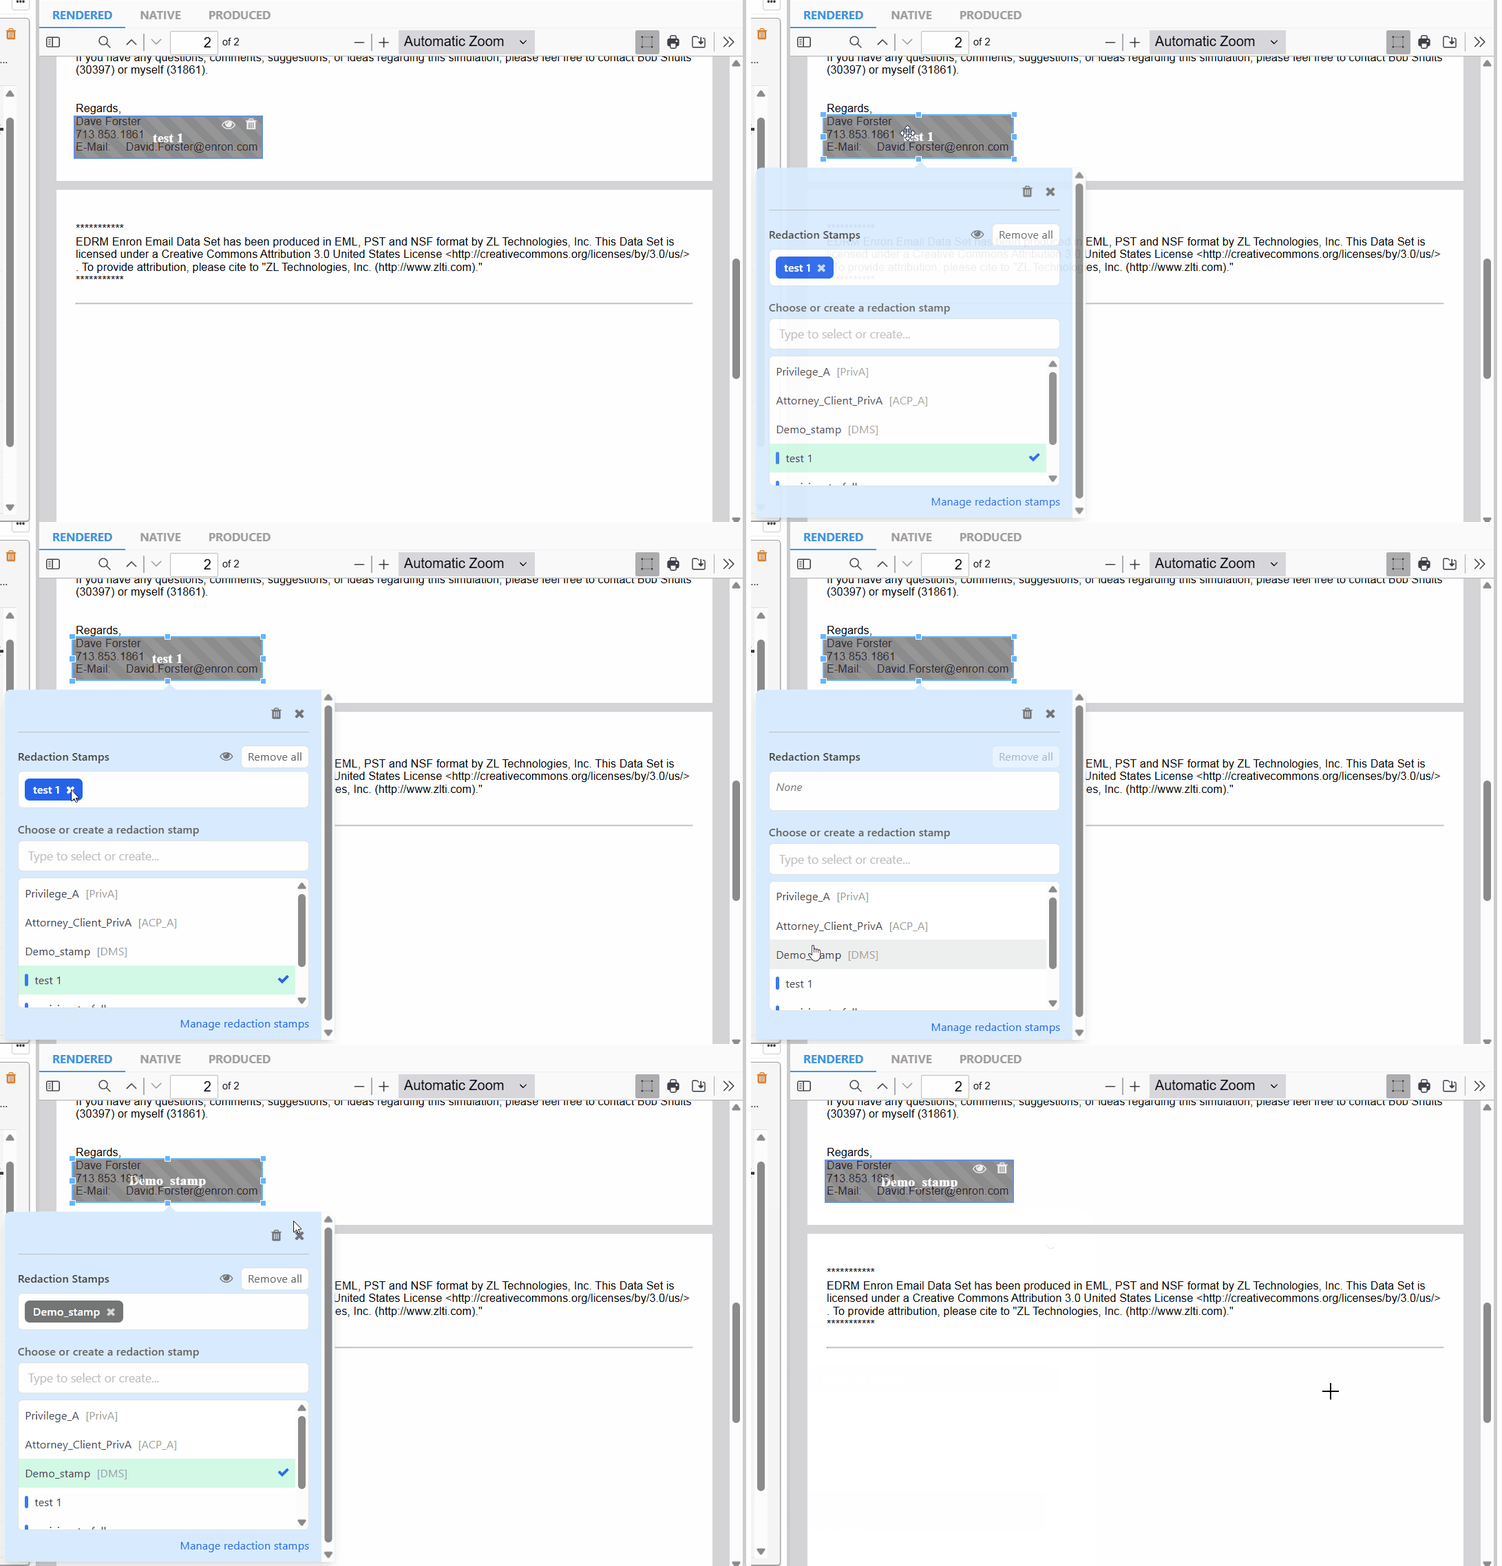
Step 5. Click to choose a redaction stamp from the list
Step 6. Close the 'Redaction stamp' pop-up window to save the changes
Deleting a redaction stamp associated with a redaction
Step 1. Open the document you want to update the redaction stamps in
Step 2. Click on the 'Draw' redaction icon in the document viewer toolbar to enable editing of existing redactions
Step 3. Scroll to the redaction from which you want to delete the redaction stamp and click on it to view the 'Redaction stamp' pop-up window
Step 4. Click on the x against the redaction stamp you want to delete
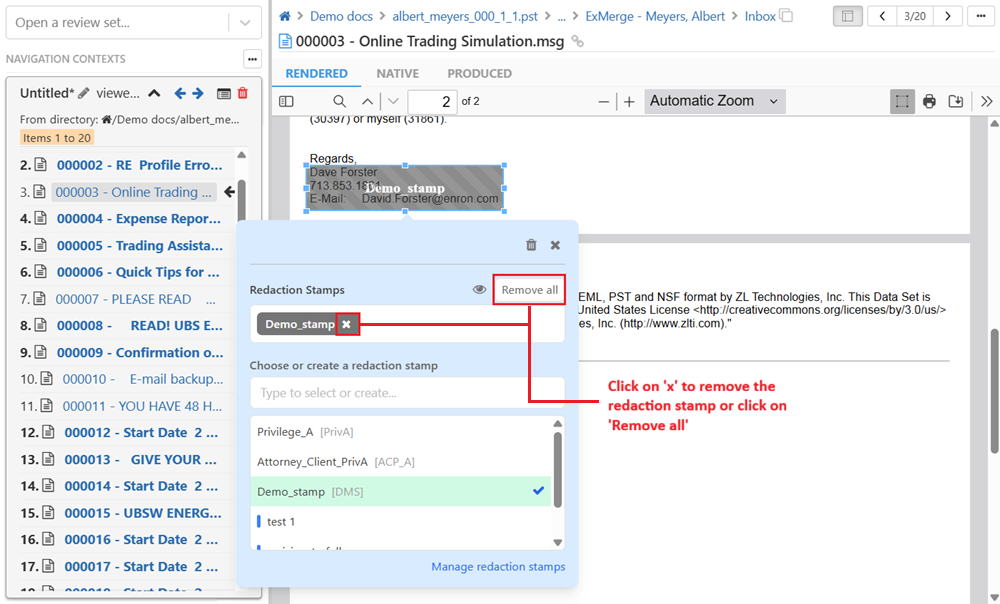
Note: Clicking on Remove all will delete all redaction stamps associated with a redaction
Step 5. Close the 'Redaction stamp' pop-up window to save the changes