Managing Cases
An Organization can contain multiple cases. With GoldFynch, you can create new cases directly through an Organization or create them separately and then transfer them. Suppose you have a pre-existing case that needs to be included within the Organization. The Managing cases function for Organizations will let you transfer the case to the Organization.
Creating cases through Organizations
Step 1. On the Organizations Dashboard, either:
- Click on the
+ New Casebutton against the Organization on the Organizations Dashboard - Click on the
Managebutton, and under theCasestab, click on the+ Create New Casebutton
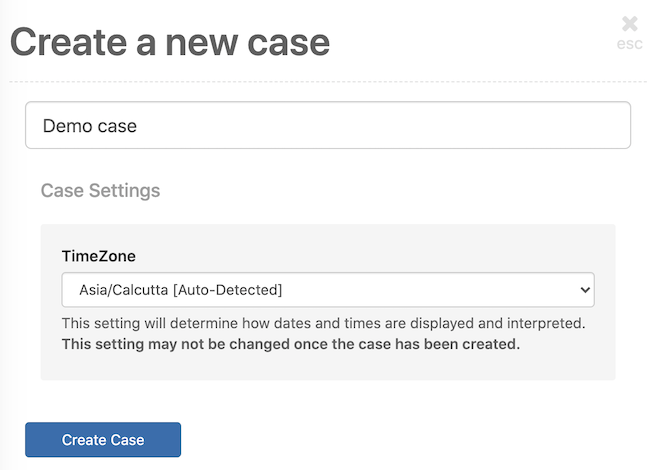
Step 2. Enter a case name
Step 3. Select an appropriate time zone
Step 4. Click on the Create Case button
GoldFynch will automatically add the case to the Organization and the Organization's billing will be the default payment method.
Transferring cases to your Organization
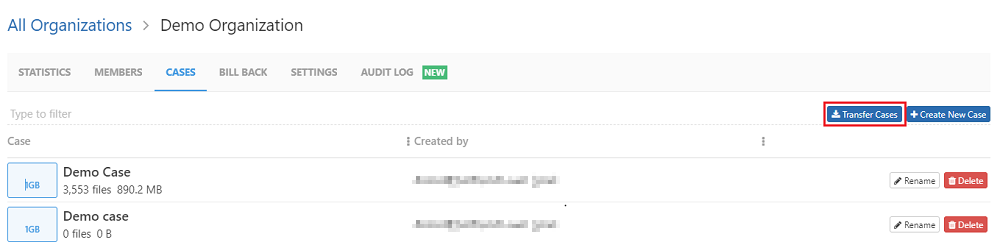
Step 1. Click on the Manage button against the appropriate case on the Organizations Dashboard
Step 2. On the Cases tab, click on the Transfer button. This will display a list of cases available for transfer to the Organization. These are cases that you are either the Owner or Admin of, and which are not currently under any other Organization.
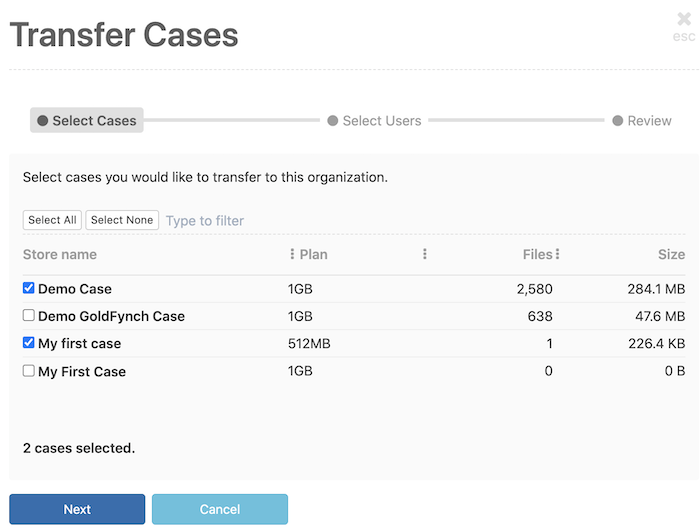
Step 3. Check the checkboxes against cases you wish to transfer under this Organization.
Step 4. Click on the Next button.
Step 5. (optional) Check the checkbox against any existing members of the cases that you would like to transfer to the Organization, and select the permission levels you wish to assign them from the drop-down box against each member. As mentioned in the note:
- GoldFynch will give all transferred members access to all cases in the Organization
- The permission levels they receive will be as assigned
- GoldFynch will also maintain the higher permission of a member in the case if it is higher than the assigned permission level
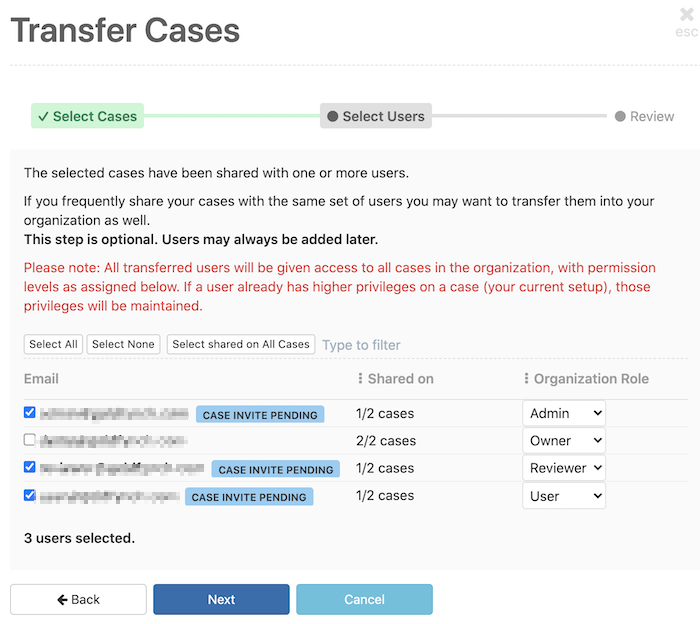
Step 6. Click on the Next button.
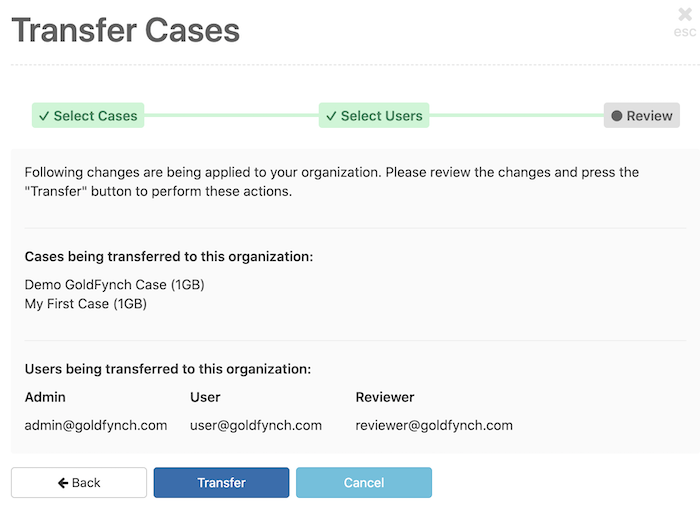
Step 7. Review the configuration for the case transfer that is about to be made, then click on the Transfer button.
Renaming a case
Step 1. Click on the Manage button against the appropriate case on the Organizations Dashboard
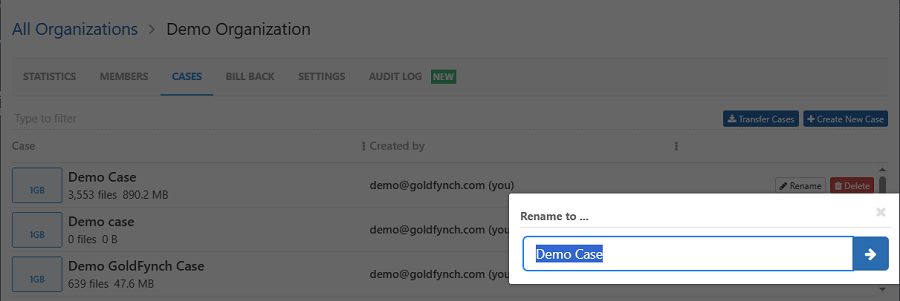
Step 2. On the Cases tab, click on Rename against the case you want to rename

Step 3. Enter the new name in the text box and click on the arrow icon
Deleting a case
Step 1. Click on the Manage button against the appropriate case on the Organizations Dashboard
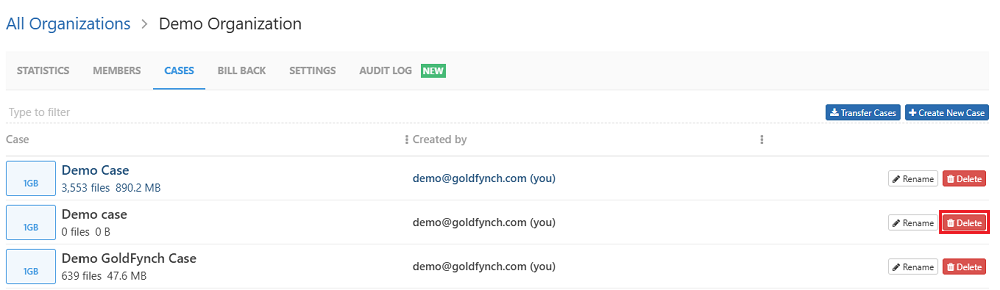
Step 2. On the Cases tab, click on Delete against the case you want to delete
Step 3. On the case deletion confirmation screen, select a reason for deleting the case, and (optionally) leave feedback for the GoldFynch team. Your feedback is always constructive for improving the product .
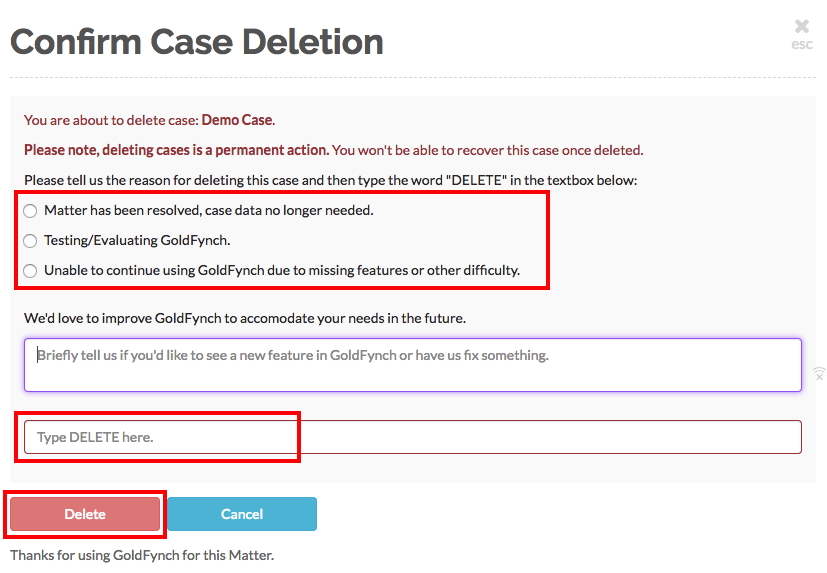
Step 4. Type the word "DELETE" - (all in capital letters) into the box at the bottom of the screen, and click on the Delete button, which becomes clickable
GoldFynch will completely remove your case from the servers, and billing will cease from that point on.
Note: Both renaming and deleting of cases can also be done directly from the cases page by the owner of the case.